Installing smart switches like Wi-Fi light switches, smart dimmers, and other connected devices is a project many homeowners take on as a DIY task. While swapping out standard switches for smart ones may seem straightforward, there are some important factors to consider before deciding whether to DIY or hire an electrician.
Page Contents
- 1 What are the benefits of smart switches?
- 2 Should I hire an electrician?
- 3 How do smart switches work?
- 4 How do I choose the right smart switches?
- 5 What tools and materials do I need?
- 6 How do I install smart switches?
- 7 How do I wire a 3-way switch?
- 8 How do I wire a 4-way switch?
- 9 What if I don’t have a neutral wire?
- 10 How do I reset a smart switch?
- 11 Troubleshooting common smart switch issues
- 12 Conclusion
What are the benefits of smart switches?
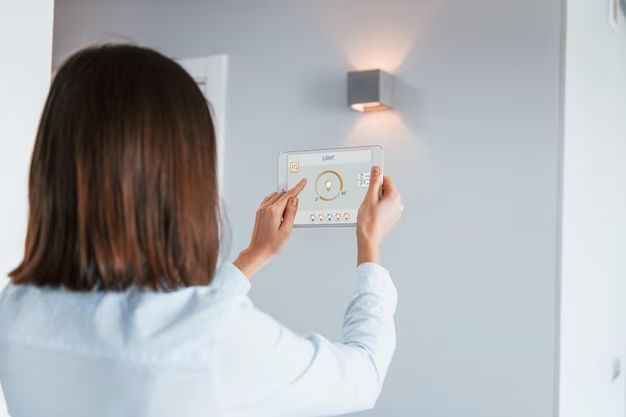
Smart switches allow you to control lighting and other devices remotely using your smartphone and voice assistants like Amazon Alexa or Google Assistant. Many models provide scheduling, automation based on time of day or sensors, energy monitoring, scenes, integration with other smart devices, and advanced features like geofencing and away modes.
Key benefits of smart switches include:
- Remote control – Turn lights on/off from anywhere using an app
- Voice control – Use voice commands to control lights and other devices
- Automation – Create schedules, rules, routines to automate lighting
- Energy savings – Dim lights, turn off unused lights to save energy
- Advanced features – Geofencing, away modes, notifications, etc.
- Safety/security – Make it look like you’re home when you’re away
Should I hire an electrician?
Installing smart switches as a DIY project can save money compared to hiring an electrician, but there are some factors to consider:
| Consider hiring an electrician if… | DIY may be suitable if… |
|---|---|
|
|
Safety should be the top priority – if in doubt, hiring a professional electrician is recommended.
How do smart switches work?
Smart switches replace standard light switches and contain wireless radios to connect to your home Wi-Fi and enable communication and control through a smartphone app and voice control. There are two main types of smart switches:
- Smart Wi-Fi light switches – Replaces existing standard switch, provides app and voice control. Needs a neutral wire.
- Smart light switch dimmers – Replaces a traditional dimmer, offers dimming capabilities and smart features. Often needs a neutral wire.
For installation, smart switches wire into your existing electrical boxes like regular switches:
- Line/live wire brings power into the box
- Load wire connects to light(s) and switches power on/off
- Neutral wire completes the circuit (required for most smart switches)
- Ground wire connects to grounding screw or wire
The switch controls the power to the light fixture(s) and provides connectivity for app and voice control via your Wi-Fi network.
How do I choose the right smart switches?
Here are the key factors to consider when choosing smart switch models for your home:
| Factor | Details |
|---|---|
| Compatibility | Ensure the switch is compatible with your home’s wiring:
|
| Features | Consider desired features like:
|
| Design | Matches existing switch style and finish? |
| Budget | Compare costs of switches with desired features |
| Brand | Reputable brands with good app reliability and customer service |
What tools and materials do I need?
Here are the basic tools and materials needed for installing smart switches as a DIY project:
Tools:
- Voltage tester/multimeter – test wires to identify line/load
- Phillips screwdriver
- Flathead screwdriver
- Needlenose pliers
- Wire strippers
- Electrical tape
- Flashlight
Materials:
- Smart switches
- Wire nuts
- Wall plates
- Pigtails/short wires (if needed)
Safety gear like gloves and eye protection is also recommended when working with electrical wiring.
How do I install smart switches?
Here is an overview of the basic installation process for smart switches:
- Turn off power – Turn off circuit breaker for the switch you’re replacing. Use a voltage tester to confirm power is off.
- Remove old switch – Unscrew switch plate and carefully remove wires from old switch. You may want to take a photo for reference.
- Prepare wires – Strip insulation and twist copper ends. Pigtails can connect multiple wires.
- Connect wires – Connect wires to new smart switch, matching previous connections. Consult manual for wiring diagrams.
- Mount new switch – Secure smart switch in box and attach wire cover.
- Install switch plate – Attach wallplate and tighten screws.
- Restore power & test – Turn circuit breaker back on. Test switch to ensure proper operation.
- Configure switch – Connect to Wi-Fi and set up app/account. Program schedules, automations, etc.
Key tips for smart switch installation:
- Use caution and turn power off at circuit breaker
- Take photos before disconnecting any wires
- Connect wires securely with proper wire nuts
- Consult manufacturer’s wiring diagram
- Test switch to confirm proper operation
- Wi-Fi and app setup required after physical installation
How do I wire a 3-way switch?
3-way switches (two switches controlling one light) require different wiring than standard single-pole switches. There are a few options for wiring smart switches in 3-way setups:
Smart switch + add-on switch
- Install smart switch at one location
- Install matching add-on/accessory switch at second location
- Smart switch powers light and communicates wirelessly with add-on
Dual smart switches
- Install smart switches at both locations
- Both communicate wirelessly to control light
- No add-on required
Smart relay
- Install smart relay behind light fixture
- Standard switches at two locations control relay
- Relay powers light and provides app connectivity
The best option depends on your wiring setup. Consult manufacturer wiring diagrams to ensure proper 3-way installation.
How do I wire a 4-way switch?
4-way switches involve three switch locations controlling the same light. There are a couple options for wiring smart switches in these configurations:
Smart switches at two locations
- Install smart switches at two of the locations
- Leave standard switch at third location
- Smart switches communicate wirelessly to control light
Smart relay
- Install smart relay module near light
- Standard 4-way switches control relay
- Relay powers light and enables app control
You typically can’t replace all three 4-way switches with smart models directly. The best solution depends on the exact wiring setup. Hiring an electrician is recommended for 4-way smart switch installation.
What if I don’t have a neutral wire?
Most smart switches require a neutral wire in the switch box to operate. If you don’t have a neutral wire present, you have a few options:
- Use a smart switch that doesn’t require neutral – Many models are available but may have limited features
- Run new wiring to add a neutral wire if possible
- Use a smart switch with battery packs or external module
- Install a smart bulb like Philips Hue that doesn’t require switch wiring
Adding new wiring for neutral can be complex, so consulting an electrician is recommended if neutral is missing and required by the smart switch.
How do I reset a smart switch?
If your smart switch is unresponsive or acting irregular, resetting it may help resolve issues. To reset a smart switch:
- Locate small hole or recessed button on the smart switch
- Use a paper clip to press and hold the reset button for 10-15 seconds
- The switch will go through reboot process
- Reset any accessories like add-on switches as well
- Restore power and reconnect the switch to Wi-Fi if needed
Resetting deletes any previous configurations and returns the smart switch to factory settings. You’ll have to reconnect it to your home Wi-Fi network and reprogram any custom settings.
Troubleshooting common smart switch issues
Here are some steps to resolve common issues with newly installed smart switches:
| Issue | Troubleshooting Tips |
|---|---|
| Switch isn’t getting power |
|
| Light won’t turn on |
|
| App connection issues |
|
| Switch isn’t responding |
|
Conclusion
Installing smart switches is a worthwhile upgrade for your home lighting. While hiring an electrician may be the safer option, many standard smart switch installations can be tackled as DIY projects with proper precautions and preparation. Ensure you select compatible smart switches for your wiring configuration and features needs. With the right tools, materials, and wiring knowledge, you can modernize your switches with smart lighting control.