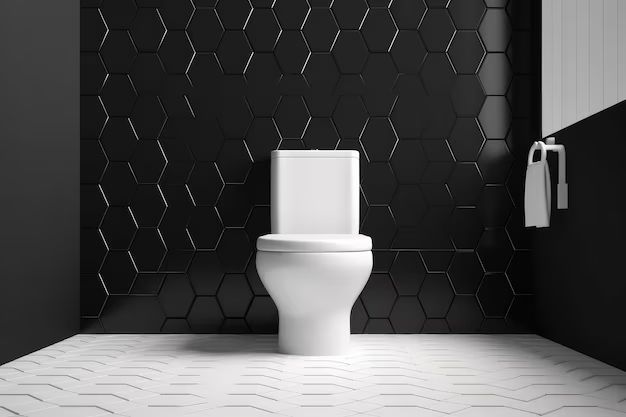
When installing a new toilet or replacing an existing toilet, proper cutting of the floor and wall tiles is crucial for a clean finish. The toilet’s waste pipe needs to align perfectly with the drain pipe in the floor, and the base of the toilet must sit flat on the floor. Careful tile cutting ensures no gaps or misalignments around the toilet. Here are some tips on how to accurately cut tiles for a toilet’s waste pipe.
Page Contents
Measure and Mark the Location
The first step is to determine the exact position of the toilet and mark where the waste pipe will come up through the floor. Place the toilet in the desired location and mark the points where the bolts will attach to the floor. Also mark where the center of the toilet flange will be. This is where the waste pipe needs to align. Use a framing square or straight edge to draw layout lines extending from the flange center marking. These layout lines will guide your tile cuts.
Dry Fit with Spacers
Do a dry fit of the floor and wall tiles to test your planned layout. Place tile spacers around each tile to indicate the grout joints. Examine the tile layout to see where cuts will need to be made for the waste pipe and toilet bolts. The toilet flange should align cleanly with the grout joints of the floor tiles. You may need to adjust the tile layout to optimize the cuts.
Mark Cut Lines and Holes
Based on your dry fit, carefully measure and mark where rectangle cutouts will need to be made in the floor tiles for the waste pipe. Double check your measurements. Also mark where L-shaped cuts will be needed on tiles for the toilet bolt holes. Use a straight edge and pencil for accuracy. For circular holes, use a compass to outline the diameter of the required hole.
Cut the Floor Tiles
There are several tools you can use to cut ceramic or porcelain floor tiles:
- Carbide tile cutter – A manual scorer with a tungsten carbide cutting wheel to score and snap tile.
- Wet saw – An electric saw with a diamond abrasive blade and water to cool and lubricate the blade.
- Angle grinder – A compact power tool with a diamond tile blade. Useful for straight cuts and bevel cuts.
- Tile nippers – Used to nibble away small chunks of tile material.
A wet saw is the best tool for straight precise cuts. For simple square or rectangular holes, carefully score the tiles and tap to snap them along the cut lines. Use an angle grinder or tile nippers to smooth the edges. Test fit the cut tiles around the toilet flange to ensure the openings are aligned correctly.
Cut Tile for Toilet Bolt Holes
The floor tiles around the toilet bolts need L-shaped cuts to fit around the bolts. Measure and mark the holes. Score along the lines with a carbide cutter then use nippers to cut out the L-shaped notches. Smooth the edges with an abrasive stone. Test fit the floor tiles and verify the holes align properly over the bolt layout marks.
Cut the Wall Tiles
Cutting the wall tiles around the toilet waste pipe involves making alignment notches or holes in the corner edge of the tiles. This allows the pipe to fit through cleanly. Use the following steps:
- Hold the wall tile upright against the corner with the waste pipe. Mark along the edge where the pipe meets the tile. This tracing should produce a U-shape on the tile edge.
- Use a carbide scorer to cut along the U-shape. Tap the tile to snap off the unwanted section.
- Use tile nippers and an abrasive stone to smooth and round over the edge of the U-shaped cutout.
- Test fit the wall tile over the pipe to confirm the notch alignment is accurate.
The same method can be used to cut a circular hole in a wall tile to surround the pipe. Trace the pipe location, then use a screwdriver or drill bit to punch a starting hole through the tile. Use nippers to nibble away the area until the desired hole size is achieved. Smooth the edges with an abrasive pad.
Cut Wall Tiles for Toilet Mounting Bolts
The toilet mounting bolts will also need to align with notches cut into the corner edge of the wall tiles. Measure and mark the bolt locations on the tile edges. Use a carbide scorer and nippers to cut out small notches where the bolt heads and washers will fit.
Test fitting as you go ensures the wall tiles will interlock cleanly around the toilet waste pipe bolts when installed.
Use Protective Gear
Always wear appropriate protective gear when cutting tiles:
- Safety goggles, glasses, or face shield
- Ear plugs or muffs
- Dust mask
- Knee pads
Tile cutting can produce debris and sharp fragments. The protective equipment will help guard against eye injuries, hearing damage, dust inhalation, and knee abrasions.
Cut Precisely and Test Fit
Avoid messing up the tile layout by double checking all your hole and cutout measurements. Cut carefully and smoothly along the marked lines. Use test fitting to validate the results and make incremental nibbling cuts as needed. Patience and precision leads to a clean installation.
Conclusion
Cutting floor and wall tiles for a toilet installation requires careful planning and measurement. Mark the exact locations for the waste pipe and mounting bolts based on the toilet position. Use a wet saw, tile cutter, or grinder to make square/rectangle cutouts and notches. Make incremental nibbling cuts with nippers to enlarge holes or improve alignments. Test fit the cut tiles as you go for a perfect fit around the toilet waste area. Wear protective gear and be meticulous for best results.