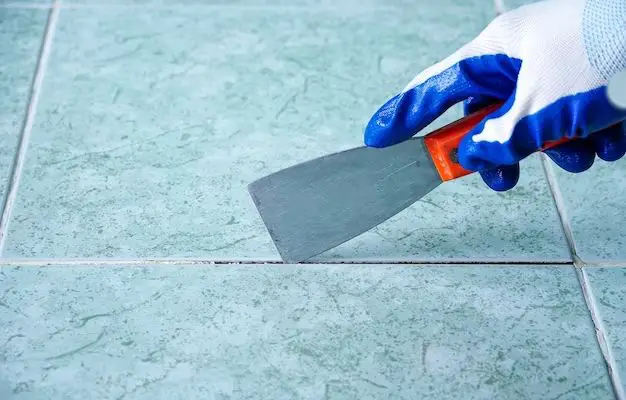
Over time, grout can become stained, cracked, or just generally worn down. Re-grouting is a common home improvement project, but first you have to remove the old grout. This can be especially difficult if the grout has hardened significantly. There are several methods you can try to soften and dissolve grout so it can be more easily scraped out and replaced.
Page Contents
Why Does Grout Harden Over Time?
Grout is a cement-based material that is used to fill the seams between tiles. It typically contains cement, sand, water and various additives and polymers. When mixed and first applied, grout has a toothpaste-like consistency that allows it to be pushed into tile joints. However, once in place, the grout begins to harden and cure, bonding to the sides of the tiles and gaining strength.
There are a few reasons grout can become excessively hardened over time:
– Normal curing of cement – The cement in grout naturally cures and hardens over time, just like concrete. This process can make grout harder and more difficult to remove years later.
– Improper cleaning – Using too much water or steam to clean tiles can cause the cement in the grout to hydrate further and become harder. Harsh cleaners can also degrade and erode the grout over time.
– Moisture exposure – Exposure to water and moisture from leaks, flooding, etc can hydrate and harden grout similar to overcleaning.
– Movement and cracks – Normal shifts in the house over time can cause hairline cracks in grout. Water and contaminants can seep into these cracks, reacting with the cement and hardening the grout from the inside out.
How to Soften Hardened Grout
If your grout has become stubborn and rock hard, there are several steps you can take to try and soften it up before attempting to scrape it out:
Method 1: Vinegar
White household vinegar is a mild acid that can help dissolve mineral deposits and break down hardened grout. Follow these steps:
1. Sweep or wipe away any dirt or debris from the grouted area so the vinegar can work directly on the grout.
2. Pour plain, white vinegar directly onto the grouted joints you want to soften. Completely saturate the area.
3. Let the vinegar sit for at least 15 minutes. For particularly stubborn grout, you may need to let it sit overnight.
4. Scrub the grout joints with a stiff bristle brush or an old toothbrush. The mechanical action will help dislodge and dissolve the hardened grout after the vinegar has worked on breaking it down.
5. Rinse the area thoroughly with clean water once done scrubbing. Vinegar can eat away at the grout, so you don’t want to leave it on too long.
6. Check if the grout has softened enough to scrape out with a pointed tool. If not, repeat the process until it has broken down sufficiently.
Method 2: Baking Soda and Vinegar
For even more dissolving power, you can combine baking soda and vinegar:
1. Sprinkle baking soda liberally onto the grouted area you want to soften. Pour vinegar over the baking soda until it is fully saturated. The vinegar will cause the baking soda to foam and fizz.
2. Allow the mixture to sit and work on the grout for at least 30 minutes. Overnight is ideal.
3. Scrub with a stiff bristle brush. The baking soda gives some grit to scour away at the grout while the vinegar dissolves it.
4. Rinse thoroughly and repeat as needed until grout is softened.
Method 3: Commercial Grout Remover
There are specialty grout removing products available at your local hardware store. Look for ones specifically designed for removing hardened or epoxy grout. Follow the product instructions closely:
1. Apply the remover to the grouted area, ensuring it makes full contact.
2. Allow it to sit for the specified dwell time to work at dissolving the grout. This can range from 10 minutes to overnight depending on the product.
3. Agitate and scrub with a stiff brush. The product directions will specify the appropriate brush.
4. Rinse thoroughly. Be sure to follow any safety precautions listed on the product for handling and cleanup.
Method 4: Power Grout Saw
For extremely hardened grout, a rotary power grout saw is the most effective way to remove it. This specialty tool uses a carbide saw blade to cut away grout instead of scraping it out.
If hiring a professional isn’t an option, you can rent a power grout saw from some hardware stores and home improvement centers. Follow all safety instructions that come with the rental unit. Take precautions against broken tiles and airborne dust.
Tips for Removing Hardened Grout
– Always pre-wet the tile and grout before applying any removers or acids. This prevents absorption into the tile and helps focus the action on the grout.
– Work in small sections for best results. Don’t tackle too much hardened grout at once.
– Use an old toothbrush, a grout brush with stiff nylon bristles, or a brass-bristle brush to scrub away dissolved grout.
– Rinse frequently to prevent any vinegar, baking soda, or commercial removers from drying on the tile.
– Be patient and persistent! It can take multiple applications and scrubbing sessions to fully soften and remove stubborn grout.
– Make sure to protect nearby surfaces from splashing vinegar or other removers.
– Wear safety goggles, gloves, and a dust mask when scraping out grout to protect yourself.
– If multiple attempts don’t soften the grout enough for removal, call in a professional grout saw service. Forced removal may damage the tiles.
What to Do Once Grout is Removed
Once you have successfully scraped out the old, hardened grout, it’s time to re-grout the space with fresh grout. Here are the next steps:
1. Sweep and wash the tile to remove any remaining debris and old grout film.
2. Make repairs to any damaged or missing tiles. You want the surface to be in good condition before regrouting.
3. Apply grout release or sealer to the tiles if recommended for the specific tile type. This will make future grout removal easier.
4. Mix up a batch of tile grout, following the package directions. Use a grout float to spread it into the empty joints, pressing firmly.
5. Wipe away excess grout with a damp sponge and let it begin to cure and harden.
6. Once cured, seal the grout joints with a grout sealer to protect from moisture and staining.
7. Enjoy your tiles and refreshed grout lines! Be sure to routinely seal and properly clean your grout to keep it looking fresh.
Conclusion
With some determination and the right methods, you can tackle removing even the most stubborn hardened grout. Vinegar, baking soda, commercial removers and power grout saws can all be effective depending on the situation. Remember to work in small sections, rinse frequently and take precautions against dust and debris. The finished result of beautiful new grout lines is worth the effort of properly dissolving and removing old grout. Just be sure to properly maintain your grout going forward.
| Method | What to Use | How to Apply | Dwell Time |
|---|---|---|---|
| Vinegar | White household vinegar | Pour directly onto grout lines | 15 minutes to overnight |
| Baking Soda and Vinegar | Baking soda and white vinegar | Sprinkle baking soda onto grout lines, then pour on vinegar | Minimum 30 minutes, overnight optimal |
| Commercial Remover | Store-bought grout remover | Apply to grout lines per product instructions | Variable, follow product instructions |
| Power Grout Saw | Rotary grout saw | Cut along grout lines with grout blade | N/A |