Dealing with a leaking nozzle can be a frustrating problem, especially when it’s causing water damage or leading to higher utility bills. However, fixing a leaky nozzle is often an easy DIY project that doesn’t require special tools or skills. This guide will walk you through the steps for diagnosing and repairing a leaking nozzle so you can solve the issue quickly and prevent future leaks.
Page Contents
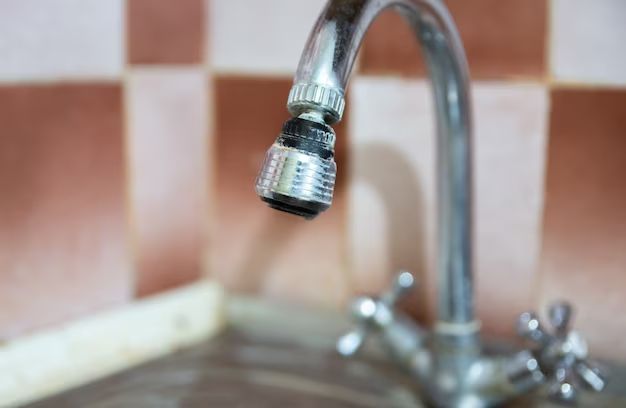
What causes nozzle leaks?
Nozzles can leak for a variety of reasons, including:
- Cracks or damage – Cracks or holes in the nozzle from impact, wear and tear, sun damage, etc. can allow water to leak out.
- Loose connections – The nozzle may not be tightly threaded or sealed onto the pipe or hose connector, allowing water to escape around the loose connections.
- Worn out washers or gaskets – Rubber washers and gaskets within the nozzle eventually wear out and no longer create a tight seal.
- Mineral buildup – Hard water deposits and mineral buildup can corrode, crack, or obstruct the nozzle over time.
- Incorrect nozzle – Using the wrong nozzle type or size for your pipe or hose connections can result in improper fits that leak.
How to locate the leak
Start by thoroughly inspecting the nozzle and connections to try to pinpoint the exact source of the leak:
- Look for moisture, drips, or water stains that indicate leaks.
- Remove the nozzle from the pipe or hose and check for cracks, damage, or gaps.
- Examine washers and gaskets for wear or tears.
- Check for loose connections or improper threading.
- Turn on the water to test for leaks in operation.
Often, a visual inspection will reveal the cause of the leak, like a visible crack or a loose connector. If it’s not obvious, you may need to go through a process of elimination to identify the problem area.
Quick fixes
Try these quick and easy fixes first to see if they stop the leak:
- Tighten connections – Tighten any loose threaded connections with pliers or a wrench. Tighten hose connections by hand.
- Replace washers – Unscrew the nozzle, remove worn washers and gaskets, and replace with new rubber washers.
- Clean mineral deposits – Remove the nozzle and soak it in white vinegar or a CLR solution to dissolve mineral buildup that may be obstructing seals.
Test the nozzle after each attempted fix to see if the leak has stopped. You may get lucky with one of these quick repairs.
Replace the nozzle
If you can’t pinpoint the exact cause of the leak or the quick fixes don’t solve the problem, replacing the entire nozzle is the simplest solution. Nozzle replacement only costs a few dollars and takes just minutes. Follow these steps:
- Turn off the water supply and open the nozzle to release any built-up pressure.
- Unscrew the damaged nozzle completely off the pipe or hose.
- Check the pipe or hose threading and make sure there is no damage or debris.
- Apply plumber’s tape to the threads to create a tighter seal.
- Screw on the replacement nozzle by hand until tightly sealed.
- Slowly turn the water back on and check for leaks.
- Make any needed adjustments to tighten.
Be sure to purchase the correct replacement nozzle for your particular pipe or hose connector type and size.
Repairing plastic nozzles
For plastic nozzles attached to hoses and sprinkler systems, you can often repair cracks or damaged areas rather than replacing the entire nozzle:
- Clean and dry the nozzle thoroughly.
- Apply plastic epoxy adhesive to the damaged area and smooth over cracks or holes.
- Clamp the nozzle tightly shut until the epoxy hardens fully.
- Once dry, reconnect the nozzle and test for leaks.
Epoxy putty sticks provide an easy solution for minor nozzle repairs. For more extensive damage, replace the nozzle.
Repairing metal nozzles
Metal nozzles on pipes can often be repaired if the damage is limited:
- Clean and dry the metal nozzle.
- Use sandpaper to rough up the damaged area and surrounding surface.
- Apply a thin coat of metal epoxy to fill in any gaps or holes.
- Allow the epoxy to cure fully.
- Sand any drips or uneven areas to smooth the repair.
- Seal with waterproof sealant.
For cracks wider than 1/8 inch or any through-holes in metal nozzles, replacement is the better option.
Preventing future leaks
To help prevent nozzle leaks from recurring, follow these maintenance tips:
- Inspect nozzles periodically for wear, cracks, and mineral buildup.
- Replace old or damaged rubber washers and gaskets.
- Use nozzle covers or bring nozzles indoors during freezing weather.
- Winterize and drain irrigation systems properly.
- Disconnect hoses during cold weather.
- Avoid kinking hoses or damaging nozzles.
- Clean nozzles regularly to remove debris and scale.
- Use nozzle adapters or reducers for proper hose-to-nozzle fit.
When to call a plumber
Repairing nozzle leaks is usually a quick and straightforward DIY project. However, in some cases it’s best to have a professional plumber handle the repair:
- If the leak originates behind wall pipes or under floors.
- For large ruptured pipes or severely damaged nozzles.
- If the water supply valves are corroded or won’t shut off.
- For leaks that persist despite your repairs.
- If you’re uncomfortable working with plumbing systems.
A licensed plumber can use specialized tools and materials to fully diagnose and fix the leak at its root cause. This is the safest approach for large leaks or leaks in hard to access areas.
Conclusion
With some basic DIY troubleshooting and repairs, you can easily fix many leaking nozzle issues. Start by pinpointing the leak location and source, then try quick fixes like tightening connections or replacing washers. For unrepairable nozzles, a full replacement is fast and inexpensive. Take steps to prevent future leaks through regular maintenance. Call on a professional plumber for major leaks or complex repairs requiring in-wall access. Catching and fixing nozzle leaks quickly can prevent water damage and wasted water in your home or yard.