Page Contents
- 1 What is an accent wall?
- 2 Why panel an accent wall?
- 3 Things to Consider Before Installing Panels
- 4 How to Select Panels
- 5 Preparing the Wall
- 6 Measure Carefully
- 7 Cutting Panels
- 8 Installing Wood Panels
- 9 Installing Wainscoting
- 10 Installing 3D Wall Panels
- 11 Installing Tile Panels
- 12 Installing Metal Panels
- 13 Finishing Touches
- 14 Panel Accent Wall Ideas
What is an accent wall?
An accent wall is a single wall in a room that is treated differently from the other walls through the use of color, texture, material, or pattern. The accent wall serves to draw attention and provide visual interest in the room. Accent walls can be created through wallpaper, wood paneling, painting a different color, tile, stone, brick, stenciling, or other treatments.
Why panel an accent wall?
There are several reasons to panel an accent wall:
– Provides dimension and texture – Wall panels add depth, richness, and visual interest to a flat wall. The panels create shadows and contours that make the wall more dynamic.
– Warms up a space – Wood paneling can lend a natural, rustic, cozy feel to a room. It brings in warmth that drywall lacks.
– Covers flaws – Panels can conceal imperfections, cracks, or texture differences on the wall surface.
– Easy to install – Many panel systems nowadays use lightweight materials that can be installed directly over existing drywall. This makes installation straightforward.
– Cost effective – Pre-fabricated panels are relatively affordable compared to full wall treatments like tile or brick. Panels provide a big visual impact for a smaller investment.
– Customizable – Panels come in a wide array of materials, sizes, finishes, and patterns. This allows for creativity and personalization. You can achieve very different looks using panels.
– Changeable – Panels are removable and replaceable. If you tire of the look down the road, you can easily change it out. This is an advantage over permanent treatments like paint.
Things to Consider Before Installing Panels
Before starting your project, consider the following:
– What is your design goal? Do you want a modern, sleek look or a rustic, natural look? This will inform the type of panel to use.
– What size panels and what layout pattern do you want? Larger panels make less of a statement than busier, smaller layouts.
– Do you want to install over drywall or remove drywall and install on studs? Installing over drywall is easier.
– How heavy are the panels? This will determine what type of mounting hardware you need.
– Do you need to run electrical behind the panels? Plan wiring before installing.
– What is your budget? Paneling ranges from value priced to high-end.
– Do you want to install it yourself or hire a professional? DIY is straightforward if you’re handy. Professionals can ensure it’s done right.
– Make sure the panels are made of moisture-resistant material if installing in bathrooms or laundry rooms.
How to Select Panels
There are many paneling materials and styles to choose from:
| Panel Type | Description |
|---|---|
| Wood planks | Real wood panels add natural warmth. Many plank sizes, stains, and finishes are available. |
| Reclaimed wood | For rustic appeal, reclaimed barn wood panels have an aged, distressed look. |
| Plywood | Simple, inexpensive panels. Often used for whitewashed or painted looks. |
| MDF | Affordable medium density fiberboard panels. Primed for painting or staining. |
| 3D planks | Molded ridges simulate real wood planks with authentic texture. |
| Wainscoting | Traditional style with raised panels set in a framework. Available in wood, MDF, or vinyl. |
| Shiplap | Rustic, overlapping horizontal boards popular in farmhouse style homes. |
| Tile | Natural stone or ceramic tile provide a sleek, modern accent wall. |
| Wallpaper | Available in endless prints and textures. Provides color and visual impact. |
| Laminate | Durable, affordable option good for bathrooms. Many stone and woodgrain choices. |
| Metal | Aluminum, stainless steel, and tin panels create an industrial, urban chic look. |
The options are nearly endless, so view samples and examples to find the right panel look for your project. Consider factors like cost, durability, weight, ease of installation, and how dramatic you want the end result to be.
Preparing the Wall
Preparing the accent wall surface is key to getting panels properly installed:
– Remove any wall hangings, outlet covers, light switches, and border trim.
– Fill any cracks or holes with spackle and sand smooth.
– Clean the wall thoroughly to remove dirt, grease, and other residues.
– Prime the wall with a quality primer/sealer. This provides a neutral base and ensures proper adhesion.
– For glossy paint, lightly sand to dull the sheen so panels adhere better.
– Check for wall straightness. Shims can be used to straighten bowed framing.
– Identify stud locations for secure fastening, using a stud finder. Mark stud edges with painters tape.
– Address moisture issues. Use a moisture meter to check for hidden leaks or condensation.
– Repair affected areas and allow wall to fully dry before installing panels.
Measure Carefully
Careful measuring ensures your panels fit right the first time. Avoid costly do-overs by following key tips:
– Map out your panel layout on paper first. Mark stud locations. Plan the number of panels needed.
– Measure the wall length and height. Account for alcoves or offsets. Include areas behind appliances or furniture.
– For irregular spaces, make a template from heavy paper to test fit.
– Measure panels before cutting to confirm size. Account for gaps if panels slide together.
– For outlets and switches, measure and mark the exact positioning on panels before cutting.
– Allow for trimming irregular edges and corners. Save scraps for use there.
Planning and precision measuring will result in a professional looking installation.
Cutting Panels
Cut panels with the following tools:
– Circular saw – For fast straight cuts outdoors. Use a fine-tooth blade suitable for clean cuts in your panel material.
– Jigsaw – For indoor cuts like outlet openings or irregular edges. Fit a fine blade.
– Table saw – For precise straight cuts and ripping panels to width. Use a sharp blade and slow feed rate.
– Router – For trimming panel edges or cutting dado grooves. Use a sharp bit matched to panel thickness.
– Hole saw – For boring holes for plumbing or electrical. Center bit on marks. Let drill do the work.
– Oscillating tool – For detailed scroll cuts like around pipes or fittings. The narrow blade allows tight curves.
– Tin snips – Handy for cutting metal panels. Work slowly to avoid jagged edges.
Safety is a priority. Follow tool manufacturer instructions. Wear eye and ear protection and follow safe practices to avoid accidents.
Installing Wood Panels
For real wood planks, shiplap, and other wood products, install as follows:
- Apply construction adhesive to the back of each panel with a caulk gun. This creates a strong bond to the wall.
- Fasten panels to wall studs for a sturdy mounting. Predrill holes to prevent splitting. For drywall, use screws long enough to penetrate studs.
- Use finish nails for added strength between studs. Set nail heads slightly below surface.
- Follow the panel layout plan. Use spacers to set consistent gaps between planks.
- Work from top to bottom. Run boards horizontal or vertical depending on preference.
- Trim around windows, doors, and baseboards for a custom fit.
- Fill nail holes with matching wood filler. Sand lightly once dry.
- Finish with silicone caulk between boards and along all seams for a watertight installation.
Wood panels require some basic carpentry skills. Allow panels to acclimate to interior conditions before installation. Take care to properly space, align, and secure all panels.
Installing Wainscoting
To install classic wainscoting paneled walls:
- Cut paneling and rails to size. MDF wainscoting kits include all the trim and parts needed.
- Apply adhesive to back of panels and rails. Follow layout measurements.
- Insert bottom rail into dado groove on base shoe molding. Nail into wall studs.
- Install side rails between top and bottom rails. Check for level and plumb.
- Insert panels into dado grooves in rails. Nail through trim into panels.
- Cut and install any vertical rails needed for your layout spacing.
- Caulk perimeter seams and nail heads for a finished look.
- Prime, then paint wainscot to suit your color scheme.
Wainscoting requires careful layout and assembly. Hire a carpenter for complex or intricate designs. Use painter’s tape layout lines as a guide.
Installing 3D Wall Panels
Three-dimensional wall panels made of high density urethane or PVC provide authentic texture. Install as follows:
- Start with a clean, primed wall. Ensure surface is completely smooth.
- Determine your panel layout. Mark plumb lines on the wall to align panels.
- Apply panel adhesive in a serpentine pattern on the back. Provide 1/4″ space around edges.
- Press panels to the wall aligning to your guide lines. Hold in place firmly for 30-60 seconds.
- Use a small roller to apply even pressure and flatten panels against the wall.
- For inside corners, cut panels to make mitered seams. Use silicone to seal gaps.
- Finish edges and around windows and doors with trim matched to the panel thickness.
Textured 3D panels made of lightweight materials install quickly with adhesive. Follow manufacturer instructions closely for best results.
Installing Tile Panels
Tile creates a contemporary yet classic accent wall. Use these tips for proper installation:
- Select your tiles. Natural stone, ceramic, marble, and glass tiles all work well.
- Plan tile layout – staggered brick pattern or stacked. Have 10% extra tiles.
- Use cement board rather than drywall for a durable surface.
- Mark layout lines on the wall to keep tiles straight and level.
- Spread thinset mortar using a notched trowel. Do small sections at a time.
- Press tiles into thinset. Use spacers for consistent grout lines.
- Cut border and feature tiles with wet saw or tile cutter.
- Let thinset cure fully – 24-48 hours. Avoid moving loose tiles.
- Mix grout. Apply with float, press into lines. Let harden slightly then polish off residue.
- Seal grout lines with penetrating sealer for water resistance.
Tiling requires skill. Consider hiring a tile setter for top quality results, or take a class if DIYing.
Installing Metal Panels
For a modern, industrial look, metal panels are a bold choice:
- Common metals used are aluminum, galvanized steel, and copper. Check gauge – thicker metals hold fasteners best.
- Use battens – wood strips that provide a nailing base. Screw battens to wall studs.
- Match metal screws and finish washers to the metal color.
- Drill oversized holes in the metal panels so they can shift seasonally.
- Snap chalk lines on the battens to ensure panels mount straight and level.
- Apply adhesive caulk to battens. Press metal panels into place.
- Drive screws into washers and battens every 12-16″. Avoid over-tightening.
- For inside and outside corners, cut precise seams. Grind edges smooth.
- Use rubber washers between overlapping panels to prevent metal clicking.
Hiring a skilled metalworker provides the best results for metal accent walls. Follow all safety measures when handling large sheets of sharp metal.
Finishing Touches
Finish your accent wall panels with these final steps:
- Inspect overall installation for any visibly missing fasteners, gaps, popped nails, or cracks.
- Make adjustments and fix flaws for best appearance.
- Caulk all seams, corners, and edges with a clear silicone caulk.
- Reinstall baseboard trim, outlet covers, and switch plates.
- Prime and paint any raw wood or MDF.
- Seal natural wood products with polyurethane for protection.
- Clean panel surfaces gently with mild soap and water.
- Stand back and admire your stylish, freshly paneled accent wall!
Proper prep work, careful installation, and finishing touches result in an accent wall with clean, professional results. Panels provide texture and beauty to transform a blank wall into a decorative focal point.
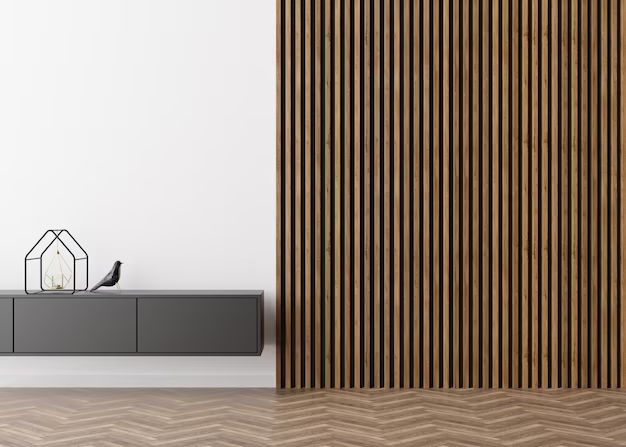
Panel Accent Wall Ideas
Here are some chic and unique panel accent wall ideas to inspire your own projects:
Rustic Wood Planks
Distressed wood planks in varying stains add a cozy, cabin vibe to a room. Try mixing widths and lengths.
Bold Wainscoting
Crisp white wainscoting trimmed in black makes a striking accent wall in a modern space.
Natural Stone
Slate or sandstone tile arranged in a stacked pattern provides an earthy, spa-like feel.
Mirror Panels
Small mirrored rectangular tiles amp up the glam factor and reflect light beautifully.
Salvaged Barnwood
Reclaimed boards with peeling paint and rugged texture create a charming farmhouse wall.
Black Tin Ceiling
Victorian inspired pressed tin tiles in dramatic black update a traditional look.
Geometric Tiles
Moroccan inspired cement tiles form colorful geometric patterns for global flair.
Faux Brick
Realistic brick veneer panels make a stunning impact without the masonry work.
Whatever your style, paneling allows you to customize your space and add artful interest to your home. With so many options, you can easily create a stylish accent wall that reflects your personal taste.