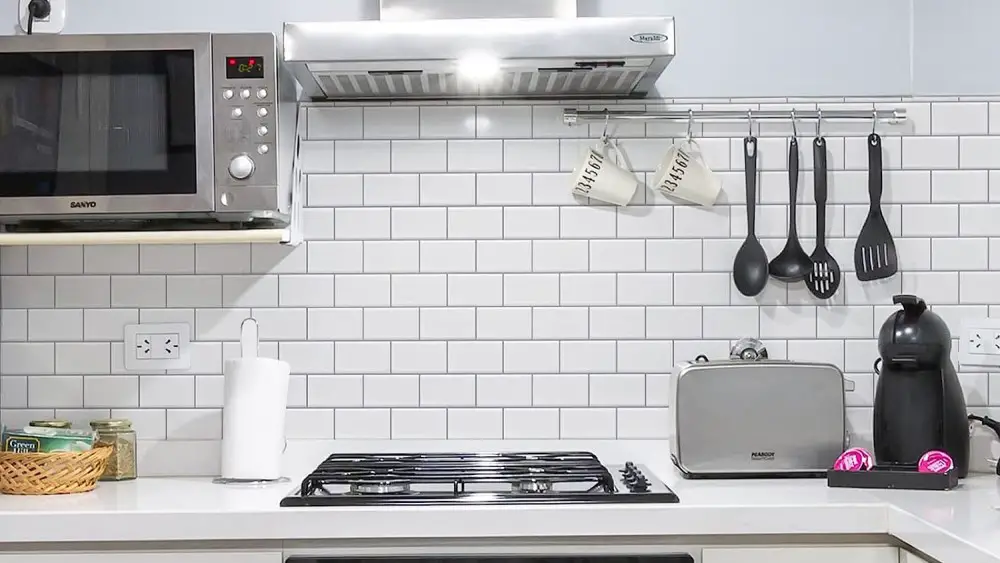
Improve your kitchen by peel and stick backsplash tile for an affordable, easy upgrade. Peel and stick backsplash tile allows do-it-yourselfers to quickly transform the style of their kitchen without the mess, expense, and labor of traditional tile installation.
With just a utility knife, measuring tape, and some time, you can install a sleek, modern backsplash in your kitchen in one weekend. Peel and stick tile comes in endless materials, colors, and patterns to match your space.
Follow a few simple preparation and installation steps outlined in this guide to learn how to enhance your kitchen with easy peel and stick backsplash tile. We’ll cover choosing the right tile, prepping your workspace, detailed installation instructions, and care tips – everything you need to know to take your kitchen from boring to beautiful with this budget-friendly project.
Page Contents
- 1 Key Takeaways
- 2 What is Peel and Stick Backsplash Tile
- 3 Understanding Peel and Stick Backsplash Tile
- 4 Benefits of Using Peel and Stick Backsplash Tile to Improve Your Kitchen
- 5 Choosing the Right Peel and Stick Backsplash Tiles for Your Kitchen
- 6 Preparation Before Install Peel and Stick Backsplash Tile in Your Kitchen
- 7 Step by Step Installation Guide for Peel and Stick Backsplash Tile in Your Kitchen
- 8 Maintenance and Care Tips for Peel and Stick Backsplash Tile in Your Kitchen
- 9 Conclusion
- 10 Frequently Asked Questions
- 10.1 How do you install Smart Tiles Peel and Stick backsplash?
- 10.2 How do you install peel and stick glass tile backsplash?
- 10.3 What is the best way to install peel and stick backsplash in corners?
- 10.4 Can you install peel and stick backsplash over tile?
- 10.5 How do you make your peel and stick backsplash stick better?
- 10.6 Is peel and stick tile worth it for backsplash?
- 10.7 How do you hide seams on peel and stick backsplash?
Key Takeaways
To improve your kitchen by peel and stick backsplash tile, here are the steps you can follow:
- Select the right tile material, size, colors and pattern for your kitchen’s style
- Thoroughly clean and prep the backsplash area by removing any old tile, sanding, and ensuring the wall is smooth
- Gather necessary tools likeutility knife, tape measure, smoother, caulk, and grout if desired
- Measure the space and cut tiles to fit, peeling off mesh backing and sticking row by row
- Apply even pressure and use a tool to smooth each tile for best adhesion
- Trim excess mesh, caulk edges, let cure, and grout if desired
- Clean tiles gently with mild soap and water, avoid harsh chemicals
- Immediately wipe up any grease, splatters or excess moisture
- Replace any damaged tiles by peeling up and re-sticking new tiles
- Limit exposure to direct sunlight or heat to prevent damage
By properly selecting, preparing, installing, and caring for peel and stick backsplash tile, you can affordably upgrade the style of your kitchen in just a weekend.
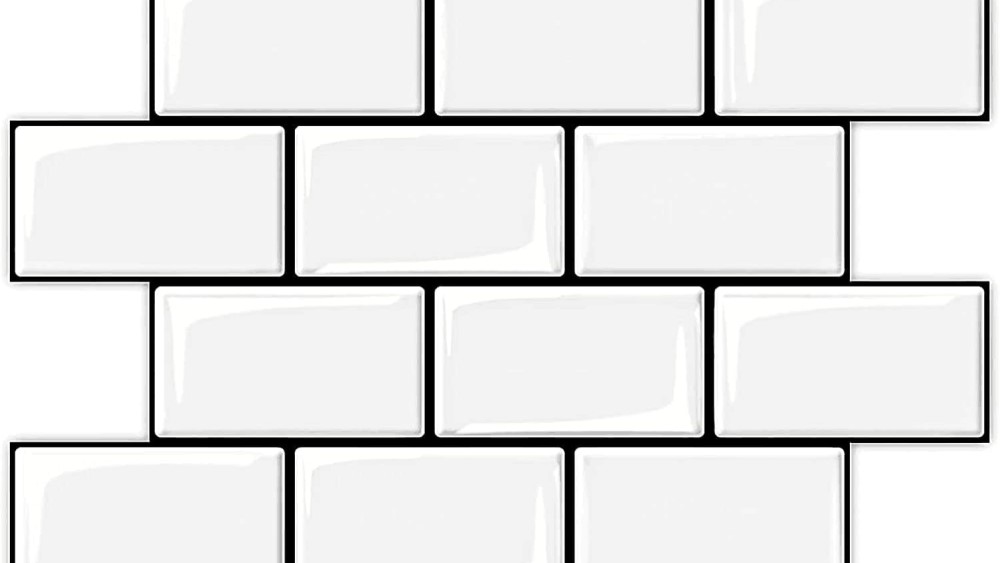
What is Peel and Stick Backsplash Tile
Peel and stick backsplash tile, also known as self-adhesive tile or sticker mosaic, is exactly what it sounds like – tiles with an adhesive backing that can be easily peeled and stuck to your wall. The tiles come mounted on a mesh sheet for simpleinstallation.
Peel and stick tiles are made from various materials including real ceramic or porcelain, metal, plastic, or a composite material. They provide the look of traditional permanently installed backsplash tile, while allowing for easy DIY installation without all the messy mortar or grout. The adhesive is strong enough to adhere the tile permanently to the wall.
Peel and stick backsplash tile has exploded in popularity in recent years thanks to its simplicity and affordability. It allows homeowners to quickly upgrade their kitchen on a budget. The project can usually be completed in a single weekend with no professional assistance required.
Understanding Peel and Stick Backsplash Tile
There are a few key factors to understand about peel and stick backsplash tile before starting your project:
- Thickness – Peel and stick tiles are thinner than traditional ceramic tile, usually around 1/8 inch thick. The thin and lightweight material makes the tiles easy to cut, shape, and stick to the wall.
- Adhesive backing – The adhesive is applied in an even layer across the entire back of the tile. The strong adhesive is designed to bond permanently to common wall materials such as drywall, plaster, wood, metal, tile, laminate, concrete, and many plastics.
- Mesh mounting – Individual tiles are mounted to a mesh sheet in the desired pattern, making the tiles easy to transport, cut, and apply as one unified sheet. After applying to the wall, the mesh can be peeled away.
- Grouting – Grouting is optional for peel and stick tile. The thin grout lines on the mesh provide ample spacer and some tile brands have built-in grout line color. If desired, traditional sanded grout can also be used between tiles.
- Durability – Peel and stick tiles hold up well to moisture and daily wear and tear. However, they are not as durable as real ceramic or stone and can be prone to bubbling or peeling if not properly installed. The adhesive can lose strength when exposed to prolonged heat or sunlight.
Benefits of Using Peel and Stick Backsplash Tile to Improve Your Kitchen
Installing peel and stick backsplash tile offers many advantages over traditional tiled backsplashes or other kitchen upgrades:
Cost Savings
The main benefit of peel and stick tile is the low cost, especially compared to professionally installed ceramic tile. Peel and stick tile costs between $5-$20 per square foot. There’s no need to hire contractors for installation, eliminating high labor costs. Required tools and materials are minimal.
Quick and Easy Installation
With peel and stick tile, there’s no need for precise tile cutting, no mortar messy mortar mixing, and no waiting for grout to set. The tiles are ready to stick right from the package. Installation can usually be completed in just one day compared to multi-day professional tiling jobs. No specialty skills or equipment are required.
Removability
Peel and stick tiles can be easily removed intact for rearrangement, replacement, or to revert back to the original wall. Traditional mortar-set tile is labor intensive to remove. This reversibility makes peel and stick tile low commitment and ideal for renters.
Style and Design Flexibility
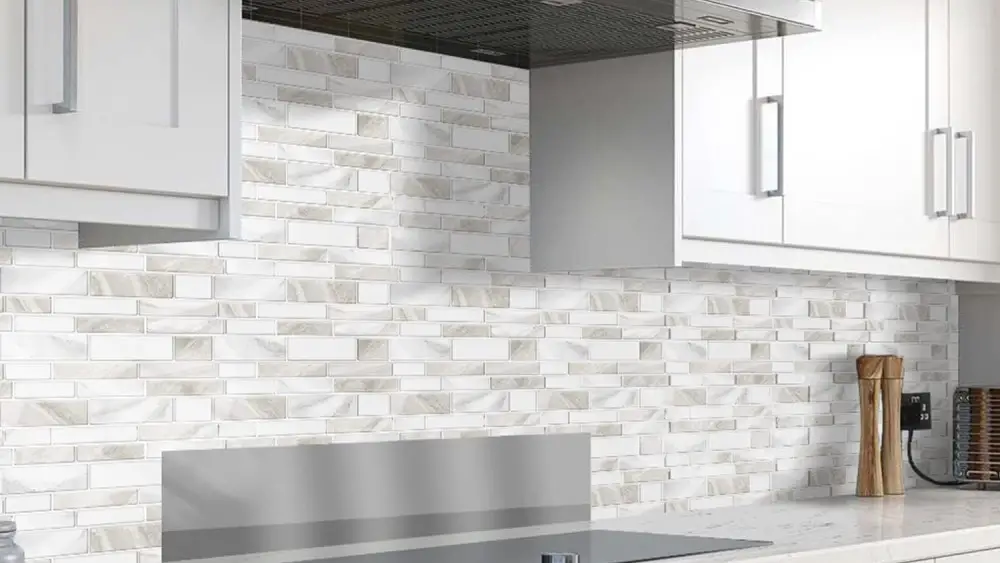
Peel and stick backsplashes come in endless styles – subway, penny round, marble, mosaic, geometric, and more. Many mimic the look of high-end ceramic tile at a fraction of the cost. Mix and match colors and patterns for a custom designer look. Easy to cut and shape peel and stick tile allows for creative installations.
DIY Friendly
Nearly anyone can install a peel and stick backsplash successfully with minimal preparation and tools required. No need to hire a professional tiler. Watch a few online tutorials to learn proper techniques and tips. Peel and stick tile empowers DIY-ers to upgrade their home and add value through their own skills.
No Grout Hassle
Grout between tile can be difficult for DIY-ers to install correctly. Peel and stick tiles have built-in grout line spacing and some products have grout lines pre-colored on the mesh. Optional grouting is messy, but not required – no need for precise grout width and cleaning.

Choosing the Right Peel and Stick Backsplash Tiles for Your Kitchen
With the wide range of peel and stick backsplash tile sizes, materials, styles, and colors available, picking the right option for your space can seem overwhelming. Keep the following factors in mind when selecting tile: Consider Your Kitchen’s Style
Do you want your new backsplash to match your current kitchen style or give the space an entirely new look? Consider the cabinets, countertops, appliances, and overall design aesthetic of your kitchen. Then select tile materials, colors, and patterns that coordinate well. For a cohesive look, incorporate similar colors and textures used throughout the kitchen. Those seeking a bold new style can use the backsplash as an opportunity to create a statement focal point.
Tile Material
Peel and stick tiles come in an array of materials, each with their own advantages:
- Ceramic or porcelain: Most realistic looking, mimics high-end tile in durability and style. Can be patterned, glossy, or matte finish.
- Metal or tin: Reflective and eye-catching – great for contemporary, modern, or farmhouse styles. Prone to scratches and dents.
- Glass: Sleek and luminous glass finish. Can look like real stone and comes in bold colors. Not very durable or heat resistant.
- Plastic: Most budget-friendly option. Lightweight and easy to install but less realistic look. Won’t shatter like real stone or ceramic.
- Composite: Blend of materials to mimic natural stone or ceramic while adding durability. Provides realistic look for lower cost.
Tile Size and Shape
Peel and stick tiles typically come in standard sizes ranging from 1 inch mosaics up to 4 x 12 inch subway tile rectangles. Some common options include:
- Penny tile rounds
- Hexagons
- Subway tiles
- Mini mosaic tiles
- Large format tiles
The size and shape you choose impacts the overall look and feel. Smaller tiles like mosaics create busier patterns. Large tiles have a more contemporary, seamless look. Subway tile offers classic style. Combine different sizes and shapes for contrast and interest.
Color and Pattern
Tile patterns range from solid colors to marbled, textured, geometric, or graphic designed looks. Colors span the spectrum from bright primaries to natural stone hues.
Factor in the existing color scheme and cabinets when selecting a scheme. For a bright, retro look consider glossy primary colored tiles. Earth tones work well in traditional kitchens. White or neutral tiles keep the space light and open feeling.
Mix and match colors in geometric, overlapping, or mosaic patterns for a lively style. Stick to a simple brick pattern or single color for clean and classic.
Preparation Before Install Peel and Stick Backsplash Tile in Your Kitchen
Installing a peel and stick backsplash tile is relatively easy. But taking a few steps to prepare the workspace and gather supplies ahead of time will ensure success:
Cleaning the Wall
Peel and stick tile adheres best on smooth, clean surfaces free of residue, dirt, and grease. Clean the backsplash area thoroughly by:
- Removing existing backsplash tile, wallpaper, etc if present
- Washing with degreasing cleaner and rinsing well
- Sanding and scraping away rough spots, old adhesive, peeling paint
- Fixing any holes or cracks in the wall
- Ensuring the surface is completely smooth and dry before application
Proper prep work results in the adhesive bonding tightly to the wall. Wipe the area down with rubbing alcohol just before installation for best adherence.
Gathering Necessary Tools
Assemble all required tools and materials beforehand to make installation fast and easy:
Tools:
- Utility knife or sharp razor blade
- Tape measure
- Level
- Pencil
- Painter’s tape
- Smoothing tool like wallpaper seam roller
- Spacer tiles (optional)
Materials:
- Selected peel and stick backsplash tile
- Adhesive (if required)
- Caulk in a matching color
- Grout (if desired)
Safety gear like gloves and eye protection are also recommended. Having everything prepped saves time and hassle during the peel and stick tiling process.
Step by Step Installation Guide for Peel and Stick Backsplash Tile in Your Kitchen
Once your workspace is prepped and tools gathered, follow these simple steps for DIY peel and stick backsplash tile application:
Measuring and Cutting
First, measure the backsplash area to determine how many full tiles and cut tiles are needed. Plan the tile layout – staggered brick pattern or another alignment. Cut the mesh backing of the first tile with a utility knife. Peel adhesive backing and press in place in a corner as the first tile.
Continue cutting tiles to fit around outlets, corners, and edges. Score and snap off individual tiles from the sheet as needed – tile cutting tools aren’t required. Simple utility knife cuts are all that’s needed for most peel and stick tile materials.
Cut tiles should have a minimum of 2 inches on any side to stay firmly attached. Make small slices in the mesh instead of cutting tiles fully apart until installation.
Peeling and Sticking
Once first tile is aligned, begin peeling away mesh sheet and sticking tiles row by row. Apply firm even pressure across each tile for best adhesion, using a smoothing tool or your hands.
Work in sections to control sticky tiles. Keep the remaining mesh sheet face down until ready to stick the next area. Peel backing and stick tile pieces carefully to avoid shifting of placed tiles.
Watch for bubbles – lift and re-stick if not adhering smoothly, using added adhesive if needed. Wipe away excess glue oozing from tile edges as you work.
Finishing Touches
At edges and corners, press tile pieces firmly in place, trim excess mesh, and caulk any gaps. Let adhesive cure 24 hours before grouting if desired. Avoid putting heavy items on backsplash for several days.
Seal tile if needed per manufacturer instructions with grout sealer or caulk. Finally, wipe away any residue and enjoy your stunning new backsplash! Proper installation will result in long-lasting peel and stick tiles.
Maintenance and Care Tips for Peel and Stick Backsplash Tile in Your Kitchen
The right care will keep your new peel and stick backsplash looking fresh. Follow these maintenance tips:
Cleaning the Tiles
- Use mild soap and water only – harsh chemicals can damage adhesive
- Avoid abrasive scrubbing pads or brushes
- Immediately wipe up grease, food splatter, or standing water
- Re-caulk as needed to prevent moisture entering seams
Repair and Replacement
- Carefully peel up and replace any damaged, lifting, or stained tiles
- Re-adhere loose areas with adhesive
- Limit exposure to direct sunlight and heat to prevent curling or shrinkage
With proper installation and care, a DIY peel and stick backsplash can last for years of stylish performance. Avoid moisture buildup, intense heat, and heavy scrubbing to get the longest life from your tiles.
Conclusion
Peel and stick backsplash tile provides a budget-friendly weekend upgrade to kitchens of any style. With minimal tools required and easy peel and stick installation, homeowners can easily DIY this project and make a big impact.
In just a day or two, you can switch up your backsplash from boring to bold. Proper prep, careful application, and tile maintenance will keep your new backsplash looking pristine. By following this guide, you’ll end up with a stylish, quality tile backsplash with no professional hired. Peel and stick tile allows you to affordably tackle kitchen upgrades yourself for a satisfying DIY experience.
Frequently Asked Questions
How do you install Smart Tiles Peel and Stick backsplash?
Clean the surface thoroughly and make sure it is smooth. Wipe with rubbing alcohol. Measure and dry fit tiles to plan layout. Cut tiles as needed with utility knife. Peel off backing and press tiles firmly into place row by row. Smooth with applicator tool. For Smart Tiles, overlap edges slightly instead of butting seams. Trim excess mesh. Let cure 24 hours before sealing or grouting.
How do you install peel and stick glass tile backsplash?
Prepare the surface completely smooth and grease-free. Cut glass tiles with a wet tile saw or scorer tool to avoid shattering. Spread thin even layer of adhesive on wall before applying tiles. Press each tile firmly for 60 seconds to adhere, check for corners lifting. Use caulk between tiles and let cure fully before grouting.
What is the best way to install peel and stick backsplash in corners?
For inside corners, cut tile edges at 45 degree angles to fit neatly together. For outside corners, use full tiles butted to the corner edge. Caulk any gaps. Cut precise shapes to fit around irregular corners. Take time fitting corners for best results as they are most visible.
Can you install peel and stick backsplash over tile?
Yes, peel and stick can be installed over existing backsplash tile. Ensure the tile is well adhered, clean, and grease free. Cut tiles to fit around existing tile edges and layout. This creates a quick facelift but covering grout lines can look messy.
How do you make your peel and stick backsplash stick better?
Clean the surface thoroughly and don’t install onto paint or wallpaper. Apply firm even pressure while sticking the tiles. Use a smoother tool. If tiles lift, use kitchen/bath adhesive spread thin behind each tile. Avoid moisture or steaming up area after install so adhesive can fully cure.
Is peel and stick tile worth it for backsplash?
For the price, ease, and quick installation, peel and stick tile is an excellent backsplash choice. It allows you to easily upgrade the style affordably. Great for renters. Drawbacks are less durability than real tile and potential lifting issues if improperly installed. Overall the pros of low cost, easy install, and stylish options outweigh cons for most.
How do you hide seams on peel and stick backsplash?
Use smallest size tile such as mosaics which have barely visible seams. Overlap tile edges slightly instead of butting for seamless look. Match grout color to tile color for camouflaged seams. Caulk between tiles and smooth with finger to fill gaps. Take care aligning tiles properly so seams don’t become visible.
