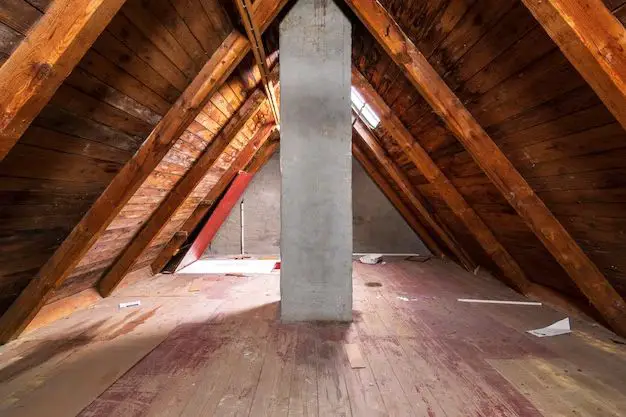
Insulating your attic hatch can help improve the energy efficiency of your home and keep conditioned air from escaping into your attic. An attic hatch, also called a scuttle hole or attic access, is a small opening that allows access to your attic space. Attic hatches are often located in ceilings or on walls inside closets. Many attic hatches come uninsulated from the manufacturer, which can lead to heat loss in winter and heat gain in summer as conditioned air transfers between your living space and attic.
Adding insulation to your attic hatch helps prevent conditioned air from escaping into your attic. This in turn reduces energy costs associated with heating and cooling your home. Insulating your attic hatch may also help with issues like condensation or mold growth by maintaining stable temperatures in your attic. In this article, we will look at the benefits of insulating attic hatches, recommended insulation levels, and how to properly insulate an attic access.
Page Contents
Should You Insulate Your Attic Hatch?
Here are some of the main benefits of insulating your attic hatch:
- Reduces heat loss/gain between living space and attic – Insulation acts as a barrier to heat flow, keeping conditioned air in your living spaces.
- Lowers energy bills – Preventing heat transfer means your HVAC system doesn’t need to work as hard to maintain temperature.
- Improves comfort – Living spaces stay warmer in winter and cooler in summer.
- Reduces moisture issues – Insulation maintains stable attic temperatures year-round, reducing condensation.
- Easy DIY project – Insulating attic hatches is a straightforward task for most homeowners.
- Low cost way to increase home efficiency – The return on investment from adding attic hatch insulation is high.
Insulating your attic hatch aligns with proper air sealing practices. Along with weatherstripping doors and windows, sealing attic hatches helps reduce air leaks that allow unconditioned air to enter the home. This uncontrolled flow of air into or out of the home not only leads to energy waste, but can also create drafts or hot/cold spots.
The majority of homes can benefit from insulating attic access points. Unless your attic hatch is already well-insulated or your attic space is intentionally conditioned, adding insulation can be an effective way to boost energy efficiency. Attic hatches located in garages or other unconditioned spaces may not need additional insulation if that space already freely mixes with attic air.
Recommended Attic Hatch Insulation Levels
When it comes to insulation, attic hatches should meet the same recommendations as the attic floor. The Department of Energy recommends the following attic insulation levels based on climate zone:
| Climate Zone | Recommended Attic Insulation R-Value |
|---|---|
| Zone 1 | R30 to R49 |
| Zone 2 | R30 to R60 |
| Zone 3 | R30 to R60 |
| Zone 4 | R38 to R60 |
| Zone 5 | R38 to R60 |
| Zone 6 | R49 to R60 |
| Zone 7 | R49 to R60 |
| Zone 8 | R49 to R60 |
Check with your local climate zone and match attic hatch insulation with current attic insulation. For attic hatches over 2×4 framing, R13 to R19 fiberglass batts can be used. Attic hatches with thicker framing can accommodate higher densities like R21 or R30.
The insulation value represents the resistance to conductive heat flow. The higher the R-value, the better the insulating performance. Matching attic floor and attic hatch insulation R-values ensures approximately equal heat transfer resistance. This creates a uniform envelope across the attic space.
While new attic insulation projects should follow the latest recommendations, adding any amount of insulation to an existing uninsulated hatch will provide notable benefits. Even a moderate layer of R13 insulation improves upon no insulation at all.
Types of Insulation for Attic Hatches
Common options for insulating attic hatches include:
- Fiberglass batts – Flexible batts sized to fit between attic hatch framing. Provide good thermal performance for the price.
- Mineral wool batts – Similar to fiberglass with excellent fire resistance.
- Rigid foam – Can be glued directly to the attic side of the hatch. Foam provides structural rigidity.
- Spray foam – Expands to fill gaps and adhere to surfaces. Provides excellent air sealing.
- Cellulose – Loose-fill cellulose blown into the attic side of the hatch.
Fiberglass batts are a popular choice for their availability, effectiveness, and affordability. Rigid foam boards also perform well. Spray foam excels at air sealing but can be more expensive for large hatches. Any of these insulation types appropriately installed will notably improve the thermal efficiency of an attic access hatch.
How to Insulate an Attic Hatch
Insulating an attic hatch is a straightforward DIY project. Here are the basic steps involved:
Materials Needed
- Insulation material (batts, rigid foam, etc.)
- Tape measure
- Utility knife
- Caulk and caulk gun
- Rigid backing material (e.g. plywood, foam board)
- Weatherstripping
- Self-adhering weatherstripping tape (optional)
- Wood or sheet metal screws
Steps to Insulate an Attic Hatch
- Inspect the attic hatch framing – Check for adequate depth to fit insulation. Measure framing dimensions to calculate required insulation.
- Air seal gaps and penetrations – Use caulk to fill any cracks or holes in the hatch framing.
- Cut insulation to size – Cut batts or rigid boards to fit snugly within framing.
- Install insulation – Place insulation flush against the attic-side of the hatch. Use adhesive or mechanical fasteners as needed.
- Add backing – Install plywood or rigid foam backing to hold insulation in place.
- Weatherstrip the edges – Apply weatherstripping around the outer edges of the hatch to reduce air leakage.
- Secure the hatch – Ensure the hatch is properly mounted and any latches engage tightly.
The goal is to create a tight seal on the attic side of the hatch with no gaps in the insulation. Use caulk or spray foam as needed to seal any cracks or fill voids. The backing holds the insulation flush and provides a thermal break between the insulation and attic hatch door.
Take your time fitting the insulation pieces and be precise when cutting to size. Measure twice to ensure accuracy. The backing not only retains the insulation, but also protects against wind washing in the attic which can reduce insulation effectiveness. Weatherstripping the perimeter reduces air leakage around the sides.
Conclusion
Insulating your attic access hatch provides a range of benefits, from energy savings to improved comfort and indoor air quality. Match the hatch insulation value to your attic insulation for optimal efficiency. Fiberglass batts provide an affordable and straightforward option. With some basic DIY skills, you can tackle this project in less than an hour. Investing in attic hatch insulation can be one of the most cost-effective ways to boost your home’s performance.
As energy costs continue to rise, preventing heat loss through attic hatches becomes increasingly important. A snugly insulated attic access ensures conditioned air stays where it belongs – inside your living space. Take control of your energy bills and comfort by properly insulating any attic hatches or scuttle holes in your home’s ceiling and walls. Your heating system will thank you!