Page Contents
- 1 What is a feather duster?
- 2 Should you clean a feather duster?
- 3 How often should you clean a feather duster?
- 4 How to Clean a Feather Duster
- 5 Cleaning Different Types of Feather Dusters
- 6 Cleaning Solutions to Avoid
- 7 Drying Your Feather Duster
- 8 Caring for Feather Dusters Between Cleanings
- 9 Warning Signs It’s Time for a New Feather Duster
- 10 Storing Your Feather Duster
- 11 Conclusion
What is a feather duster?
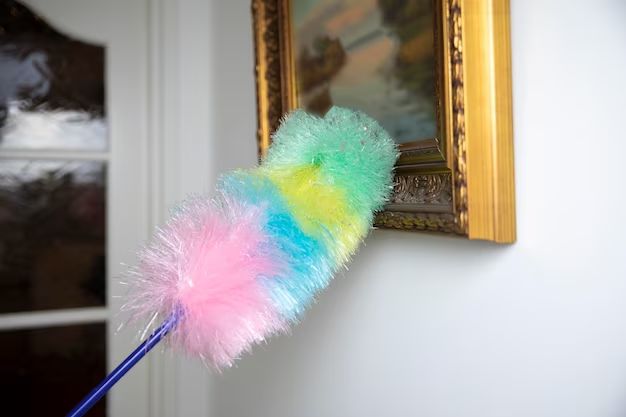
A feather duster is a cleaning tool made of feathers attached to a long handle. It is used to dust and clean surfaces by sweeping away dust, dirt, and other debris. The soft feathers are able to reach cracks, crevices, and other difficult to reach areas that a cloth cannot. Feather dusters have been used as cleaning tools for centuries.
Originally, feather dusters were made from actual bird feathers attached to a stick or handle. Ostrich feathers were commonly used due to their long length and fluffiness. Goose, turkey, chicken, and pheasant feathers were also popular choices. Nowadays, most feather dusters are made using synthetic materials designed to mimic feathers. Common synthetic materials used include polyester, nylon, and rayon. Real feather dusters are still available but less common.
Should you clean a feather duster?
Yes, it is recommended to clean a feather duster on a regular basis. Cleaning helps remove built up dust, dirt, and debris that can accumulate between uses. Here are some key reasons to clean your feather duster:
– Removes dirt, dust, and allergens – Over time, feather dusters collect all types of dust, pet dander, pollen, and other debris. Regular cleaning helps eliminate these allergens and keeps the duster hygienic.
– Extends lifespan – Cleaning a feather duster helps maintain the structure, shape, and integrity of the feathers or synthetic fibers. This allows the duster to last longer before needing to be replaced.
– Improves dusting performance – Dust and dirt can weigh down the feathers/fibers and reduce their fluffiness. Cleaning restores the lightweight and airy structure so the duster maintains optimal dusting capabilities.
– Freshens smell – Dust can create musty, dirty smells over time. Cleaning removes odors and leaves the duster smelling fresh.
– Prevents spreading dirt – A dirty duster simply moves dirt around instead of picking it up. Cleaning allows the duster to effectively trap dirt during use.
So in summary, cleaning a feather duster regularly provides multiple benefits that help the duster last longer while improving its cleaning efficiency. It is considered proper duster maintenance and hygiene.
How often should you clean a feather duster?
Most experts recommend cleaning your feather duster at least every 2-3 months with regular use. However, the optimal cleaning frequency depends on several factors:
| Factor | More frequent cleaning needed |
|---|---|
| Amount of use | Daily use |
| Dust level in home | Homes with pets, carpet, or dust issues |
| Type of feather duster | Lower quality/more delicate feathers |
Homes that are carpeted, have pets, or otherwise prone to dust will need more frequent feather duster cleaning than homes without these issues. Delicate natural feather dusters also require more cleaning than sturdy synthetic fiber dusters.
A good rule of thumb is to clean the duster any time the feathers start looking dirty, dusty, matted, or lose their fluffiness. Don’t wait for the scheduled cleaning timeframe if the duster needs freshening sooner. It’s better to clean it right away rather than using a suboptimal dirty duster.
How to Clean a Feather Duster
Cleaning a feather duster is a simple process. Here are some recommended methods:
Shake Out Outdoors
Take the feather duster outside and vigorously shake it up and down. This helps release a lot of the loose dust and dirt trapped in the feathers. Make sure to do this away from indoor air vents so the dust doesn’t circulate back into your home.
Use a Vacuum Hose
Attach a vacuum hose extension with a soft brush nozzle. Run the brush nozzle over the feathers to vacuum up dirt and debris. Use a low suction setting to avoid damaging the feathers.
Wash with Mild Detergent
For a deeper clean, the feather duster can be washed. Mix a small amount of mild detergent like dish soap or laundry detergent into a basin of lukewarm water. Swish the feather duster around to soak and agitate it. Rinse thoroughly. Air dry completely before using again.
Steam Clean
Use the steam setting on an iron without making direct contact with the feathers. Or use a handheld garment steamer. The steam helps loosen and remove embedded dust and odors.
Dryer Refreshen
Toss a lightly used duster in the dryer on air fluff setting for 5-10 minutes. The heat and tumbling action freshens the feathers.
Fabric Softener Spray
Mist the feathers lightly with fabric softener diluted in water. This helps freshen the smell.
Avoid harsh chemical cleaners, bleach, or very hot water as these can damage the feathers. Skip wire brushing or rough scrubbing. Handle the duster gently throughout cleaning.
Cleaning Different Types of Feather Dusters
Cleaning methods may vary slightly depending on the type of feather duster:
Ostrich Feather Dusters
The large, delicate feathers require gentle cleaning. Start with vacuuming and steaming. Wash occasionally with mild soap if needed. Reshape feathers and lay flat to dry.
Turkey/Goose Feather Dusters
These dusters can withstand a bit more vigorous cleaning. Shake outdoors, vacuum, wash in cool water if needed, and air dry thoroughly.
Synthetic Fiber Dusters
These rugged dusters are lowest maintenance. Shake out, vacuum, or wash in detergent. Fabric softener spray keeps fibers fluffy. Air or tumble dry.
Mini Palm Fiber Dusters
Gently vacuum and use soft brush nozzle. Wash in mild detergent only when fairly dirty. Do not soak long. Air dry.
Follow any specific care instructions from the duster manufacturer. Adjust cleaning methods based on the fragility of the feathers or fibers.
Cleaning Solutions to Avoid
Use caution with the following cleaning solutions when cleaning feather dusters:
| Solution | Issue |
|---|---|
| Harsh detergents | Can strip natural feather oils |
| Bleach | Damages and fades feathers |
| Very hot water | Heat can warp feathers |
| Wire brush/rough scrub | Can tear delicate feathers |
| Soaking too long | Makes feathers limp, misshapen |
Stick to mild cleaning solutions and gentle handling when cleaning feather dusters to avoid damage. Harsher chemicals and abrasive methods often do more harm than good.
Drying Your Feather Duster
Proper drying is crucial after washing a feather duster. Any moisture left in the feathers can cause issues like mildew, clumping, and loss of fluffiness. Make sure to completely air dry feather dusters before putting them away or using them.
Ideally, lay the feather duster flat on a towel and separate the feather strands to dry fully. Or hang it up gently so air circulates all around. Move it outside on a dry day or use a fan indoors directed away from the feathers. Avoid hanging it in direct sunlight which can fade colors.
It can take 1-2 days for a feather duster to dry completely. The drying time will be shorter for synthetic fibers versus natural ostrich or feather dusters. Fluff the feathers occasionally as they dry to prevent matting and stiffness. Only store once all moisture has evaporated.
Rushing the drying process can mean moisture gets locked into the duster, preventing it from fully fluffing up again. This reduces its dusting abilities. Patience at drying time ensures your freshly cleaned duster will perform like new again.
Caring for Feather Dusters Between Cleanings
Implement these feather duster care tips between full cleanings:
– Shake outdoors often to release dust.
– Store hanging up or upright, not laying flat. Allows air circulation to prevent moisture buildup.
– Occasionally “fluff” the feathers back to shape with your fingers or a comb.
– Protect from direct sunlight to avoid fading.
– Check for signs of damage and discard if feathers are bent, matted, or shedding excessively.
– Consider covers to protect delicate ostrich feather dusters when not in use.
– Allow to fully air dry after any use before storing away.
With proper maintenance, a quality feather duster should provide several years of helpful dusting power. Show your duster some TLC between deep cleanings so it stays in top dusting form.
Warning Signs It’s Time for a New Feather Duster
When a feather duster seems to have lost its dusting prowess, it may mean it’s time to replace it. Here are some signs a duster has reached the end of its lifespan:
– Missing, broken, or excessively shedding feathers
– Permanently bent, twisted, or crushed feathers
– Solid clumps of matted feathers that won’t separate
– Faded, worn out, “bald” patches
– Duster feels lightweight as feathers thin out
– Loose or damaged handle attachment
– Duster has a musty, sour odor even after cleaning
– Feathers are covered in sticky dust residue
While cleaning can revive feather dusters to a degree, dusters do gradually wear out with extensive use. If a duster seems overly damaged or has deteriorated feather quality, it likely needs to be replaced for optimal dusting functionality. Shop for a new duster so you have a fluffy, efficient tool ready for dusting duty once again.
Storing Your Feather Duster
Use these feather duster storage tips to help extend its usable lifespan:
– Ensure duster is completely dry before storing to prevent moisture damage.
– Hang duster or stand upright rather than laying flat.
– Keep out of direct sunlight and away from heat sources.
– If hanging, pad the hook area to avoid damaging feathers.
– Store in a breathable bag or box. Avoid sealed plastic which traps moisture.
– For delicate dusters, use a protective cover or case.
– Keep boxed dusters flat with tissue paper separating feather layers.
– Store in a clean, dry area away from dust and dirt.
Proper storage in a well-ventilated, protected area helps keep your feather duster in the best condition between uses. Avoid cramming it into crowded closets or drawers which can bend feathers. Handle with care and keep dirt away from the storage space.
Conclusion
Regular cleaning and maintenance makes a big difference in the performance and longevity of feather dusters. While it takes a small time investment, the improved dusting ability and extended usable life are well worth the effort. Follow the cleaning tips outlined here to keep your feather duster in top dust-busting form for many years to come. Show your duster some extra TLC so it can continue doing its dust-removal duties with ease. A little upkeep goes a long way for this handy household cleaning tool!