Replacing a bathroom exhaust fan motor can seem like a daunting task for a homeowner, but with the right knowledge and a few handy tools, it can be accomplished by most DIYers. A bathroom exhaust fan helps remove moisture, odors, and humidity from the bathroom while you shower or bathe. Over time, the motor inside the fan can wear out and stop working properly. When this happens, replacing the motor is often cheaper and easier than installing a whole new exhaust fan unit. In this article, we’ll walk through the steps for replacing a bathroom exhaust fan motor, as well as provide tips for troubleshooting common issues. Read on to learn how to breathe new life into your existing bathroom ventilation.
Page Contents
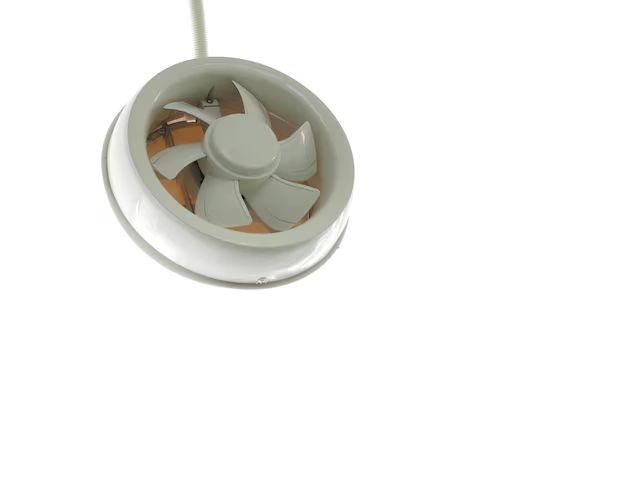
When to Replace the Motor
Here are some signs that indicate it may be time to replace your bathroom exhaust fan motor:
- The fan is making loud, straining noises when turned on
- The fan blades are spinning slower than normal or not at all
- You can feel little or no airflow coming from the vent
- The fan is constantly running even when switched off
- You see smoke or smell burning coming from the fan unit
If you notice any of these issues with your bathroom fan, it likely means the motor is malfunctioning. Replacing the motor can often fix these problems and get your exhaust fan working properly again.
How to Replace a Bathroom Fan Motor
Follow these steps to replace the motor in your bathroom exhaust fan:
Turn Off Power and Remove Fan Cover
Before doing any work, shut off the power supply to the fan. This is an important safety precaution. Locate the circuit breaker powering the fan and switch it to the OFF position. Then remove the fan cover to access the internal components. Many covers twist off or are secured with a few screws.
Disconnect and Remove the Existing Motor
Once you can see the motor, disconnect the wiring. There will be a quick connect plug, wire nuts, or other connectors. Carefully release the motor from the mounting frame. There are typically screws or clips holding it in place. Set the old motor aside once removed.
Install the New Motor
First, transfer any mounting hardware from the old motor onto the new one. Then insert the new motor in the same position as the old one and secure in place with the hardware. Reconnect the wiring using the same setup as was originally installed. Make sure the wire colors align correctly.
Reinstall Fan Cover and Restore Power
With the new motor installed, carefully replace the fan cover. Screw it back into place or twist it on securely. Restore power to the fan by turning the circuit breaker back on. Test that the fan is working by turning it on. The blades should spin faster, and you should feel strong airflow.
Troubleshooting Common Problems
If your bathroom exhaust fan still isn’t working right after replacing the motor, here are some troubleshooting tips:
Fan is Making Noise
Noisy operation after a new motor often indicates there is a problem with the fan blade assembly. Make sure the blades are aligned properly on the shaft and that nothing is obstructing them. Use metal blade balances if provided.
Fan Vibrates
Excessive vibration usually means the motor was improperly seated into the mounting frame. Switch off power and remount the motor securely using the clips or screws. Make sure it is aligned straight in the housing.
Fan Speed Is Inconsistent
If the fan speed seems to change randomly, the problem could be faulty wiring or a bad capacitor. Check that all wire connections are secure. Test or replace the capacitor if provided.
Fan Cycles On and Off
When a fan turns on and off repeatedly, it typically points to a problem with the blower wheel or a blockage in the ductwork. Thoroughly clean the blower wheel and shaft. Remove any obstructions from the ducts.
When to Call a Professional
While the average handy homeowner can replace most bathroom fan motors, there are a few cases when it’s best to call a professional:
– You don’t feel comfortable working with electrical wiring
– The existing wiring is damaged or improperly configured
– You discover extensive rust or corrosion in the fan housing
– The fan ductwork needs significant modifications or repairs
– You determine the issue is with another fan component
Hiring a professional can ensure the job is done safely and properly. It also guarantees your new motor will work as expected.
Conclusion
Replacing a malfunctioning bathroom exhaust fan motor is usually a fairly straightforward DIY project. After shutting off power and removing the fan cover, you can access and swap out the motor relatively easily. Just be sure to connect the wiring correctly and remount the motor securely. Test for normal operation when finished. With proper troubleshooting, you can get your bathroom ventilation working like new again. If the existing wiring or ductwork seems faulty, hiring a professional electrician or HVAC technician is recommended. But in most standard cases, this repair can be tackled by an ambitious DIYer armed with some basic tools and safety know-how.
| Fan Issue | Potential Cause |
|---|---|
| Loud, straining noises | Faulty motor bearings |
| Slow or no spinning | Motor is stuck or burnt out |
| Little or no airflow | Broken fan blades |
| Constant running | Motor wiring problem |
| Smoke or burning smell | Electrical short circuit |
| Troubleshooting Tips | Potential Solution |
|---|---|
| Noisy operation | Check fan blade alignment and obstructions |
| Excessive vibration | Remount motor securely in housing |
| Inconsistent fan speed | Check wiring connections and capacitor |
| Cycles on and off | Clean blower wheel and ducts |
Replacing a bathroom exhaust fan motor is a project many DIYers can take on themselves. But if the wiring is damaged, ductwork needs replacing, or you feel uncomfortable with the electrical work, calling a professional electrician or HVAC technician is advised. With proper troubleshooting and installation, your newly replaced motor should get your bathroom ventilation working like normal again.