Yes, cracks in plaster ceilings can often be repaired. Plaster ceilings develop cracks for a variety of reasons, including minor settling of the house, temperature and humidity changes, vibrations, and impact damage. Small hairline cracks may not require repair right away, but larger cracks should be fixed to prevent further damage to the ceiling. There are several methods for repairing cracks in plaster ceilings, including filling with spackling compound, using plaster washers, and patching with new plaster. The best repair method depends on the size and type of crack.
Page Contents
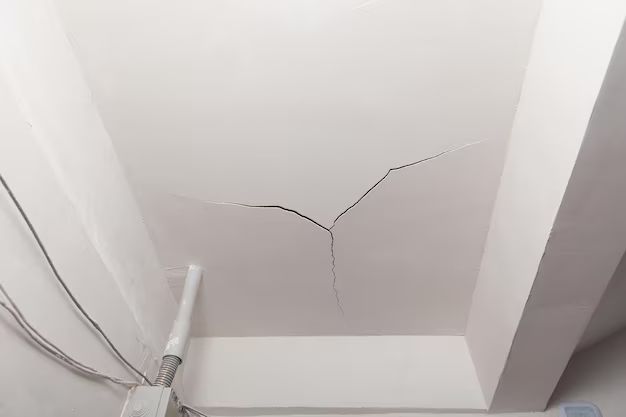
What causes cracks in plaster ceilings?
Cracks in plaster ceilings most commonly develop due to:
- Settling of the house – As a house ages, settling and minor shifts in the foundation and framing can cause cracks in ceiling plaster.
- Temperature and humidity changes – Plaster is porous and absorbs moisture. Changes in temperature and humidity cause the plaster to expand and contract, resulting in cracks.
- Vibrations – Knocks, bangs, and vibrations from slamming doors, footsteps, or loud appliances can cause hairline cracks in ceilings over time.
- Impact damage – Direct blows to the ceiling from objects can immediately crack the plaster.
- Structural issues – In rare cases, major ceiling cracks may indicate structural problems with the framing that require inspection.
Hairline cracks due to minor settling or temperature changes are common and may not require immediate repair. However, leaving larger cracks can allow moisture intrusion and lead to additional cracking or plaster failure.
How to prepare for plaster ceiling repairs
Proper preparation is key to achieving lasting repairs on plaster cracks:
- Clean the crack – Use a vacuum attachment and soft brush to remove any loose plaster, dust, or debris from the crack.
- Widen the crack slightly – Use a utility knife to cut away loose edges and widen the crack just enough for filling material to adhere.
- Remove texture – If the ceiling has a heavy knockdown or splatter texture, scrape the texture away in a wider area around the crack to prevent a bumpy patch.
- Cover nearby surfaces – Place drop cloths or tape off walls, flooring, and furniture to protect from dust and debris.
It’s also a good idea to address any underlying issues that may have caused the cracking prior to repairing. For instance, adding insulation, HVAC modifications, or foundation repairs may help stabilize the area and prevent new cracks from forming.
How to repair hairline cracks
For minor hairline cracks less than 1/16 inch wide, a simple solution is to fill with lightweight spackling compound:
- Use a putty knife to press spackle into the crack.
- Feather out the spackle onto the surrounding ceiling in a wider area.
- Let dry completely and sand smooth.
- Prime and paint with ceiling paint to blend.
The spackle creates a flexible patch that moves minimally with temperature changes to prevent re-cracking. This works well for stable hairline cracks in high traffic areas that may not be noticeable once painted.
How to repair larger cracks
For more significant cracks wider than 1/16 inch, fuller repairs will be needed:
Plaster washers
Plaster washers provide an easy, low-cost method for patching large cracks along ceiling joists up to 3/8 inch wide. Follow these steps:
- Cut strips of drywall joint tape wider than the crack.
- Spread spackle into the crack and over tape strips on both sides.
- Press the plaster washer firmly into place over the crack.
- Coat over with a thin layer of spackle, let dry, and sand smooth.
- Prime and paint to finish.
The fiber tape and metal washer effectively bridge the crack to prevent movement. This works well for stable cracks related to minor settling.
New plaster
For heavy cracking wider than 1/2 inch or unstable cracks that continue spreading, the best permanent solution is to re-plaster the damaged section:
- Tape off a wider area surrounding the crack.
- Cut back the existing plaster using a utility knife or drywall saw.
- Nail wood lath over the area, overlapping existing plaster edges.
- Apply new plaster in coats until flush with surrounding ceiling.
- Let dry completely, then prime and paint.
This provides a fresh plaster patch that bonds tightly to the lath and prevents re-cracking. While more labor intensive, it offers a longer-lasting repair.
Tips for preventing new cracks
To help prevent new cracks from forming:
- Allow adequate drying time after repairs before painting – 30 days is ideal for full curing.
- Avoid hanging heavy objects on ceiling.
- Insulate attic and exterior walls to regulate temperature changes.
- Renail any loose ceiling lath or framing.
- Monitor foundation for settling issues.
Proper home maintenance and quickly addressing minor cracks can help preserve original plaster ceilings for many years. Periodic inspection and repairs will keep cracks from worsening and causing safety hazards.
Signs you need professional repairs
In some cases, it’s best to call in a plaster specialist for ceiling repairs:
- Cracks are rapidly expanding across multiple ceilings.
- Severe cracks wider than 1 inch indicate potential structural problems.
- Ceiling feels unstable or areas are sagging, possibly from deteriorated lath.
- Significant chunks of plaster have fallen or are missing.
- You are unable to determine the cause of extensive cracking.
Professionals have the expertise to evaluate the underlying issue and ensure structural reinforcement is added if needed. For very old homes, they can also match vintage plaster textures and details.
Cost to repair plaster ceilings
Plaster ceiling repairs range from $2 to $10 per square foot on average depending on:
- Crack size – Small hairline cracks cost less to repair than large cracks.
- Repair method – Filling cracks is cheaper than re-plastering sections.
- Accessibility – Professional repairs cost more for high ceilings that require scaffolding or lifts.
- Finish matching – Matching unique plaster details or textures adds labor costs.
- Additional damage – Extensive cracking, sagging areas, or chunks falling increase repair costs.
Here are typical price ranges:
| Crack size | Repair method | Cost per sq.ft. |
| Hairline | Spackling | $2 – $3 |
| 1/8″ – 1/2″ | Plaster washers | $3 – $6 |
| Over 1/2″ | Re-plastering | $6 – $10 |
Most small projects under 100 square feet cost $200 to $700. Extensive ceiling repairs over 500 square feet may cost $2,500 to $5,000 or more. Get multiple quotes to find the best plaster repair contractor for your project.
Conclusion
Cracks in plaster ceilings can often be repaired with careful filling and patching techniques. For minor hairline cracks, DIY spackling may suffice, while severe or expanding cracks require professional re-plastering. Address underlying issues, allow proper drying time, and take steps to prevent damage to achieve lasting repairs. Well-executed plaster ceiling repairs can restore the look of damaged ornamental ceilings and prevent further deterioration for years to come. Regular inspections and prompt minor repairs will keep vintage plaster ceilings in good shape.