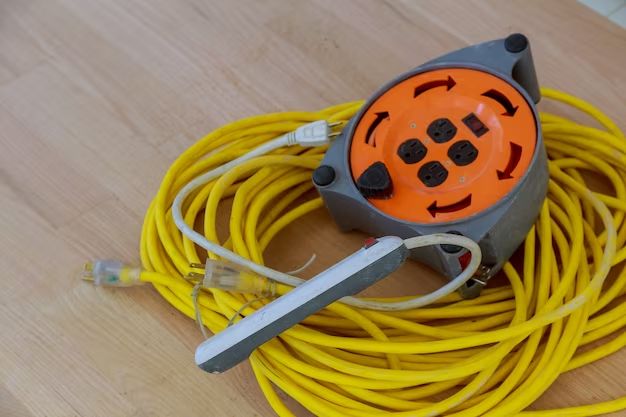
An extension cord is a very useful device that allows us to connect electrical devices to outlets that are located far away. However, like any electrical product, extension cords can become damaged over time. When an extension cord stops working properly, some people’s first instinct may be to throw it away and buy a new one. But before resorting to that, it’s worth considering whether the cord can be repaired. Repairing an extension cord is often a relatively simple and inexpensive fix that can restore functionality and extend the cord’s lifespan. In this article, we’ll look at the most common issues that affect extension cords and how to diagnose and repair them.
Page Contents
Why extension cords stop working
There are a few main reasons why an extension cord may stop functioning properly:
- Damaged or exposed wires – If the insulating plastic or rubber coating on the extension cord becomes cracked or damaged, the inner wires can become exposed. This poses a safety hazard and can cause shorts or complete failure.
- Loose plug connections – The prongs on the plug may become loose over time, resulting in a poor connection with the outlet. This can cause intermittent loss of power or complete failure.
- Broken internal wires – With aging or excessive pulling/twisting, the small gauge wires inside the cord can become broken. This will lead to an open circuit and no power throughput.
- Water damage – If the cord gets wet, water can corrode the internal metal conductors and also pose an electric shock risk.
- Short circuit – If a short circuit occurs, it can damage the wires or insulating plastic coating.
- Thermal damage – Overheating from high loads or restricted airflow can melt the insulation.
In most cases of extension cord failure, the underlying issue is with the cord’s wiring itself and not the plugs. So if the cord looks physically intact, then it may be repairable by replacing any damaged wiring.
How to test an extension cord
Before attempting to repair an extension cord, it’s important to properly test and diagnose where the fault lies. Here are step-by-step instructions for testing a faulty cord:
- Visually inspect the entire length of the cord for any damage like cuts, cracks, or burn marks in the plastic covering. Pay particular attention near the plugs where damage most often occurs. Any exposed copper wiring presents a shock hazard and requires replacement.
- Plug the cord into an outlet and run the opposite end to an electrical device like a lamp or phone charger. Turn the device on to see if it powers up normally.
- If the device does not power on, try resetting the connection by unplugging and replugging both ends of the extension cord. Faulty connections can sometimes be repaired by resetting the plugs.
- Test the continuity of the electrical wires inside the cord using a multimeter. Set the multimeter to the continuity setting and touch the probe pins to the prongs on each plug of the cord. The multimeter should beep or flash a light to indicate a complete circuit.
- If the multimeter doesn’t detect continuity, the inner wires are likely severed somewhere along the length of the cord and will need to be repaired or replaced.
- Inspect the female end of the extension cord closely. Look for any bent or loose internal parts, scorch marks, or melted plastic that indicates overheating or short-circuiting.
- Perform the same continuity check by connecting the multimeter probe pins to the female end’s connector slots and the plug prongs. This tests the pathways separately.
This comprehensive testing sequence will identify whether the fault lies with the plug connections, the extension cord wires themselves, or an issue with the female receiving end of the cord. Once the source of the problem is identified, the best repair method can be determined.
Repairing exposed wires
If there are any portions of exposed copper wiring due to a severed or melted cord insulation, this presents a major safety hazard and should be repaired immediately. Here’s how to properly repair exposed wires:
- Completely cut away any damaged or burned cord insulation to expose undamaged wire underneath.
- Cut about 1 inch of undamaged wire from each severed end. This will allow connection to new undamaged wiring.
- Slide a length of heat shrink tubing over each wire end, making sure it is large enough diameter to fit over the connector you will use.
- Splice the wiring back together by twisting matching wire colors from each side around the center of a wire nut or metal crimp connector.
- Apply the wire nut or crimp the metal connector tightly using pliers to join the wires.
- Slide the heat shrink tubing over the wire connector and use a heat gun to shrink it tightly over the joint.
- Test continuity across the repaired joint using a multimeter. You should have connectivity.
- Use electrical tape to wrap the newly insulated joint and provide additional protection.
This will securely rejoin the severed wires inside the cord while insulating them from exposure. Continue to wrap tape along the entire exposed portion of wires to fully seal it. The cord should now be restored to safe functionality.
Repairing a loose plug
If your extension cord testing revealed an issue with a loose or faulty plug connection, this is fairly simple to remedy:
- Unscrew and disassemble the plug cover and inspect the internal contacts and wires.
- Check for any worn out or damaged parts and replace if needed. The plug contacts should be firm and undamaged.
- Tighten any loose screw connections around the internal wiring lugs.
- Wrap the cord wiring around the screw lugs in a clockwise direction to relieve strain and tighten the connection. Leave no bare wire exposed.
- Reassemble the plug cover and test again by plugging into an outlet and appliance.
- If the plug still feels loose in the outlet, carefully spread the prongs slightly wider so they press tightly into the outlet.
Pay attention to any scorch marks indicating overheating and make sure wires are properly attached with no bare portions exposed. A little bit of routine maintenance helps keep plugs connecting properly.
Replacing broken wires inside
For cords where the internal wiring has become severed or damaged, the only real option is full wire replacement. Here is how to go about it:
- Cut the cord a few inches past the damaged portion of wires and completely remove the bad section.
- Strip about 1 inch of insulation off the newly cut wire ends.
- Obtain similar gauge replacement wiring at least long enough to bridge the cut gap with some extra length.
- Splice the replacement wiring to the cut cord ends by twisting matching colors together with wire nuts or crimp connectors.
- Cover each joint with heat shrink tubing for insulation.
- Test continuity across the wire joints using a multimeter.
- Seal the wire joints and any exposed wire with electrical tape.
With the damaged portion fully removed and new wiring installed, your extension cord should now function properly end-to-end. Be sure to test continuity across the entire length after completing the repair. If continuity is restored, the cord is now repaired.
Fixing water damaged cords
If an extension cord has become soaked due to liquid exposure, there is likely internal corrosion that requires cleaning:
- Unplug the cord immediately and allow it to fully dry for 1-2 days.
- Disassemble the plug covers and use rubbing alcohol to scrub away any corrosion on the contacts.
- Check the wires for corrosion and snip away any severely degraded portions.
- Scrub the unplugged female end’s connector slots with rubbing alcohol.
- Replace any damaged wiring as previously described.
- Allow the cord to dry fully for several days after cleaning before reusing.
Thorough cleaning and drying can often revive water damaged cords, as long as the internal insulation hasn’t become too degraded. But extensive corrosion will necessitate wire and insulation replacement in severely damaged sections.
Warning Signs That an Extension Cord is Unsafe
While many extension cords can be repaired, sometimes the damage indicates that a cord is too far gone or unsafe to salvage. Here are some warning signs that a cord should simply be discarded and replaced entirely:
- Severely melted or burned insulation that cannot be fully removed from wires.
- Multiple damaged or exposed portions of wiring.
- Cords with damaged female ends unable to hold plugs securely.
- Hardened or cracked plastic coating that no longer flexes.
- Exposed copper wires that cannot be fully insulated when repaired.
- Cords submerged in water for prolonged periods.
- Damage too close to the plugs to allow proper repair.
- No continuity detected across large sections.
- Evidence of short-circuiting or extreme overheating damage.
In these cases, there are simply too many potential hazards to consider continued use acceptable. Any extension cord that cannot be returned to safe working order after repair should be promptly discarded.
Safety Tips for Extension Cord Repairs
When undertaking DIY repairs on electrical cords, following proper safety measures is crucial:
- Wear protective gloves, eyewear, and clothing in case of sparks or flashes during repair.
- Ensure the cord is fully unplugged before attempting repairs.
- Check for live power using a multimeter or voltage tester before cutting or handling.
- Replace components with identical or at least equivalent ratings.
- Use fiberglass electrical tape for greater heat resistance.
- Wrap all splicing and taps with tape for insulation.
- Carefully match wire colors when splicing to avoid polarity issues.
- Conduct thorough continuity testing when complete before reconnecting appliances.
- Err on the side of caution – if ever unsure, have repairs done by a professional.
Rushing into an electrical repair without proper diligence can lead to disastrous results. Always put safety first and take your time to do the job right.
Conclusion
Repairing a damaged extension cord is often a simple DIY undertaking that can restore full functionality at minimal cost. The most common issues stem from severed wires, loose plug connections, water corrosion, and melted insulation. By methodically testing for faults, replacing damaged wires and components, rejoining severed wiring properly, and fully insulating all repairs, an extension cord can usually be restored to reliable service. While home repair is feasible in many cases, severely damaged cords with multiple issues may need complete replacement for safety. With the right caution and diligence, reviving an extension cord through repair is a gratifying DIY achievement.