Changing your own oil can save you money and allow you to get to know your vehicle better. However, it does require some preparation and knowledge to do it properly. In this article, we’ll go over the basics of what you need to know to change your oil at home, including answering common questions like:
Page Contents
- 0.1 Is changing your own oil difficult?
- 0.2 What tools and supplies do I need?
- 0.3 How do I get the vehicle raised safely?
- 0.4 What’s the step-by-step process?
- 0.5 How do I dispose of used oil properly?
- 1 Is changing your own oil worth it?
- 2 What type of oil and filter do I need?
- 3 Safety Tips for DIY Oil Changes
- 4 Conclusion
Is changing your own oil difficult?
Changing your own oil is not overly complicated, especially if you have a little bit of mechanical aptitude. The process involves draining the old oil, replacing the oil filter, adding new oil, and disposing of the old oil. With the right tools and preparation, most people can learn to do a basic oil change on their own. The most important things are having the proper equipment, reviewing the steps ahead of time, and following all safety precautions.
What tools and supplies do I need?
Here is a list of the basic tools and supplies you’ll need to change your oil at home:
- Oil filter wrench or pliers
- Drain pan to catch used oil
- Funnel to add new oil
- Ramps or jack stands to safely raise the vehicle
- Creeper or floor mat to lie on while working under the vehicle
- Wrench to remove drain plug
- Replacement oil filter
- Enough new motor oil to replace what drains out
- Ratchet and socket to remove/replace drain plug and filter
- Gloves to protect your hands
- Rags, brake cleaner or degreaser to clean up spills
You’ll also need to know the correct oil type and quantity for your vehicle. Refer to your owner’s manual for this. Many auto parts stores will also look this up for you if you bring in your VIN number.
How do I get the vehicle raised safely?
To drain the oil, you need access underneath the vehicle. This means you need to safely raise and support it. Most home mechanics use ramps or jack stands designed for this purpose. Park the vehicle on a flat surface and put the transmission in park with the emergency brake on. Then place the ramps under the front wheels and carefully drive up onto them. Make sure the ramps are solid and secure before going under. If using jack stands, be sure to use jack stands that are rated for the weight of your vehicle and that they lock securely into place. Never get under a vehicle supported only by a jack, as jacks can fail suddenly.
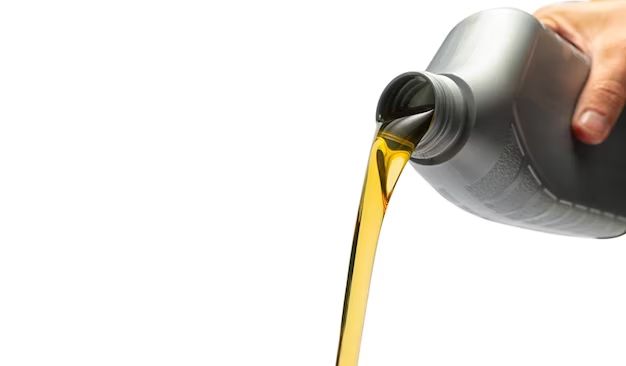
What’s the step-by-step process?
Here is a typical sequence of steps for an oil change:
- Position vehicle safely on ramps or jack stands.
- Spread out drain pan underneath oil drain plug.
- Use wrench to loosen drain plug, turning counterclockwise.
- Once drain plug is loose, finish unscrewing by hand and allow oil to drain into pan.
- While oil drains, locate oil filter under the vehicle.
- Use oil filter wrench to turn filter counterclockwise and remove.
- Check sealing surface on engine for any stray gasket pieces and clean surface.
- Apply thin layer of fresh oil to gasket on new filter.
- Screw new filter onto engine until gasket contacts the surface.
- Tighten filter an additional 2/3 to 3/4 turn by hand.
- When oil finishes draining, clean and replace drain plug.
- Lower vehicle safely back to ground.
- Add correct quantity of new oil through fill opening.
- Start engine and check for any leaks.
- Let engine run briefly and re-check oil level.
- Top off oil if needed until level reads full.
Be sure to have an oil drain pan that can hold the full volume of oil in your engine. Allow adequate time for all the oil to fully drain before moving on to the next steps. The filter should be replaced every time, not reused. When adding new oil, go slowly and check the dipstick to avoid overfilling.
How do I dispose of used oil properly?
Never dump used motor oil down a drain or onto the ground, as this causes major environmental damage. Instead, you’ll need to recycle it properly. Some options for used oil disposal include:
- Take it to an auto parts store or service station – Many will accept used oil for recycling.
- Look for household hazardous waste drop-off sites in your community that accept oil.
- Use curbside pickup if your municipality offers that for motor oil.
- Contact local environmental agencies to find authorized collection centers in your area.
Pour the drained oil from your catch pan into empty containers with tight fitting lids labeled “Used Oil.” Keep these sealed until you can take them to be recycled.
Is changing your own oil worth it?
Doing your own oil changes can save you a good bit of money over paying a shop. The exact savings will depend on the rates in your area, as well as the type of vehicle you have. On average most people can save around $20-40 each time they change their own oil instead of paying a mechanic.
Beyond just the cost savings, here are a few other advantages to changing your own oil:
- You can ensure quality oil and parts are used every time.
- It allows you to inspect components under your vehicle.
- You won’t have to schedule appointments and wait at a shop.
- Gives you satisfaction of doing your own basic maintenance.
However, there are also some downsides to consider:
- Need to dispose of used oil properly.
- Potential for messes if you spill or drip oil.
- Need to have tools, supplies, and a workspace.
- Physical labor involved lying underneath a vehicle.
Overall, changing your own oil is a good option for many people willing to take on the extra work themselves in exchange for the cost savings and ability to oversee this maintenance task. Even with the costs of tools, supplies, and disposal, most people will recoup their expenses fairly quickly.
What type of oil and filter do I need?
The type of oil and filter required for your vehicle will depend on the make, model, engine type and manufacturer recommendations. Here are some guidelines:
Oil Type
- Most modern vehicles use 5W-30 synthetic blend oil.
- Check your owner’s manual for viscosity recommendations.
- Synthetic oils provide better protection and may allow longer change intervals.
- Make sure oil meets API performance rating standards – “SN Plus” or better.
Oil Filter
- Use a filter from the vehicle maker or reputable brand like Fram, Bosch or Purolator.
- Select the filter recommended for your specific vehicle’s make/model/engine.
- Double check the filter gasket size and threading to match OEM specs.
The oil fill amount will also be listed in your owner’s manual. On average, most cars take 4-6 quarts for an oil change. Use the dipstick to double check oil level once done, topping off as needed.
Safety Tips for DIY Oil Changes
Changing your own oil is pretty straightforward, but there are some important safety steps to follow:
- Keep yourself and your workspace clean – oil spills are slippery.
- Allow adequate time for the oil to fully drain before continuing.
- Double check the drain plug and filter are tightened properly before refilling.
- Dispose of used oil immediately in sealed containers.
- Wear safety glasses and gloves to protect yourself.
- Never get under a vehicle solely supported by a jack.
- Avoid contact with hot exhaust components.
- Keep children and pets away from the workspace.
- Have a fire extinguisher on hand just in case.
Rushing through an oil change risks stripped drain plugs, loose filters, and serious spills. Always put safety first and take your time. It’s also advisable to re-check your oil level after driving a few miles to spot any leaks early.
Conclusion
Changing oil at home is a straightforward task that many people can tackle after preparing their workspace, gathering supplies, and learning the steps involved. While not overly complicated, it does require caution, proper disposal of waste, and a method of safely raising your vehicle. If you invest in the right tools and materials, changing your own oil can provide big savings over paying a repair shop. Just be sure to always refer to your vehicle owner’s manual for the recommended oil type, viscosity, and service intervals. With a little practice, you’ll be able to knock out routine oil changes quickly and rest assured knowing the job was done right.