Installing your own shower glass and door is absolutely possible for a DIY homeowner, but it does require some special tools and knowledge. The difficulty level varies depending on the type of shower enclosure you want to install. Putting in a basic sliding glass door is easier than setting up a complex frameless glass enclosure. With proper planning and patience, you can definitely take on this project yourself and save on installation costs.
Page Contents
What You Need to Know Before Starting
Here are some key considerations before installing shower glass:
- Know your shower enclosure type – Sliding, hinged, neo-angle, and frameless glass all require different installation techniques.
- Gather the right tools – You’ll need safety gear, measurement tools, drill, silicone, and glass tools.
- Check if you need help – For frameless glass installation, getting an extra set of hands is recommended.
- Take safety precautions – Wear gloves and eye protection when handling glass.
- Have patience – Aligning panels and adjusting door tracks takes time and care.
Tools and Materials Needed
Installing shower glass requires having the right tools for the job. Here are the essential items you’ll need:
Safety Gear
- Gloves
- Safety glasses
- Ear protection (if using loud power tools)
Measurement and Marking Tools
- Measuring tape
- 4-foot level
- Pencil
- Laser level (optional, but useful)
Hand and Power Tools
- Cordless drill
- Hole saw
- Hacksaw
- Miter saw (for cutting aluminum tracks)
Shower Door Hardware
- U-channel or J-channel
- Bottom door guides
- Door handles
- Hinges
- Wall jambs or clamps
Other Supplies
- Silicone sealant
- Glass cleaner
- Masking tape
- Shims
- Anchors
- Screws
Glass and Aluminum
- Tempered glass panels
- Fixed glass side panels (if needed)
- Aluminum rails and door jambs
Preparing the Shower Enclosure
Proper prep work is crucial for a smooth installation. Follow these steps to get your shower ready for the new glass enclosure:
- Carefully remove the existing shower door or enclosure if you have one.
- Inspect the walls and floor. Ensure surfaces are smooth, plumb, and moisture-resistant.
- Fill any holes or imperfections with spackle and sand smooth.
- Clean the walls thoroughly and allow to dry fully.
- Measure the opening carefully and have glass panels cut to size.
- Lay out all hardware components and glass and do a dry fit without any silicone.
Measuring Tips
- For sliding doors, measure the wall-to-wall opening at both top and bottom. Deduct 1/4″ from this dimension for the door size.
- For hinged doors, measure between plumb wall surfaces. Deduct 1/2″ for clearance.
- Note measurements for the side panels. Include wall thickness.
- Measure every 24″ from top to bottom if walls are uneven.
Installing Sliding Shower Doors
Sliding shower doors are a popular choice because they don’t require additional clearance space for opening. Follow these steps:
- Drill holes and mount wall jambs using shims and anchors. Level jambs vertically and horizontally.
- Place fixed panel into one jamb. Have helper hold it while silicone sets.
- Set bottom door guide on threshold. Insert loose glass panel into guide and other jamb.
- Top guide inserts in header. Adjust rollers so door is plumb and centered in opening.
- Drill holes for handles based on preferred position. Attach handles securely.
- Caulk perimeter of enclosure with waterproof silicone. Allow 24 hours drying time.
Sliding Shower Door Tips
- Ensure jambs are plumb and parallel for proper door clearance.
- Shim jambs as needed to get panels aligned and prevent binding.
- Keep gaps even on sides and top for smooth sliding operation.
- Avoid drilling holes in the glass for handles. Attach to aluminum instead.
Installing Hinged Shower Doors
Hinged shower doors take up more space when opened but offer a traditional look. Here’s how to install them properly:
- Mount hinge jamb plumb and level. Use shims and anchors and check with level.
- Set fixed glass panel into silicone on one side. Support until adhesive cures.
- Install hinges on door panel. Attach hinge jamb to wall on other side.
- Hang door panel on installed hinges. Have helper support door.
- Adjust hinges so door aligns with fixed panel when closed.
- Add waterproof silicone around enclosure and hinge jamb. Allow to cure fully.
Hinged Shower Door Tips
- A minimum 2-1/2″ clearance is needed from the swing side of the door.
- Use shims and wedges to adjust the angle of the door panel until aligned properly.
- For a watertight seal, caulk the interior and exterior of the hinge jamb.
- Choose self-closing hinges if desired. Make sure the closure strength is appropriate.
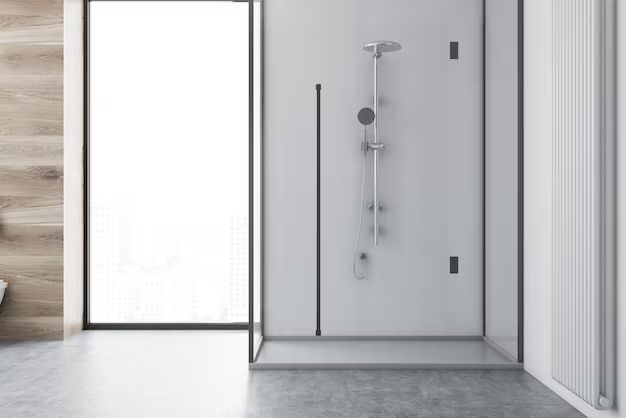
Installing Frameless Shower Glass
Frameless glass enclosures require meticulous alignment and special hardware. Here are some step-by-step instructions:
- Drill holes for wall anchors based on hardware locations. Install wall jambs level and plumb.
- Set the back glass panel first. Use clamps or adhesive strips to affix to jamb.
- Place a corner clamp on the return panel with the proper angle. Adjust clamp screws.
- Install second corner clamp on adjacent wall. Insert loose side panel in between.
- Affixbrackets or hardware for door panel. Hang doorand adjust for ideal clearance.
- Seal all glass-to-glass joints and metal joints with silicone. Allow to fully cure.
Frameless Glass Tips
- Getting measurements right is crucial. Leave 1/8″ gaps between panels.
- Use levels, squares, laser guides to keep glass perfectly plumb and aligned.
- Don’t overtighten clamps or hardware. Go slow and make minor adjustments.
- Use a helper or temporary support for the heavy glass until silicone cures.
Common Shower Glass Installation Issues
Even if carefully installed, shower glass may develop problems over time. Here are some common installation issues and how to fix them:
| Issue | Cause | Solution |
|---|---|---|
| Doors not sliding smoothly | Rollers or guides out of alignment | Adjust rollers for proper clearance. Lubricate tracks. |
| Leaking between panels or walls | Not enough silicone sealant | Apply additional silicone in problem areas. Let cure fully. |
| Glass wobbly or loose | Weak brackets or improper alignment | Check brackets are tight. Realign panels if needed. |
| Door swings crooked | Hinges need adjusting | Loosen hinge screws, realign door, tighten screws. |
| Drafts from gaps | Uneven gaps between panels | Adjust door/panels to create uniform gaps. |
Conclusion
Installing shower glass requires careful measuring, strategic equipment, and attention to detail. For frameless glass, having an assistant is highly recommended. While challenging, with proper planning and patience, installing your own shower door is certainly feasible. The right techniques will result in a beautiful, watertight enclosure you can enjoy for years.