Yes, it is possible to mount a light fixture on vinyl, aluminum, wood or other types of siding. When installing lighting on siding, it’s important to choose an appropriate mounting method and light fixture to ensure it is securely attached and does not damage the siding. Some key factors to consider are:
Page Contents
- 0.1 Choosing the Right Light Fixture
- 0.2 Picking the Best Mounting Method
- 0.3 Installation Tips
- 0.4 Porch Lights
- 0.5 Step Lights
- 0.6 Security Lights
- 0.7 Motion-Activated Lights
- 1 How to Install Lights on Vinyl Siding
- 2 Installing Lights on Wood or Fiber-Cement Siding
- 3 How to Attach Lights to Stucco Homes
- 4 Safety Tips for Mounting Lights on Siding
- 5 Conclusion
Choosing the Right Light Fixture
– Weight – Select a lightweight fixture that won’t put too much stress on the siding. Wall sconces, slim LED lights or small motion lights are good options. Avoid heavy pendant lights or lanterns.
– Attachment Style – Look for lights with attachment plates or brackets that distribute weight over a wider area rather than a single point. This further reduces stress on the siding.
– Adjustability – Models with adjustable angle brackets make it easier to properly position the light on various siding profiles.
– Weatherproofing – Be sure the light is rated for outdoor use and has ample weather seals to prevent moisture damage. IP65 rating is recommended.
Picking the Best Mounting Method
– Exterior screws – This is the easiest and most secure way to mount a light to siding. Pre-drill oversized holes in the siding to insert exterior-rated, corrosion-resistant screws. Use washers to better distribute pressure.
– Adhesive pads – Heavy duty, outdoor-rated adhesive pads provide another attachment option. Look for pads rated for at least 5X the weight of the fixture. Clean the siding thoroughly before applying.
– Silicone adhesive – Using exterior-grade silicone as an adhesive is effective for lighter fixtures. Ensure the fixture has a flat back plate for maximum contact.
– Siding hooks – Specialty hooks or brackets can clip onto vinyl siding seams to hang lights. These work best with shallow fixtures.
Installation TipsCommon Lighting Options for Siding
There are many styles of light fixtures that work well mounted on various types of siding. Here are some of the most popular options:
Wall Sconces
Wall sconces are designed for flush wall mounting, so they can easily be adapted to mount on siding. Their slim profile and light weight minimizes the stress on the siding. Opt for metal or plastic/composite materials instead of glass for durability. Wall sconces come in a range of styles from modern to traditional.
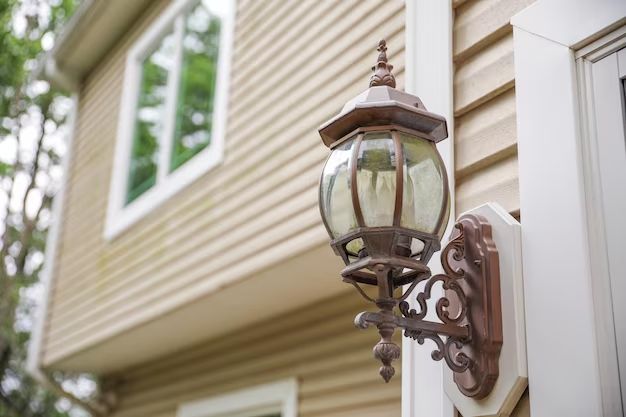
Porch Lights
Basic porch lights are inexpensive options for illuminating door areas. Longer, narrow designs are best suited for siding installation. Use a model rated for wet locations that has a gasketed lens to prevent moisture issues. You can choose a traditional black unit or pick a more decorative bronze, nickel or aluminum finish.
Step Lights
Low-voltage LED step lights are perfect for lighting walkways on homes with siding. Their compact size and focused light distribution works well. Opt for metal-bodied fixtures rated for wet, outdoor use. Make sure they have adjustable angles for proper siding mounting.
Security Lights
Security lights come in both wired and battery-powered versions. The key is finding a low-profile, lightweight model that won’t overload the siding. Units that use an adjustable angle bracket or have keyhole slots for mounting are preferable. Water-resistant designs will hold up best outdoors.
Motion-Activated Lights
For hands-free convenience, motion-activated security lighting is a great choice. Look for compact LED fixtures with motion sensors and simple mounting brackets. Battery-powered, wireless options are also available that adhere to siding with adhesive pads. Just be sure to place in optimal activation areas.
How to Install Lights on Vinyl Siding
Vinyl is the most common siding material found on modern homes. Here are some tips for safely and effectively installing lights on vinyl:
Materials
– Exterior-rated light fixture with vinyl-compatible mounting plate or bracket
– Exterior screws with washers
– Caulk or non-corrosive silicone (for sealing)
– Electrical supplies like outdoor-rated wire connectors, junction box, etc.
Steps
1. Turn off power at the main breaker panel. Use a contact voltage tester to confirm it’s off.
2. Choose an installation location at least 12 inches from windows, doors, and corners. Position near the top of a siding panel or on a flat section.
3. Mark the screw positions based on the light housing’s mounting bracket. Make sure the mounting plate or base is level.
4. Pre-drill very slightly oversized holes through the vinyl where screws will go. Drill slowly to avoid cracking the siding.
5. Run exterior-rated wiring to the light’s location if hardwired. Make connections in a covered electrical box.
6. Place the fixture’s mounting plate against the siding and insert the exterior screws with washers through the pre-drilled holes.
7. Tighten the screws only until secure. Do not overtighten. The washers should distribute pressure.
8. Seal around the fixture and mounting plate with silicone caulk to prevent moisture ingress.
9. Turn the power back on and test operation of the light.
Key Tips
– Always be sure to use the manufacturer’s specified screws and pre-drill appropriately sized pilot holes.
– Take care not to crack or warp the vinyl siding when drilling or tightening screws.
– Positioning the light near the top of a siding panel or on a flat area provides the most secure base.
– Proper sealing is crucial to prevent moisture damage over time.
Installing Lights on Wood or Fiber-Cement Siding
Wood siding like cedar and fiber-cement siding like Hardie board are also common exterior cladding materials that lights can be mounted on. Here is a quick guide:
Wood Siding
– Use the wood grain as a guide and install perpendicular to the direction of the planks.
– Pre-drill holes slightly smaller than the screw diameter to avoid splitting the wood.
– Place boards on a flat section rather than over board joints for stability.
– Take care not to countersink the screws and damage the siding surface.
– Seal around the fixture with silicone caulk for water resistance.
Fiber-Cement Siding
– Mark the drill points based on the mounting bracket layout.
– Pre-drill holes slightly larger than the screw diameter, especially with Hardie board.
– Avoid drilling too close to panel corners or edges to prevent cracking.
– Use corrosion-resistant, exterior-rated screws. Do not overtighten.
– Caulk around the light housing with quality silicone sealant.
How to Attach Lights to Stucco Homes
The rough, porous surface of stucco siding requires some special consideration when installing exterior lighting. Here are a few tips:
Materials
– Light fixture with a stucco flange or extra support plate
– Masonry anchors or screws specifically designed for stucco
– Caulk/sealant made for masonry surfaces
Steps
1. Choose a smooth area of stucco avoiding bumps or irregularities. Position at least 12 inches from corners.
2. Mark the desired height and layout for the fixture’s mounting bracket. Make sure the base aligns evenly on the wall.
3. Use a masonry drill bit to pre-drill very slightly oversized holes. Drill to a depth of at least 1 1/4 inches.
4. Insert stucco anchor sleeves into the holes. Gently tap flush until the flange contacts the surface.
5. Align the light’s mounting plate over the anchors. Insert the exterior-rated screws and tighten.
6. Run electrical wiring to the box location and make connections with outdoor-rated parts.
7. Seal around the entire fixture and mounting plate with exterior-grade caulk. Smooth the bead with a wet finger.
8. Turn on the power and test the light.
Key Tips
– Use anchors with wide flanges that can better grip the irregular surface. Screws alone are not enough.
– Pre-drilling helps prevent crumbling or cracking of the stucco when driving in anchors.
– Take care not to overtighten screws into the anchors in the fragile stucco.
– Proper sealing is very important due to the porous nature of stucco.
Safety Tips for Mounting Lights on Siding
Proper safety precautions should always be taken when working on the exterior of your home. Here are some key tips for safely installing siding lights:
– Turn off power at the main breaker before starting work. Verify it is off with a contact voltage tester.
– Use a sturdy, dry ladder and follow safe climbing techniques. Have someone steady the ladder.
– Wear protective eyewear when drilling or hammering to prevent eye injuries.
– Take care when working with electricity. Only make connections in exterior-rated boxes.
– Avoid using power tools in wet conditions or on a wet surface. This greatly increases shock risk.
– Do not attempt to mount heavy fixtures alone. Get help positioning large lights.
– When using adhesives, work in a well-ventilated area and wear appropriate gloves or skin protection.
– Inspect the installed light regularly for any loosening or moisture issues. Perform maintenance as needed.
– Never attempt electrical work without proper training and experience. Hire an electrician if unsure.
– Refer to local building codes for any additional regulations regarding exterior lighting installation.
Conclusion
Installing exterior lighting on home siding is certainly possible with the right fixture choice and mounting method. Key factors are selecting an appropriate light style, using special siding fasteners or adhesives, proper surface preparation, watertight sealing, and general electrical safety. While requiring some special considerations, lighting can be a great way to enhance the exterior ambiance of any home. Just be sure to follow installation best practices specific to your siding type. With attention to detail and safety, you can successfully achieve beautiful, functional lighting on vinyl, wood, stucco or other sidings.