Yes, you can absolutely pour concrete mix into a hole and then add water. This is a common way for DIYers to pour concrete footings, posts, and other small projects. The key is using the right type of concrete mix and proper technique to get good results.
Page Contents
Quick Answers
– Yes, concrete mix can be poured into a hole and have water added after. This is a common DIY concrete pouring method.
– The hole must be thoroughly cleaned and dampened first. Compact the soil at the bottom for stability.
– Use premixed concrete designed to just add water. Do not use mortar mix or cement only.
– Add water slowly and mix thoroughly to fully hydrate the concrete and avoid dry pockets.
– Pour in lifts, tamping each layer. Fill to just below ground level to allow for top finishing.
Choosing the Correct Concrete Mix
The type of concrete mix you use is very important when pouring into a hole. Here are the guidelines:
– Use only concrete mixes designed to just add water. Look for labels like “just add water” or “no mixing required”.
– Do not use mortar mix or cement only. Mortar has too much sand and cement requires careful mixing with aggregates.
– Avoid concrete with large aggregates. It won’t flow and consolidate well into the hole.
– Quikrete and Sakrete brands make concrete mixes suitable for pouring into holes.
– Aim for a mix labeled 3000 psi or higher strength. Higher strength increases durability.
Benefits of Preblended Concrete Mixes
Preblended concrete mixes offer important benefits for hole pouring:
– Correct proportions of cement, sand, and gravel are pre-mixed. No measuring required.
– Mixes flow well and self-consolidate when water is added.
– Bags are easier to carry and portion out than bulk concrete.
– Consistent quality and strength versus mixing on-site.
– Often cheaper than mixing custom concrete from scratch.
Preparing the Hole
Proper hole preparation is vital for success when pouring concrete mix:
Digging the Hole
– Hole size should be a minimum of 2 feet deep and wide for stability. Deeper is better.
– Square off the sides and bottom rather than tapering.
– Larger post or footing holes may require forms to hold shape while pouring.
Cleaning and Dampening the Hole
– Remove all loose soil, rocks, roots, and debris.
– Compact the soil at the bottom with a tamper for a firm base.
– Pre-dampen the hole before pouring. But don’t leave standing water.
Adding Gravel Fill
– Fill the bottom 2-4 inches with gravel for extra drainage.
– Compact the gravel layer with the tamper before pouring.
– The gravel base helps stabilize the post or footing.
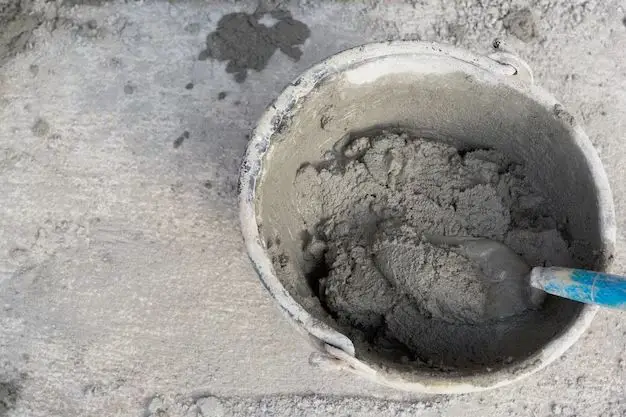
Mixing and Pouring the Concrete
Here are some tips for properly mixing and pouring into the hole:
– Start by sprinkling a little water over the empty hole to further dampen it before pouring.
– Open the bags as needed and pour the dry mix into the hole.
– Add water SLOWLY while mixing to fully incorporate it.
– Mix with a shovel in between adding water. Don’t just dump water in.
– Pour in lifts, tamping each layer. Wait until water soaks in before adding the next layer.
– Stop filling 2-3 inches below ground level. This leaves room to finish and shape the top.
Avoid Common Mistakes
– Don’t pour bags faster than you can properly mix in water. This risks dry pockets.
– Don’t overload the hole with too much concrete at once. Pour in controlled lifts.
– Make sure to tamp for compaction between lifts.
– Don’t leave any wood or metal scraps buried in the concrete.
Finishing and Curing the Concrete
Finishing and curing are critical steps:
– Once filled, tamp the top layer smooth and slope away from post or center.
– Finish the surface with a trowel for a smooth appearance.
– Apply a concrete sealer or curing compound to help moisture retention.
– Cover the concrete with plastic for a minimum of 3 days while it cures.
– Keep the concrete damp by misting during the full curing period.
– Avoid walking on or disturbing the concrete for a full 7 days while reaching max strength.
Tips for Specific Projects
The pouring technique may vary slightly depending on your specific project:
Setting Fence Posts
– Dig holes wider than the post width, e.g. 10-12 inches for a 4×4 post.
– Place the post and brace it plumb before pouring concrete.
– Fill the hole around the post in lifts, tamping to avoid air gaps.
Pouring Footings
– Dig the footing width and depth according to code requirements.
– Use forms if needed to contain the footing sides.
– Insert any anchor bolts while the concrete is still wet per plan.
Setting Deck Supports
– Dig holes below the frost line and wide enough for proper bearing.
– Place sonotube forms in the holes to create poured columns.
– Use a post base bracket at the bottom attached to the column.
Conclusion
Pouring concrete mix into a hole is an efficient and low-cost way to set posts, footings, and other foundation elements. With the right concrete mix, hole preparation, and pour technique, it can produce very solid results. Just remember to pre-dampen, pour in controlled lifts, fully integrate water, and properly cure the concrete. This will help the concrete mix gain maximum strength and stability over time. Let the concrete fully cure for at least 7 days before applying any loads or stress.
| Concrete Mix Types | Description | Uses |
|---|---|---|
| Premixed Concrete | Pre-blended mix with cement, sand, gravel just add water. Easy to use. | General concrete pouring like footings, posts, slabs. |
| Mortar Mix | Premixed cement and sand, just add water. For non-structural uses. | Brick/block laying, tuck pointing mortar joints. |
| Quikrete | Wide variety of pre-mixed concrete and mortars. | Footings, construction repair, slab, and post pouring. |
| Sakrete | Premixed concretes made for various applications. | Structural concrete, high strength, and chemical resistant options. |
| Hole Size Guidelines | Depth | Width |
|---|---|---|
| Fence Posts | 2 – 3 feet | 2 x post width |
| Deck Supports | Below frost line | 8 – 12 inches |
| Footings | Per design spec | Per design spec |
| Common Concrete Strengths | Project Types |
|---|---|
| 2500 psi | Sidewalks, curbs, general flatwork |
| 3000 psi | Driveways, garage slabs, patios |
| 4000 psi | Structural foundations, retaining walls |
| 5000 psi | Heavy industrial, high strength needs |
| Curing Times | Description |
|---|---|
| 24 Hours | Initial set. Concrete is walkable but very soft, avoid stressing. |
| 3 Days | Concrete reaches about 50% design strength. |
| 7 Days | Approximately full design strength reached. |
| 28 Days | Concrete is fully cured and set. |