Yes, it is possible to install a shower drain in a concrete floor. However, installing a drain in concrete requires some planning and the right materials and tools. There are a few different methods for installing a shower drain in concrete, depending on whether you are working with new poured concrete or an existing slab.
Page Contents
Installing a Drain in New Poured Concrete
Installing a shower drain in new poured concrete is the easiest and most effective method. Here are the key steps:
- Plan the drain location – The drain should be located near the center of the shower area at the lowest point of the slab. This allows water to flow downhill naturally towards the drain.
- Cut a hole for the drain – Use a core drill to cut a hole (usually 4-6 inches wide) in the subfloor where you want the drain. The top of the hole should be level with the finished height of the concrete.
- Install the drain assembly – Place the drain pipe and drain body in the hole following the manufacturer’s instructions. The assembly should fit snugly and have a gasket or seal to prevent leaks.
- Secure the drain – Connect anchor flanges or use concrete anchors to secure the drain body to the subfloor so it doesn’t shift when the concrete is poured.
- Pour the concrete – Pour and finish pouring the concrete slab, sloping it gently towards the drain. Allow ample curing time before using the shower.
The key is planning ahead and setting the drain body properly so it ends up at the right height and location when the concrete cures. The drain needs to be securely anchored to prevent leaks or shifting.
Installing a Drain in Existing Concrete
If you need to add a shower drain to an existing concrete slab, the process involves cutting the concrete to embed the new drain:
- Mark the location – Mark the exact spot where you want the drain located in the concrete with a marker or tape.
- Cut the concrete – Use a concrete saw to cut a hole about 1-2 inches around the drain pipe diameter. Cut at least 4 inches deep.
- Chisel out the hole – Use a masonry chisel and hammer to carefully chisel out the hole to the required size and depth for the drain.
- Install the drain – Place the drain pipe and body into the hole, check the fit, and secure it with concrete, taking care to prevent leaks.
- Patch the concrete – Mix new concrete and pour it around the drain assembly up to the surface level, then trowel smooth. Allow several days to cure before using the shower.
Cutting concrete accurately takes skill, and you want a tight fit around the drain to prevent leaks. Hire a professional if you lack masonry experience. Use a concrete mix rated for shower pans when patching.
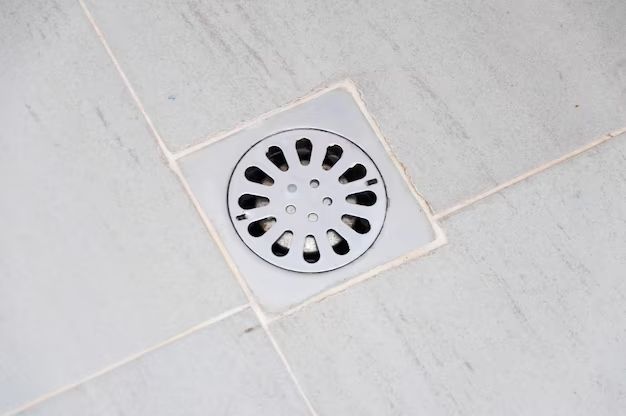
Choosing a Shower Drain
Several types of shower drains can work in concrete floors:
- Standard floor drains – Simple drain bodies with weep holes for thin concrete floors.
- Adjustable shower floor drains – Drains with height-adjustable tops to match different concrete depths.
- Clamping ring drains – Drains with a ring that clamps over the concrete floor, creating a tight seal.
- Channel drains – Long linear drains that collect water over several feet.
Make sure to get the right drain size and shape for your planned concrete thickness. Larger 4-6 inch drains are best for deeper concrete pours. Check that the drain flange fits neatly over the floor hole and provides a tight seal.
Tips for Installing Shower Drains in Concrete
Follow these tips when installing a shower drain in concrete:
- Always slope the concrete towards the drain location for proper drainage.
- Follow drain manufacturer’s instructions for hole size and installation steps.
- Waterproof the subfloor and drain connections to prevent moisture issues.
- Pour a layer of gravel under the drain location for better drainage.
- Surround drains with mesh screen to prevent clogs from debris when pouring concrete.
- Allow several days for concrete to fully cure before running water to the drain.
- Test the drain initially by filling the pan with water and checking for leaks.
Advantages of Concrete Shower Floors
Installing a shower drain in concrete offers these benefits:
- Durability – Concrete doesn’t warp or deteriorate like wood or other materials.
- Slope options – Concrete can be pitched accurately towards the drain.
- Customizable – Concrete allows you to create custom shower pans in any size and shape.
- Tileable surface – Concrete provides an ideal subfloor for natural stone and tile.
- Reduced leaks – Concrete won’t leak if properly sealed around the drain.
Concrete shower pans stand up well to constant water exposure. The lack of seams also reduces leakage potential. With proper subsurface prep and drainage, concrete supports durable, trouble-free shower installations.
Disadvantages of Concrete Shower Floors
Potential downsides to concrete shower floors include:
- Hard surface – Concrete provides a hard, inflexible surface to stand on.
- Difficult to install – Concrete requires skill to pour and finish correctly.
- Drain modifications difficult – Cutting into cured concrete for new drains is labor-intensive.
- Cracks – Concrete is prone to cracking over time if the subsurface is not prepped properly.
- Cold underfoot – Concrete feels cold and hard compared to wood or vinyl flooring.
While concrete is extremely durable, it lacks the “warmth” and comfort that some desire beneath their feet in a shower. Repairs to concrete flooring can also be time-consuming and costly if issues arise. Weigh the pros and cons carefully for your specific needs.
Cost to Install Shower Drain in Concrete
On average, expect to pay $700 – $1,200 to install a shower drain in a concrete floor. This includes drain materials, concrete, and professional labor. Factors affecting the cost include:
- Drain type – Simple drains cost less than fancy linear drains.
- Concrete area – Bigger shower pans require more concrete and labor.
- New pour vs. existing slab – Cutting concrete takes more work.
- Surface finishes – Polished or stamped concrete adds cost.
- Contractor fees – Prices vary based on location and expertise.
While a professional installation ensures proper slope and drainage, you can reduce costs significantly by pouring concrete and installing the drain yourself. Get multiple bids to find the best value contractor.
Conclusion
Installing a shower drain in a concrete floor is very doable with the right planning and methods. For new slabs, embed the drain securely before pouring the concrete. For existing concrete, carefully cut an opening to fit the new drain. Avoid leaks by anchoring the drain properly and using waterproof seals and membranes. While hiring a contractor is advisable, you can also install a concrete shower drain yourself at substantial cost savings with some DIY plumbing and concrete skills.