Replacing a GFCI (ground fault circuit interrupter) outlet is a project a homeowner can take on themselves. While caution should always be exercised when working with electrical wiring, replacing a GFCI outlet is considered a relatively straightforward task that can be safely accomplished with proper preparation and care.
Page Contents
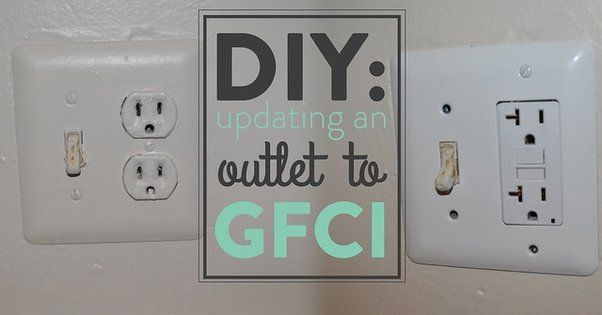
What is a GFCI outlet?
A GFCI outlet provides protection from electrical shocks. GFCI outlets have a built-in circuit breaker that senses small differences in electricity flowing in versus electricity flowing out. If there is any imbalance detected, such as a ground fault, the GFCI outlet will quickly shut off power to prevent serious injury.
GFCI outlets are now required in bathrooms, kitchens, garages, crawl spaces, unfinished basements, and many outdoor outlets. Anywhere there is risk of electrocution around water is a good candidate for a GFCI outlet. They can prevent electrical accidents and fatalities.
Why would I need to replace a GFCI outlet?
There are a few reasons you may need to replace a GFCI outlet:
- The GFCI outlet no longer works – If your GFCI outlet is no longer functioning properly, such as not resetting or turning off power, it likely needs to be replaced.
- The outlet won’t stay reset – If you have to keep resetting the outlet, this could indicate an internal failure, requiring replacement of the GFCI.
- The GFCI outlet trips frequently – Frequent, unexplained tripping of the outlet points to a defective device that should be replaced.
- Changing color schemes – You may want to replace the outlet when remodeling a room to match new decor.
- Updating older outlets – Upgrading from an older outlet to meet current safety standards.
Supplies needed
Replacing a GFCI outlet can be done with some simple supplies:
- New GFCI outlet that matches the circuit voltage (120V)
- Electrical tape
- Wire strippers
- Screwdriver
- Voltage tester
- Flashlight
Optional supplies:
- Clamp meter to double check the wires are disconnected
- Childproof outlet covers if needed
Turn off the power
Before doing any work on an electrical outlet, you must disengage the power. There are two ways to do this:
- Turn off the circuit breaker – Locate the circuit breaker that controls the outlet, typically in the main electrical panel box, and switch it to the OFF position. This will disable power to the entire circuit.
- Unplug devices and use outlet tester – Unplug any nearby devices that are powered by the outlet you’ll be replacing. Use a plug-in outlet tester to confirm the outlet is no longer live.
The circuit breaker method provides the best protection and avoids potential shocks. Make sure no other rooms are on the same circuit before turning off breakers. Test with an outlet tester before beginning work.
Remove the old GFCI outlet
With the power disengaged, you can now safely remove the old GFCI outlet:
- Unscrew the wall plate and remove it.
- Take out the two screws that secure the outlet and pull it out from the electrical box.
- Use a voltage tester again to confirm no power is present.
- Check for any additional wiring connections such as to a switch.
- Use your clamp meter (if you have one) to verify no power is running through any of the wires.
- Disconnect all the wires one at a time.
Prepare the new GFCI outlet
With the old outlet removed, get your new GFCI outlet ready:
- Strip 1/2 inch of insulation from the ends of each wire if needed.
- Wrap the bare copper ground wire around the green screw terminal on the outlet.
- Connect the black hot wire to the brass screw terminal.
- Connect the white neutral wire to the silver screw terminal.
- Make sure screw terminals are tight and wires are hooked in a clockwise direction.
Install the new GFCI outlet
You’re now ready to install the new outlet:
- Carefully insert the new GFCI outlet into the electrical box, screws facing up.
- Push in any excess wiring so the outlet fits flush with the wall surface.
- Secure outlet with the two long screws, checking for tight connection.
- Re-install the wall plate cover.
Restore power and test
Final steps are to restore power and test operation:
- Turn the circuit breaker back on or plug devices into the outlet if you unplugged them.
- Press the “Reset” button on the GFCI outlet to enable power.
- Confirm the outlet is working correctly by plugging in a lamp or other device.
- Press the “Test” button to trip the outlet and cut power.
- Press “Reset” again to confirm normal operation. The outlet should now protect the circuit.
If the GFCI outlet ever fails to reset or test properly, it may be incorrectly wired. Consulting an electrician would be advised.
Important safety notes
Replacing a GFCI outlet is well within the DIY capabilities of many homeowners. However, exercise caution, especially if you lack electrical experience. Potential hazards include:
- Electrical shock – Always turn off power at the breaker. Double check wires with a tester.
- Incorrect wiring – This can lead to malfunctioning outlets or short circuits.
- Overloaded circuits – Too many devices can overheat wires or trip breakers.
- Damaged wires – Cracked or frayed wires need to be replaced.
- Grounding issues – No ground wire can make the GFCI dangerous.
If in doubt, consult an electrician or contractor. But otherwise, replacing a GFCI outlet is a project many homeowners can take on with proper safety practices. Exercise caution, work methodically, and don’t rush the process.
Conclusion
Replacing a GFCI outlet is a straightforward project for a homeowner that just requires shutting off power, removing the old outlet, wiring up the new one, and restoring power. The most important steps are to turn off the circuit breaker, confirm the outlet is dead with a tester, carefully connect the wires to the correct terminals, and double-check operation after installation. Exercise safety and caution when working with electrical wiring. With proper care, a GFCI outlet can be replaced in about 5-10 minutes, providing protection from shocks for an entire circuit.