Yes, it is possible for a homeowner to replace a hardwired smoke detector themselves. However, there are some important steps to follow and considerations to keep in mind to ensure the job is done properly and safely. Replacing a hardwired smoke detector requires working with electrical wiring, so some basic knowledge of home electrical systems is recommended. If you are uncomfortable working with electrical wiring, it’s best to hire an electrician.
Page Contents
- 1 How Hardwired Smoke Detectors Work
- 2 Steps for Replacing a Hardwired Smoke Detector
- 3 Safety Tips
- 4 Hiring an Electrician
- 5 Cost to Replace a Hardwired Smoke Detector
- 6 Key Takeaways
- 7 Frequently Asked Questions
- 7.1 Is it hard to replace a hardwired smoke detector?
- 7.2 What tools do I need to replace a hardwired smoke detector?
- 7.3 Can I connect a new hardwired smoke detector differently?
- 7.4 What if I don’t know which breaker shuts off the smoke detector power?
- 7.5 Should I replace all my smoke detectors at once?
- 8 Conclusion
How Hardwired Smoke Detectors Work
Hardwired smoke detectors are powered directly from your home’s electrical system, usually connecting to a junction box in the ceiling. This means they don’t require batteries to operate. The detector gets continuous power from your home’s electrical wiring. Hardwired smoke detectors also often have battery backup in case the power goes out.
Hardwired smoke detectors have a few advantages over battery-powered models:
- They never need battery replacements.
- There’s no chance of them failing due to dead batteries.
- Many can still operate during a power outage thanks to battery backup.
The downside is that they are more difficult to install and replace since you have to work with household wiring.
Steps for Replacing a Hardwired Smoke Detector
If you decide to replace a hardwired smoke detector yourself, follow these steps:
1. Turn Off Power to the Detector
Start by turning off power to the smoke detector at your main electrical panel. Find the circuit breaker powering the smoke detector and switch it to the “off” position. This ensures you won’t get shocked while working on the wiring.
2. Remove the Old Smoke Detector
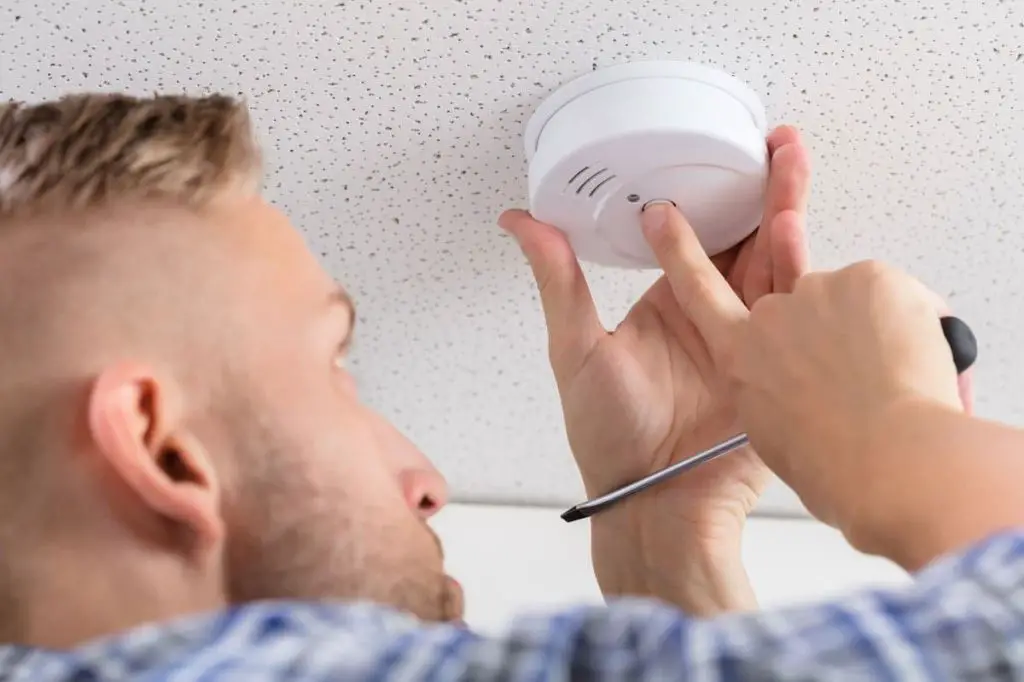
Take the smoke detector down from the ceiling or wall mount. Most models have a mounting bracket that can be unscrewed. If needed, use a small ladder or step stool to reach the detector.
Once detached from the bracket, you should see the wiring coming into the back or side of the detector. There will usually be three wires:
- Black wire – carries power from the circuit to the detector.
- White wire – neutral return wire.
- Bare copper wire – ground wire.
Use a screwdriver to detach the wires from the old smoke detector. Make sure to note what wire went where so you can reconnect them properly.
3. Install the New Smoke Detector
Attach the mounting bracket for your new smoke detector in the same spot. Screw it into the ceiling or wall securely.
Next, connect the wiring to the new smoke detector following the same pattern as the old one:
- Black wire to power terminal
- White wire to neutral terminal
- Bare copper ground wire to ground terminal
Consult the installation instructions that came with your new detector for exact details. Often the terminals are labeled or color coded. Use wire nuts to secure the connections.
Once wired up, attach the new smoke detector unit onto the mounting bracket and test it out. You want to verify power and functioning before finishing up.
4. Restore Power and Test Operation
Go back to your electrical panel and switch the circuit breaker for the smoke detector back on to restore power.
Check that the new smoke detector powers on. If it has a test button, press it to trigger the alarm and confirm it’s working correctly.
Finally, put the battery into the new detector if it requires one for backup power.
Safety Tips
When replacing hardwired smoke detectors, keep these safety recommendations in mind:
- Use a voltage tester to double check the wires have no power before touching them.
- Turn off power at the main panel, not just locally at a light switch.
- Follow the manufacturer’s instructions exactly.
- Make sure all wire connections are secure.
- Have another person present to help if needed.
Hardwired smoke detectors should be on every level of the home and inside every bedroom according to National Fire Protection Association (NFPA) recommendations. So if you are replacing one, it’s a good idea to add or replace others at the same time if needed.
Hiring an Electrician
If you don’t feel comfortable working with electrical wiring, it’s best to hire an electrician to replace hardwired smoke detectors. Here are some benefits of hiring a pro:
- An electrician can ensure it’s done safely and correctly.
- They have the proper tools and testing equipment.
- It will likely be permitted and inspected as required by local codes.
- An electrician can identify and fix any wiring issues discovered.
- You avoid the risk of electrical shock or damage.
While it may cost more than a DIY replacement, you can have peace of mind knowing it was done right. Many electricians can install multiple smoke detectors at once throughout your home.
Cost to Replace a Hardwired Smoke Detector
If you hire an electrician, expect to pay $125-$300 to have a hardwired smoke detector replaced, depending on your location and the complexity of the job. Simple replacements in easily accessible areas go for the lower end of the range, while more complicated jobs cost more.
The parts themselves if you DIY are around:
- Smoke detector unit: $20-$70 depending on brand and features
- Electrical box, wiring, connectors: $10-$20
So in total, expect to spend around $30-$90 on parts and supplies if replacing it yourself.
Key Takeaways
Here are some key tips on replacing hardwired smoke detectors:
- Turn off power at the main panel before working on wiring.
- Follow manufacturer instructions carefully.
- Label wires and note connections before detaching.
- Verify power and test operation when complete.
- Consider hiring an electrician if uncomfortable with electrical work.
- Plan to replace all smoke detectors at once if needed.
Replacing hardwired smoke detectors requires working with household wiring, so caution is needed. But with proper safety and care, most homeowners can replace a hardwired smoke detector successfully. If in doubt, call a professional electrician. Proper functioning smoke detectors save lives, so maintaining and replacing them is essential.
Frequently Asked Questions
Is it hard to replace a hardwired smoke detector?
Replacing a hardwired smoke detector is moderately difficult. It involves electrical work, including disconnecting and reconnecting wires in the correct configuration. With proper precautions it’s doable, but an electrician can make the job simpler.
What tools do I need to replace a hardwired smoke detector?
You’ll need basic electrical and hand tools like a screwdriver, wire cutters, wire strippers, needle-nose pliers, electrical tape, and a voltage tester. You may also need a stepladder. Have wire nuts on hand for connecting wires.
Can I connect a new hardwired smoke detector differently?
It’s best to follow the same wiring setup as the old detector you’re replacing. Connect the black power wire, white neutral wire, and copper ground as they were originally. Consult the manufacturer instructions for your new detector as well.
What if I don’t know which breaker shuts off the smoke detector power?
Use a circuit tester to identify which breaker controls the power. Turn off breakers one at a time until the tester shows the smoke detector wires have lost power. Mark the breaker for future reference.
Should I replace all my smoke detectors at once?
It’s recommended to replace all smoke detectors at the same time. They have a service life of about 10 years. Replacing them all together ensures your fire safety coverage stays up to date.
Conclusion
Replacing hardwired smoke detectors is an important safety task that most homeowners can complete successfully themselves. However, it does involve electrical work that should be done with care and caution. Following safety procedures like turning off power, labeling wires, and verifying connections is crucial. If not 100% comfortable working with wiring, hiring an electrician is the best option for safety and code compliance. With the right precautions, you can save money by DIYing it, but never take risks when it comes to home electrical systems. Updated, working smoke detectors help protect your family in the event of a fire.