Yes, you can replace a washer shut off valve yourself. The shut off valve is the knob located on the water supply lines behind your washing machine that controls water flow. Over time, these valves can wear out or start to leak, requiring replacement. Replacing a washer shut off valve is an easy DIY project that can be done in about 30 minutes with some basic tools. In this article, we will walk through everything you need to know to safely replace your washing machine’s shut off valve.
Page Contents
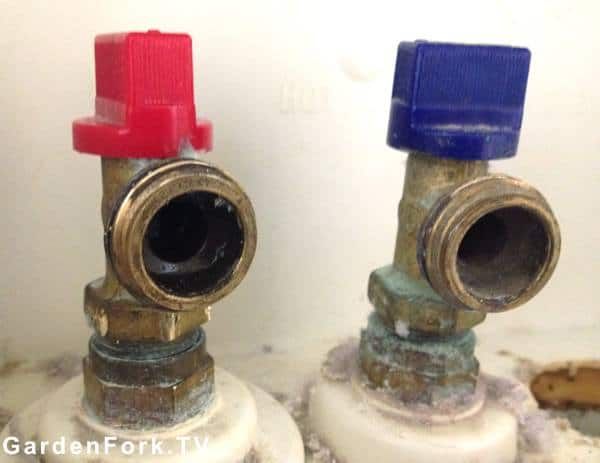
When to Replace Your Washer Shut Off Valve
Here are some signs that indicate it’s time to replace the shut off valve for your washing machine:
- Dripping or leaking water – If you notice water dripping from the valve even when it is turned off, this is a sign the valve is no longer sealing properly and needs to be replaced.
- Rust and corrosion – Over time, shut off valves can rust, especially if you have galvanized pipes. Rust indicates the valve is aging and more likely to start leaking.
- Difficult to turn – If the valve is very hard to turn or gets stuck, this indicates wear and mineral deposits inside the valve. Replacing it will help it operate smoothly again.
- Low water pressure – If the flow of water to your washer seems weaker than normal, the shut off valve could be partly clogged with mineral deposits and require replacement.
Replacing the valve when you first notice any of these signs can prevent leaking and water damage.
How to Replace a Washer Shut Off Valve
Here are the basic steps involved in replacing your washing machine’s shut off valve yourself:
Gather supplies
You will need the following supplies:
- Adjustable wrenches (2)
- Replacement washing machine shut off valve
- Teflon tape
Purchase a replacement valve that matches the type of water supply line connections you have. Most modern washing machines use flexible stainless steel braided supply hoses with 3/4 inch female threaded connections. Make sure to get a valve with the same size female thread outlet.
Turn off water supply
Locate the main water shut off valve for your house and turn it off. This is usually near your water meter. Turning off the main supply will prevent water from gushing out when you remove the old valve.
Drain washer hoses
Put a bucket or pan under the washer shut off valves. Then disconnect the hot and cold water supply hoses from the old valve and drain any residual water left in the hoses into the bucket. Keep a towel handy to catch drips.
Remove old valve
Use an adjustable wrench to loosen and unscrew the old valve from the water supply lines. You may need to hold the supply line with a second wrench while unscrewing the valve. Remove the old valve.
Clean supply lines
Use sandpaper or steel wool to gently scour the ends of the supply lines where they connect to the valve. This removes any built up mineral deposits for a smooth connection. Wipe clean.
Apply Teflon tape
Wrap the male threads on the supply line connections with 2-3 layers of Teflon tape. Wrap the tape clockwise. The tape seals the connections and prevents leaks.
Install new valve
Screw the new valve onto the supply lines by hand first. Then finish tightening with adjustable wrenches. Position the new valve so the outlet is facing the right direction.
Reconnect hoses
Attach the washer hoses to the outlet end of the new valve. Use wrenches to tighten these connections securely.
Turn on water
Turn the main water supply back on and check for leaks. Tighten any connections if needed. Then test the new valve by turning it on and off a few times. If no leaks, the job is complete!
Tips for Replacing a Washer Shut Off Valve
Follow these tips for smoothly replacing your washing machine shut off valve:
- Choose the right valve – Match the replacement to your existing line size, shape, and connections.
- Turn water off first – Always turn off the main water supply before beginning.
- Drain hoses – Draining the washer hoses allows you to unscrew the valve without water gushing out.
- Check for leaks – Test the new valve with water on to ensure there are no leaks before using.
- Consider hiring a pro – If you don’t feel comfortable doing this yourself, hire a plumber.
Replacing a bad shut off valve is much easier than repairing water damage from a leaky valve!
Common Questions About Replacing Washer Shut Off Valves
Here are answers to some frequently asked questions about replacing washing machine shut off valves:
What type of valve do I need?
In most residential installations, you need a 1/2″ or 3/4″ threaded inlet and outlet ball valve or gate valve suitable for washing machine connections.
How do I remove an old, corroded valve?
Penetrating oil can help loosen a stuck valve. You may need to very carefully chisel off or cut old valves that won’t unscrew. Replace with a new valve.
Can I just patch a small leak?
It’s best to fully replace a leaking valve. Sealants or wraps are temporary fixes and valves prone to leaks tend to get worse over time.
How do I match the new valve?
Bring the old valve with you to the hardware store. Match the shape, pipe size, male and female threads, and outlet orientation.
What tools do I need?
At a minimum, you will need two adjustable wrenches, Teflon tape, sandpaper, bucket, towels, and a flashlight. Needle-nose pliers also helpful for tight spots.
Is soldering required?
No, a compression or threaded washing machine valve does not require soldering. Just use Teflon tape on threads to seal.
Conclusion
Replacing a worn out, leaking, or inoperable washing machine shut off valve is a straightforward DIY plumbing task. With some basic tools and supplies, you can have a new functional valve installed in under 30 minutes without needing to solder or call a plumber. Pay attention to matching your existing valve setup, turning off the main water supply, draining the hoses, cleaning fittings, applying thread tape, and testing for leaks. Following the steps outlined here will allow you to safely replace your washing machine’s shut off valve and prevent leaks.