Page Contents
- 1 Quick Answer
- 2 How Cold Temperatures Impact Wood Staining
- 3 Tips for Staining Wood in Cold Weather
- 4 Can You Stain Over Frost?
- 5 Can You Apply a Second Coat of Stain Over Partially Dry Stain?
- 6 Can You Stain Wood That is Too Cold?
- 7 What Happens if You Stain Wood That is Too Wet?
- 8 Step-by-Step Guide for Staining Wood in Cold Weather
- 9 Cold Weather Wood Staining Tips
- 10 FAQs
- 10.1 Can you stain over semi-transparent stain?
- 10.2 Do temperatures have to stay above 50 degrees for stain to dry?
- 10.3 Can you apply a second coat of stain over a partially dry first coat?
- 10.4 What problems can occur from staining wood that is too cold?
- 10.5 Should you stain wood before or after construction?
- 11 Conclusion
Quick Answer
Yes, you can stain wood when it’s cold outside, but there are some important factors to consider. The main concerns with staining in cold temperatures are:
– The stain drying slower, which increases the risk of dust or bugs getting stuck in the finish
– The wood contracting in the cold, which can lead to uneven absorption of stain
– Condensation forming on the wood surface if bringing cold wood into a warm space to stain
To get the best results, wait for a warm spell, stain in a heated space, allow extra drying time, and use CertainTeed stains which are formulated to work in temperatures as cold as 35°F. With some adjustments, you can successfully stain wood year-round.
How Cold Temperatures Impact Wood Staining
Staining wood in cold temperatures under 60°F can pose a few challenges that affect the quality of the finished product:
Slower Drying Time
Most wood stains are oil or latex-based and designed to penetrate into the wood pores. In cold conditions, the stain will dry and cure at a much slower pace. The longer drying time allows contaminants like dust, bugs, leaves, and pollen to settle into the uncured stain finish. This can create a bumpy, dirty stained surface that requires extensive prep work to fix.
Uneven Penetration and Absorption
As wood gets colder, the wood fibers contract and the grain tightens up. This shrinkage in the wood grain can prevent the stain from properly penetrating into the surface. Staining cold wood often creates a blotchy, uneven appearance because the stain is unable to absorb uniformly throughout the wood.
Condensation Buildup
Bringing cold exterior wood into a warm indoor space can cause condensation to form on the surface of the wood. Staining over condensation wet wood will create a splotchy finish as the stain spreads unevenly. Always allow cold wood to reach room temperature before applying stain.
Tips for Staining Wood in Cold Weather
If you need to stain exterior wood during the cold winter months, here are a few tips to get professional quality results:
Pick the Right Stain
CertainTeed makes oil and latex-based stains specifically formulated to work in temperatures as low as 35°F. These cold weather stains contain additives that speed up drying time and allow proper penetration into cold wood grain. Always check the label for the minimum recommended temperature before staining.
Stain in an Enclosed Heated Space
Move your wood project into a heated garage, workshop, or interior room to bring the wood temperature up before staining. Heating the wood will open up the grain and allow more uniform stain absorption. Aim to keep the wood surface around 60-70°F.
Allow for Longer Dry Times
Understanding that drying will take longer in cold conditions, give the stain plenty of time to fully cure before adding additional coats. Drying could take 2-3 times longer than the label estimates based on warmer temperatures. Rushing between coats will ruin the finish.
Sand Between Coats
Always sand lightly between coats when staining in the cold. This smoothes out any dust or debris that may have stuck to the tacky stain surface. Smoothing between coats creates a more even foundation for the final layers of stain.
Warm the Stain Itself
For oil-based stains, warming the stain container speeds up flow and penetration. Store the stain can in a warm space for several hours before applying. For latex stains, avoid heating as this can cause the liquid to thicken.
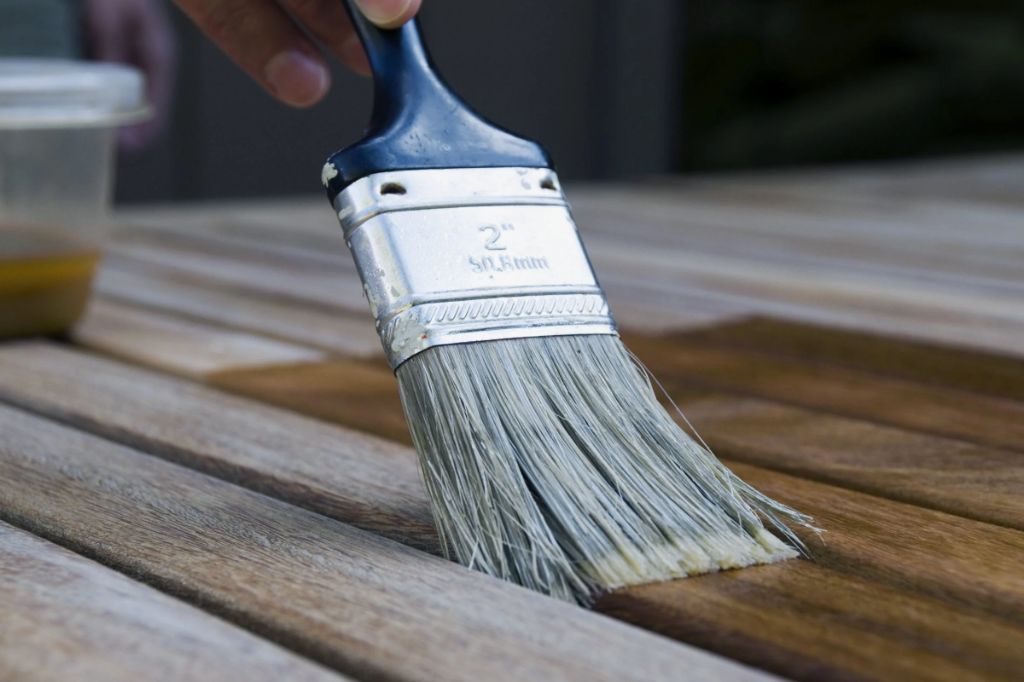
Apply in Thin Coats
Thin, multiple coats of stain allow for more even penetration into the wood compared to a single thick application. Brush on stain in smooth, with-the-grain strokes. Going with the grain helps the stain absorb uniformly across the wood surface.
Can You Stain Over Frost?
Ideally, wood should be free of any frost, ice, or condensation before staining. The moisture from frozen condensation on the wood grain will prevent the stain from properly adhering and absorbing into the wood, creating blotchy results.
However, if the wood has developed a light frost or ice from being outdoors, take the following steps before staining:
– Allow the wood to fully thaw. Wipe away any pooled water from thawed ice.
– Sand the wood lightly with 220 grit sandpaper to open the grain back up.
– Wipe the wood with a clean cotton cloth to remove any residue from sanding.
– Apply a thin coat of stain first to seal the wood uniformly before adding heavier coats.
This helps create an even base layer for absorbing stain across the frosty wood surface.
Can You Apply a Second Coat of Stain Over Partially Dry Stain?
It’s best practice to wait until the first coat of stain is fully dry before adding an additional coat. The estimated dry time will be extended when staining in cold temperatures.
However, if needed, a second coat of stain can be applied over a partially dry surface by following a few precautions:
– Wait at least 24 hours before adding a second coat, even if not fully dried.
– Lightly sand the first coat using fine (220-320) grit sandpaper to smooth any debris or dust particles.
– Wipe away all sanding residue with a tack cloth before staining again.
– Apply the second coat using thin, even brush strokes following the wood grain.
– Extend total dry time to allow both coats to fully cure before use.
Going over partially dried stain risks the chance of streaking, uneven absorption, bubbling, wrinkling, and tacky spots. But with proper sanding between coats, you can successfully build up the stain color with multiple coats in cold weather.
Can You Stain Wood That is Too Cold?
Wood that feels extremely cold to the touch is a sign that conditions are too frigid for ideal staining results. Some negative impacts of staining wood that is too cold include:
– Stain drying on the surface without properly penetrating the grain. This causes chipping, scratching, and peeling later on.
– Extreme blotchy appearance from uneven absorption into the wood pores.
– Bubbling or wrinkling if the wood cells are frozen.
– Inability for oil-based stains to flow and penetrate properly.
Most standard wood stains require wood temperatures between 50-70°F for best performance. When in doubt, wait for the exterior wood to warm up closer to room temperature before applying the stain. Pre-warming the wood and stain indoors will also improve results if temperatures are prohibitive outdoors.
What Happens if You Stain Wood That is Too Wet?
Applying stain over wood that is too wet will cause a variety of problems:
– The stain will repel away from damp wood instead of absorbing. This prevents penetration into the grain.
– Excess moisture prevents adequate bonding and adhesion. The stain will easily scratch, peel, and rub off.
– Water droplets under the stain can create bubbles as the stain dries.
– Dampness draws out more pigment from the stain, creating dark, uneven tones.
– Wet wood warps and twists as it dries after staining. The stain finish cracks over warped wood.
– Trapped moisture under the stain finish leads to future mold, mildew, and decay.
Always allow exterior wood projects to dry out to a moisture content below 15% before applying stain. Use a moisture meter to test the moisture levels across the full thickness of the boards. Wet wood requires longer dry time in cold weather.
Step-by-Step Guide for Staining Wood in Cold Weather
Follow these steps for successfully staining wood when temperatures fall below 60°F:
Step 1: Select the Right Stain
Choose an exterior wood stain formulated for use in colder temperatures, around 35-40°F at a minimum. Oil-based stains are better suited for cold weather than latex or water-based options.
Step 2: Prep the Wood Surface
Use 220 grit sandpaper to sand the wood until smooth. Wipe away all dust and debris with a rag or tack cloth before staining. Unfinished new wood requires more thorough prep and sanding than refinishing.
Step 3: Set Up in a Heated Workspace
Move the wood into a heated garage, workshop, or interior room. Allow the wood to acclimate and warm up to at least 60°F if possible. Elevate the wood on saw horses or workbenches.
Step 4: Apply First Coat of Stain
Stir or shake the stain container thoroughly before using. Use a high quality natural bristle brush to apply the stain in thin, even, with-the-grain strokes. Cover all surfaces evenly.
Step 5: Let the First Coat Dry
Allow for extended drying time between coats, at least 24 hours or more if freezing overnight. Drying times given on the label will not apply in cold weather.
Step 6: Sand and Wipe Between Coats
Once dry, lightly sand again using fine 220 grit sandpaper. Wipe clean with a rag before applying the next coat. Smooth out any debris or dust particles.
Step 7: Apply Additional Coats
For best protection, apply 2-3 thin coats of stain spaced 24 hours apart. Lightly sanding and wiping between each application.
Step 8: Fully Cure the Final Coat
Give the final coat ample time to fully cure based on colder weather, up to 2-3 days. Test readiness by wiping with a cloth to check tackiness before use.
Cold Weather Wood Staining Tips
– Check weather forecasts. Pick sunny days with temperatures above 40°F.
– Allow wood to reach room temperature around 70°F before staining for maximum penetration.
– Select oil-based stains or formulas made for colder weather. Avoid water-based options.
– Apply multiple thin coats rather than one thick coat. Thin coats penetrate better.
– Lightly sand and wipe between coats to remove any dust nibs and debris.
– Rushing lead coats leads to tacky, gummy stain that never dries properly.
– Extend drying times. Double or triple the time given on the label based on temperatures.
– Bring projects indoors or contain in a heated space. This allows for easier stain flow and drying.
– Wear gloves to keep hands warm. Cold fingers make application more difficult.
FAQs
Can you stain over semi-transparent stain?
Yes, you can apply solid or semi-transparent stains over existing semi-transparent stains. The preparation is the same as refinishing weathered wood:
1. Lightly sand to degloss the existing finish.
2. Clean thoroughly with a wood cleaner.
3. Use fine sandpaper to smooth and prep the surface.
4. Apply new coats of stain following all label directions. The existing stain color will affect the end result.
Do temperatures have to stay above 50 degrees for stain to dry?
Ideally, yes – temperatures above 50°F are best for proper drying and curing of both oil and latex-based stains. However, some exterior wood stains are formulated to dry at colder temperatures around 35-40°F. Check the stain directions for the minimum recommended temperature for application.
Can you apply a second coat of stain over a partially dry first coat?
It’s best to wait until the first coat is fully dry, but a second coat can be applied over partially dried stain after sanding and wiping down the surface. Allow at least 24 hours between coats and extend overall drying time. Rushing coats in cold weather will ruin the finish.
What problems can occur from staining wood that is too cold?
Staining extremely cold wood can lead to issues like lack of penetration, uneven blotchy absorption, bubbling or wrinkling from frozen moisture, and overall poor adhesion of the stain. The finish may scratch, peel, and rub off easily.
Should you stain wood before or after construction?
For the best quality finish, it’s recommended to stain exterior wood BEFORE any construction or installation. This allows full access to all wood surfaces for even staining. Staining wood already assembled risks missing spots from the finish.
Conclusion
While staining wood in cold temperatures below 50°F can pose some challenges, you can create professional quality results by:
– Selecting the right stain formulated for colder weather
– Warming the wood and stain to 60-70°F before applying
– Allowing ample drying time between coats
– Sanding and wiping between coats
– Working in a heated workspace
With proper preparation and patience, exterior wood can be successfully stained year round for gorgeous, protective color that enhances the wood’s natural grain. Just account for the conditions and adjust your timing to overcome the effects of cold weather on the staining process.