Adding a switch to an existing wall light is certainly possible for many homeowners, but there are some key factors to consider before taking on this project. In the opening paragraphs, we’ll provide quick answers to common questions about adding a switch to a wall light.
Page Contents
- 1 Is it difficult to add a switch to a wall light?
- 2 What tools and materials do I need?
- 3 Where can the new switch be installed?
- 4 How much does adding a switch cost?
- 5 Is a permit required?
- 6 Things Needed
- 7 Turn Off Power
- 8 Locate Installation Spot
- 9 Install Electrical Box
- 10 Run New Wiring (If Needed)
- 11 Connecting the Wires
- 12 Installing the Switch
- 13 Finishing Touches
- 14 Cost to Add a Switch to Wall Light
- 15 Conclusion
Is it difficult to add a switch to a wall light?
The difficulty level depends on your electrical experience and the specifics of your setup. For someone with basic electrical knowledge, it’s a moderately challenging DIY project. The main steps involve turning off power, wiring in the new switch, and connecting everything properly. If your wall light was originally wired without a switch, running new wiring can make the project more complex.
What tools and materials do I need?
Typical materials needed include:
- Switch
- Electrical box for the switch
- Wire strippers
- Voltage tester
- Wire connectors or crimpers
- Wire
And tools:
- Drill
- Drywall saw
- Screwdriver
- Ladder
- Stud finder
- Safety gear like glasses and gloves
Where can the new switch be installed?
Most commonly, the switch would be installed in the same general area on the wall as the existing light fixture – typically right next to it. The exact placement depends on finding a suitable stud bay to install the electrical box.
How much does adding a switch cost?
A simple light switch installation or replacement costs around $100 to $200 in materials and labor. If your project is more complex due to the need for new wiring, opening walls, etc., expect added costs in the $200 to $500 range.
Is a permit required?
In most cases, a permit is not required for a basic light switch installation in your home. However, it’s a good idea to check with your local building codes office to understand requirements for your area.
Being able to control a wall mounted light fixture via a switch provides convenience and flexibility. While many hardwired lights operate independently, adding switching allows you to turn the light on and off from multiple locations without having to walk to the fixture itself. This gives you greater control over your lighting.
When considering adding a switch to an existing wall light, there are a few important factors to think through. First, examine the light fixture to determine how it is currently wired and powered. In some cases, the light may already have wiring capable of supporting a switch, which makes the project easier. If not, you’ll likely have to run new wiring from the light back to the switch location.
Next, decide the best placement for the switch. Typical height is 4 ft or 5 ft from the floor for easy access. Proximity to the light fixture is also ideal so the wiring run is direct and simple. You’ll need to locate a stud bay with space for installing a recessed electrical box to house the switch.
With planning and attention to safety, an experienced DIYer can tackle this project over the course of a weekend. Having the right materials, tools, and basic electrical understanding will ensure success. Let’s go through the step-by-step process below.
Things Needed
Before getting started, make sure you have the necessary equipment and supplies on hand. At a minimum, you’ll need:
- Electrical switch – Single-pole toggle switch is most common
- Switch electrical box
- Nuts, clamps, and connectors for wiring
- Cables, wiring, and wire strippers
- Drill plus drill bits
- Drywall saw
- Screwdrivers
- Stud finder
- Ladder
- Safety gear – gloves, glasses, etc.
Make sure all tools are in good working order and that you have sufficient supplies for the wiring run, including a little extra. Always good to be prepared for the unexpected when working with electrical systems. Have any permits or inspections scheduled with your local building department if required.
Turn Off Power
Safety first! Before doing anything else, use the circuit breaker to shut off power to the light fixture and any outlets/switches on the same circuit. Verify power is off by using a voltage tester and operating the light switch. If you have an older home, the wiring may not follow modern color standards so tracing things can be tricky.
If you can’t isolate the light fixture circuit easily at the breaker, simply shut off power to the entire room or area where you’ll be working. No shock risk is worth the shortcut of working live.
Locate Installation Spot
Decide on the best spot on the wall to install the switch. It should be close to the light fixture for ease of running wire between them. Typical height is 4 to 5 feet above the floor. Use a stud finder to locate the stud bay where you want the switch.
The center of the stud bay should be clear and have enough depth for the switch electrical box you purchased. Make sure wires can be accessed for connection as well.
Mark the exact spot with tape or pencil for the next steps.
Install Electrical Box
With the installation spot marked, use a drywall saw to cut an opening in the wall for the electrical box. Make the opening a bit larger than the box outline. This gives some room to maneuver.
Secure the electrical box within the stud bay using nails or screws through the mounting tabs. Make sure the open side faces outward and the top aligns with your desired switch height. The box should be slightly receded into the wall stud bay.
Run New Wiring (If Needed)
If the light fixture does not already contain wiring capable of supporting a switch, you’ll need to run a new wire from the fixture box to the switch box. For lights controlled by a single switch, run a 3-conductor cable (hot, neutral, ground).
Using the drywall saw, cut a channel between the light and switch boxes through the stud bay. Make it wide and straight for easy feeding of the new cable. Secure the cable with cable clips for support and protection.
Leave plenty of extra wiring in both boxes for manipulation and connections. Feed the new wiring into the light fixture box as well to provide the hot wire that will be interrupted by the switch.
Connecting the Wires
With the boxes prepped and new cable (if needed) installed between light and switch, it’s time to handle the wiring terminations:
- Identify and label wires in the light fixture box. Check connections to the existing wiring.
- Connect the black (hot) wire coming from the switch cable to the black wire exiting the light fixture.
- Connect the white (neutral) wire from the switch cable to the white wire from the fixture.
- Connect grounding wires between both boxes as well using pigtails.
Follow a similar process at the switch box using correct wiring diagrams for single-pole switches. Connect the feed hot, the wire returning from the light, line/load, ground, etc. Use cable clamps and tight connector twists for safety.
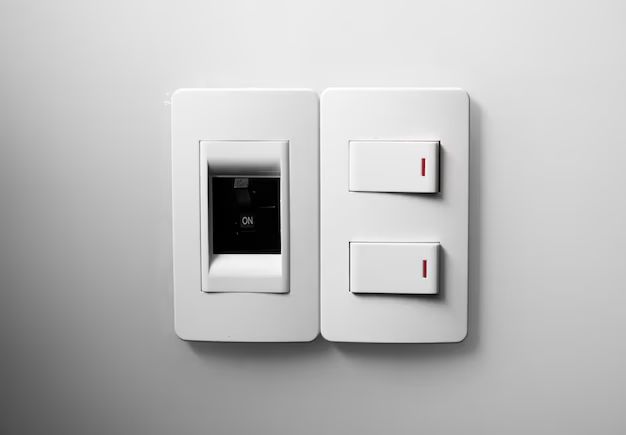
Installing the Switch
With all wiring terminations complete between the light and switch boxes, it’s time to install the switch itself:
- Double check that all wires are securely connected with no loose strands or gaps.
- Tuck wires neatly into the switch box, leaving room for the switch mechanism.
- Install the switch into the electrical box using the included screws.
- Secure the switch plate cover according to the instructions.
The switch can now control power delivery to the light fixture via the interrupting feed wire from the switch box. Flip the switch a few times to test operation before closing up the boxes.
Finishing Touches
To complete the project:
- Seal up any openings made for wires with caulk or foam.
- Use joint compound and drywall tape if needed to patch drywall openings.
- Test that the light and switch work correctly when power is restored.
- Install junction box covers, switch plate, and any other trim pieces.
- Check for compliance with any permits and arrange final inspection if needed.
That covers the main steps for adding a switch to an existing hardwired, non-switched wall light fixture. Take it slow, follow safety procedures, and don’t be afraid to call an electrician if any issues come up.
Cost to Add a Switch to Wall Light
If hiring an electrician, costs typically range from $100 to $200 to add a basic switch to an existing wall fixture depending on local rates. This covers standard installation of the switch, electrical box, wiring, and terminations. Here is a breakdown of average costs:
| Item | Average Cost |
|---|---|
| Switch | $5 |
| Electrical box | $10 |
| Cable, connectors, hardware | $20 |
| 1 hour electrician labor | $65-$100 per hour |
| Total average cost | $100-$150 |
Costs can be higher if the light fixture needs rewiring or if walls/drywall needs patching and finishing after installing boxes. Complex switch wiring layouts also adds cost. Get multiple quotes to find the best prices from electrical contractors in your area.
Conclusion
Adding a switch to an existing hardwired wall light is a worthwhile project for many homeowners seeking greater lighting control. The process involves installing new electrical boxes, running additional wires, connecting everything properly, and mounting the switch. With proper planning, materials, and adherence to electrical safety, it can be an easy DIY for someone with basic electrical knowledge.
If your wall light is already wired with the necessary conductors, the job is even simpler. You’ll also want to consider placement carefully for optimal function and aesthetics. Professional electricians can complete the entire job quickly if you run into any issues or prefer to have an expert handle this type of electrical work.
Did you find this overview helpful? Let us know if you have any other questions about adding a switch to a wall mounted light fixture in your home.
Related Questions
How do I add a switch to an outlet?
To add a switch for an outlet, install a new electrical box near the outlet and run cable between the boxes. Wire the hot conductor to the switch which will control power to the outlet. Make all terminations according to wiring diagrams. An electrician can help with this project.
Can I put two switches in one box?
Yes, installing two switches in one box is common practice. Use a double-gang box and connect each switch individually according to wiring diagrams. Ground all components properly for safety.
Where do you put a light switch in a room?
Ideal placement for a light switch is 4-5 feet above the floor on the latch side of the door. Position it so the switch plate is 1 inch or less from the door trim. Consistent placement makes them easy to locate.
How do I add a light with a switch?
Install electrical boxes for the light and switch. Run cable between them and make all wiring connections – hot feed into the switch box, switched-hot from switch to light fixture, neutrals to light, grounds, etc. Follow diagrams for single-pole switch wiring and light fixtures.
What if my light has no ground wire?
For fixtures without a ground wire, use a plastic electrical box and make sure cords are secured properly. You can also retrofit with a metal box and add ground wiring if possible. An electrician can ensure safety.
Can I put two lights on one switch?
Yes, you can control multiple lights from one switch. Wire both fixtures to the same switched-hot conductor coming from the single-pole switch. Just make sure not to overload the circuit with excessive wattage across both lights.