Adding fake beams or faux beams to your ceiling can be a great way to enhance the architectural detail and visual interest of a room without the hassle or expense of installing real structural beams. Faux beams are decorative elements that simulate the look of solid wood or steel beams protruding from the ceiling. With the right materials and techniques, it is absolutely possible for a skilled DIYer to add fake beams to their ceiling that look quite convincing.
Page Contents
- 1 What are the benefits of installing faux beams?
- 2 What materials are commonly used for fake beams?
- 3 How do you attach fake beams to a ceiling?
- 4 What are some tips for painting fake beams?
- 5 What are some creative ideas for installing fake beams?
- 6 What kind of lighting works well with fake beams?
- 7 Should you get contractor quotes for the work?
- 8 What are the best tools for cutting and installing fake beams?
- 9 What are the costs involved with adding fake beams?
- 10 What are the risks of DIY versus hiring a professional?
- 11 What precautions should be taken when installing fake beams?
- 12 Conclusion
What are the benefits of installing faux beams?
There are several potential benefits to installing fake beams on your ceiling:
– Aesthetic appeal – Fake beams can lend a stately, rustic, or industrial vibe to a room. They create interesting lines and shadows on the ceiling.
– Architectural detail – Faux beams can make a ceiling feel more finished and substantial. They provide depth and character, especially in rooms with lower ceiling heights.
– Cost – Fake beams are far less expensive than installing genuine structural beams and modifying the ceiling framing. Materials like foam, PVC, or fiberglass are budget-friendly options.
– Easier installation – Fake beams are lightweight and easy to glue or nail up. Structural beams require professional engineering and construction.
– Adaptability – Fake beams can be installed on nearly any type of ceiling – drywall, plaster, concrete, etc. You’re not limited by structural considerations.
– Non-permanent – Faux beams can be removed or relocated relatively easily if you later want to change your decorative scheme.
So in many circumstances, installing fake beams can be a simple DIY upgrade that provides noticeable visual impact for very little money.
What materials are commonly used for fake beams?
Here are some of the most popular options for faux beam materials and their key characteristics:
| Material | Attributes |
|---|---|
| Foam | Lightweight, easy to cut and install. Can be molded into any shape. Prone to denting/damage over time. |
| PVC | Durable plastic material. Can be cut and shaped as needed. Paintable. Minimal maintenance. |
| Fiberglass | Very lightweight yet strong. Wraps are paintable. No rotting or warping. |
| Wood | Beautiful natural material that can be stained, shaped and cut. More prone to damage than synthetics. |
| Polystyrene | Rigid foam sheets are easily cut, shaped and installed. Paintable surface. |
Many faux beam products consist of a foam core wrapped in a hard shell of plastic, fiberglass or polymer. This provides realistic texture and the strength to withstand occasional bumps and scrapes. Overall, PVC and fiberglass faux beams offer the best blend of durability, strength and workability for most DIY installations.
How do you attach fake beams to a ceiling?
Installation techniques can vary slightly depending on the ceiling material and beam product you are working with. But in general, here is the process:
– Mark the beam locations on the ceiling with a pencil and use a level to ensure they will be straight.
– Cut the fake beams to the proper length with a saw. Miter the ends if they will meet in corners.
– Apply construction adhesive, caulk or liquid nails to the back surface of the beam.
– Carefully lift and hold the beams against the installation marks. You may need a helper or temporary supports.
– Use finishing nails driven through the side of the beams into the ceiling. Pre-drill holes to avoid cracking more brittle materials.
– For heavier beams, use angled metal brackets anchored into the ceiling with screws.
– Fill any gaps with additional adhesive or caulk. Ensure the beam edges are fully adhered.
– Patch over screw and nail holes with filler. Sand any rough areas.
– Prime and paint the beams to match your ceiling and decor. Faux wood beams can be stained for a natural look.
Proper prep work is key – make sure the ceiling surface is clean and smooth before installing your faux beams. Carefully measuring and leveling your beam positions will give the best final look.
What are some tips for painting fake beams?
– For the most seamless blended effect, use the exact same ceiling paint on your faux beams. Or use an off-white that matches closely.
– Foam beams will require priming with a spackling or bonding primer so the paint adheres properly.
– Lightly sand any rough spots on the beams before painting for a smooth finish.
– Use painter’s tape along the edges for clean sharp lines where the beam meets the ceiling.
– Apply two coats of paint for best coverage and durability.
– Extend the paint 2-3 inches onto the ceiling on all sides of the beams for a natural transition.
– Use brush painting for a more organic look or a small foam roller for convenience. Spray painting can leave a globby texture.
– Work in small sections and maintain a wet edge to prevent lap marks between coats.
– Paint the sides and bottom edges of the beams as well for a finished three-dimensional look.
– Consider dry brushing gray or brown paint along the bottom edges to add depth and shadow.
Proper prep, priming, taping and detailed painting techniques will help your faux beams look like an integrated part of the architecture. Take your time to do the job right.
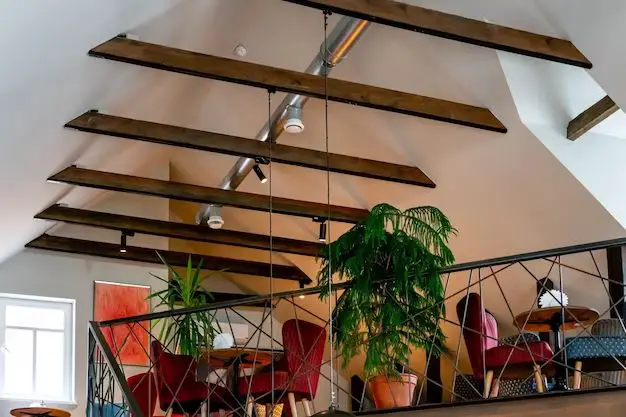
What are some creative ideas for installing fake beams?
Here are some visually interesting ways to install your faux beams:
– Angle beams diagonally across the ceiling for a dynamic look
– Install beams of varying lengths and depths for an irregular pattern
– Arrange Fake beam grids to create geometric interest
– Use thicker beams over an island or dining table as an accent
– Wrap beams around corners for cohesion between rooms
– Add decorative corbels or brackets at the ends of key beams
– Paint beams in a contrasting color to make them pop
– Install crown molding where beams meet walls for a built-in look
– Accent the ceiling with crossed beam junctions at focal points
– Combine beams with other finishes like wood planks or tin tiles
– Upgrade kitchen islands or fireplace mantels with overhead faux beams
Really think about how you can use fake beams in creative ways to enhance your room design and draw the eye around the space. Let your inner architect run wild!
What kind of lighting works well with fake beams?
Here are some lighting ideas that complement faux beam installations:
– Ambient LED track lighting or puck lights to accent each individual beam from above.
– Recessed can lights in between the beams to provide general illumination without competing visually.
– Mini pendant lights hung from the beams on short cords to highlight dining areas.
– Edison bulb string lights run along the length of the beams for a warm glow.
– Sconces mounted on the walls beside exposed faux beam ends.
– Chandeliers centered on a faux beam junction or grid pattern.
– Picture lights shining down to accent special art or architectural features.
– Wall washing floor lamps positioned to cast soft beams onto the ceiling.
The goal is to light the beams themselves while also providing adequate room lighting. A separate dimmer switch just for the beam lighting is recommended. This allows you to create a range of dramatic lighting scenes.
Should you get contractor quotes for the work?
While a skilled DIYer can often install faux beams on their own, for major beam projects on high or hard-to-reach ceilings, getting quotes from professional contractors is advisable:
Pros:
– A contractor has the experience and manpower to perfectly install beams on challenging ceiling types.
– They have access to scaffolding or lifts for tall ceilings.
– A crew can finish faster with division of labor and specialized tools.
– Licensed and bonded contractors provide insured work with warranties.
– You don’t have to rent equipment or dispose of construction waste.
Cons:
– Hiring a contractor is more expensive than DIY, especially for labor and setup fees.
– You’ll need to wait until they are available versus doing it yourself.
– Coordinating schedules with their crew can complicate your life.
– Payment must be made in full upon project completion in most cases.
If your beam project is extensive or overhead work poses safety issues, the advantages of having an insured contractor likely outweigh the downsides. Be sure to get multiple quotes. For small jobs under $500 in labor, DIY is probably more sensible if you’re reasonably handy.
What are the best tools for cutting and installing fake beams?
Having the right tools for the job will ensure safe, efficient installation of faux beams:
– Tape measure and 4′ level – For precise beam marking and leveling
– Stud finder – Locate ceiling joists/studs to secure beams properly
– Ladder or scaffolding – To reach high ceilings safely
– Electric miter saw – Make clean accurate cuts, especially for angled miters
– Jigsaw – For notching beams to fit irregular spaces
– Cordless drill and drivers – Drive screws quickly without lugging a cord
– Caulk gun – Adhesive applicators give you greater control
– Nail punch – Use to countersink finishing nails for a flat finish
– Orbital sander – To smooth rough edges and prepare for painting
– High quality paintbrushes – Angled sash brushes reach corners easily
– Drop cloths – Protect floors and furnishings from drips and spills
Avoid overextending yourself on a ladder and invest in stability aids for high ceiling work. Take your time and use the right tools to make the installation process safe and successful.
What are the costs involved with adding fake beams?
Here are typical costs associated with DIY faux beam projects:
– Faux beam materials – $5-$25 per linear foot depending on type
– Adhesives, nails, screws, brackets – $50-$150
– Paint – $50-200+ depending on primers, colors needed
– Rental fees for tools/equipment – $50-$200+
– Additional supplies – Tape, brushes, tarp, etc $50-$100
A typical 10′ x 12′ room with 5 beams averaging 8′ long would require about $500-$2000 in total materials to install, finish and paint the beams nicely. This does not include the cost of labor if hiring a contractor, which can range from $50-$200 per hour or more. Larger, more intricate beam projects easily run into the thousands. But simpler small-scale DIY jobs can absolutely be done very affordably.
What are the risks of DIY versus hiring a professional?
Doing it yourself has some advantages like saving money and learning new skills. But you also assume certain risks versus hiring a qualified pro:
– Injuries from falls, strained muscles, power tool accidents, etc. Proper safety precautions are essential.
– Messing up your ceiling surface with botched installation work, holes, cracking, etc.
– Irregular or sloppy final results from lack of experience. Achieving clean professional results takes skill.
– Wasting money and materials from mistakes or purchasing cheaper inferior products to cut costs.
– Projects dragging on for weeks due to limited work time. A pro team can complete work much faster.
– Invalidated home insurance if you don’t pull proper permits for major work.
– Possible fines for code violations you aren’t aware of. Licensed contractors ensure compliance.
Carefully weigh if the risks outweigh the cost savings of a DIY project. Protect yourself by researching thoroughly before beginning extensive faux beam installations as an amateur.
What precautions should be taken when installing fake beams?
Safety should be your top priority when working on your ceiling:
– Use tall ladders safely with a spotter – Never overextend yourself
– Wear protective goggles to avoid eye injuries from debris
– Use thick work gloves when handling rough materials
– Wear a particle mask if creating much dust from cutting
– Keep floors clear of tools and materials to avoid tripping
– Follow all power tool safety guidelines to avoid severe lacerations
– Have someone available nearby to call for help if needed
– Work slowly and carefully on scaffolding or lifts high up
– Ensure all adhesives and paint products have proper ventilation
– Never try to install very heavy beams alone – get assistance
– Install fire/smoke alarms if using flammable materials like wood
– Keep a first aid kit and fire extinguisher easily accessible
Rushing causes most accidents. Allow plenty of time and get help to lift heavy objects. Making safety your top priority will keep your project on track.
Conclusion
The addition of faux beams is an impactful design upgrade that’s quite achievable as a DIY project. With the right prep work, materials, tools and safety practices, fake wood or metal beams can be securely installed on nearly any ceiling surface to enhance visual appeal. While professional installation is ideal for ornate or challenging beam designs, a careful DIYer can successfully tackle smaller scale projects on their own. Just be realistic about your skill level, and don’t cut corners that could compromise safety or quality. At the end of the day, faux beams provide a charming architectural element that can take any room to the next level while keeping your budget grounded.