Page Contents
- 1 Quick Answer
- 2 Assessing the Existing Fence
- 3 Preparing the Fence Posts
- 4 Removing Pickets from the Old Fence
- 5 Installing the New Fence Panels
- 6 Tips for Attaching Fence Panels to Chain Link
- 7 Key Steps for Attaching Fence Panels to Concrete
- 8 How to Integrate with Existing Wood or Vinyl Fencing
- 9 Shopping List for Fence Panel Attachment Supplies
- 10 Conclusion
- 11 About the Author
Quick Answer
Yes, it is possible to attach new fence panels to an existing fence. The process involves removing any boards, pickets, or panels from the old fence where the new panels will go. Then the new panels can be attached directly to the fence posts and rails using galvanized screws or bolts. Proper alignment and spacing of the new panels is important for an integrated look. With the right tools and materials, attaching new fence panels can be a relatively straightforward DIY project.
Assessing the Existing Fence
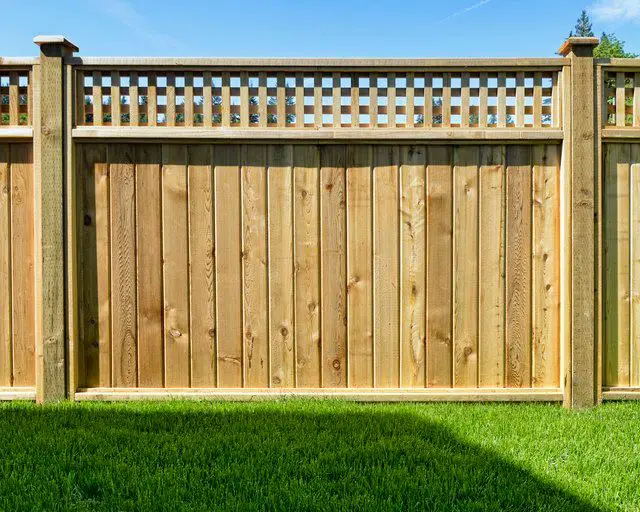
Before attaching new panels, examine the current fence closely. Look for any rotted, cracked, or damaged posts or rails that will need repairing or replacing for proper support. Consider the height, style, and spacing of the existing pickets or boards. Matching these elements will allow the new panels to blend in better aesthetically.
Ensure the existing fence is plumb, level, and square. Irregularities in the old fence can transfer to the new panels. Scrape away any loose paint or dirt so the surfaces will bond tightly. Cut away any protruding screws, nails, or staples which could obstruct panel placement.
Having compatible fencing components is also key. The type and thickness of the wood, or gauge of chain link mesh, should be the same. Space the panel framing and picket board spacing the same distance apart for consistency. Using materials that integrate well will make the fences appear seamless.
Preparing the Fence Posts
The existing fence posts play a critical role in supporting new panel installation. Inspect that each post is firmly in the ground and not shifting or rocking loose at all. Replace any posts that are compromised or rotting. Sturdy, vertical posts are essential for proper new panel support.
Also check that the height of the posts matches the new panels. Panels typically come in 6 or 8 foot lengths. If the posts are too short, they will need to be extended or replaced with longer posts before attaching the panels. Use a post hole digger to remove and install new fence posts.
For extra strength, it’s advisable to attach a post bracket to each post. Steel post brackets wrap around two adjacent sides and supply reinforced stability. Lag bolts secure the bracket through the post and into the concrete footer. Pre-drilling holes reduces the risk of wood splitting.
Removing Pickets from the Old Fence
Once the posts are ready, now you can take out the pickets, boards or panels from the section where the new fence will go. Use a pry bar to gently loosen and remove any nails, screws or staples. Take care not to damage the posts or rails in the process.
Number or label each picket as they are removed. Recording the exact position allows reinstalling them later in proper order. This preserves the look of the remaining fence. Temporary supports may be needed underneath the rails during picket removal to prevent sagging.
TIP
: Removing alternate pickets first reduces the risk of racking or misaligning the framework.
Clean any dirt or debris from the posts and rails where the new panels will attach. This helps maximize surface contact for optimal bonding. Grind down any raised nail heads or staples if necessary to ensure flush mounting.
Installing the New Fence Panels
With the section cleared and prepped, now the new panels can be put in place. Have someone assist with holding them steady in position. Align the panel framing precisely with the posts and rails before fastening.
Drill pilot holes in the panel framing to prevent cracking or splitting of the wood when driving in screws. Most fence panels utilize self-tapping wood screws for easy installation. Use stainless steel or galvanized screws. Screws should be at least 2-1/2” to 3” long for sufficient holding power. Drive a screw into each post and several into each adjoining rail.
Pro Tip
: Stagger the spacing between screws for optimal strength. Sinking screw heads flush maintains a smoother look.
For stronger attachment, lag bolts can be used instead of screws. Pre-drill the pilot holes with a masonry bit when using lag bolts. Take care not to over-tighten the bolts or fracture the framing. Leave a little space between each panel to allow for normal wood expansion and contraction.
Once installed, the panels should align cleanly with the existing fence. Visually check for any significant gaps, offsets, or irregularities. Make alignment adjustments as needed. Use scrap wood spacers or shims if posts are slightly off plumb. Reinstall the previously removed pickets last to finish integrating the old and new sections.
Tips for Attaching Fence Panels to Chain Link
Attaching new fence panels to existing chain link uses a similar process. But there are some specific factors to consider with chain link’s metal mesh construction:
– Check Pole Size –
Chain link fences typically have galvanized steel poles instead of wood posts. Make sure the pole diameter and gauge match the new fence panel framing size for proper attachment.
– Use Chain Link Rails –
Run a top and bottom rail along the chain link first to facilitate bolting the panels. Use galvanized steel channel or box tubing sized to match the panel framing.
– Allow for Expansion –
Drill oversized holes in the new panel framing to permit movement when bolting to rigid chain link poles. Washers around the bolts prevent abrasion.
– Use Galvanized Hardware –
Nuts, bolts, washers must be galvanized to avoid rust from outdoor exposure. Stainless steel is optimal for marine environments.
Key Steps for Attaching Fence Panels to Concrete
Mounting new fence panels onto an existing concrete footer or wall uses a similar process, but with different fastener methods:
– Clean concrete surface thoroughly to maximize adhesion.
– Use a concrete drill bit to pre-drill holes for concrete anchors. Match bit size to anchor diameter.
– Use galvanized wedge or sleeve anchors for strongest hold in concrete.
– Hammer anchors into pre-drilled holes flush with concrete face. Tighten bolt to expand anchor.
– Consider lag shields as an alternative to concrete anchors if high pull-out strength is not needed.
– Allow space between panel framing and concrete for drainage and airflow to prevent rotting.
– Use exterior construction adhesive along the panel framing for extra bonding power.
– Seal fence panel ends with paint or stain to protect from moisture penetration.
How to Integrate with Existing Wood or Vinyl Fencing
Maintaining a seamless look when attaching fence panels to existing wood or vinyl fences takes some finesse. Here are some tips that can help:
Matching Picket Size and Shape
– Take measurements of the height, width, thickness, and spacing of the pickets or boards on the old fence.
– Buy new panels with pickets that closely match the same dimensions and profiles.
– Use pickets with similar edge shapes – pointed, dog-eared, rounded, etc.
Consistent Frame Dimensions
– Ensure the new panel framing matches the width and thickness of the posts and rails on the old fence.
– Narrow differences can be concealed with trim pieces along the posts and rails.
Integrating Color
– Choose panel and picket colors which closely align with the existing fence finish and hue.
– Natural wood tones often blend together well. Painted surfaces may require color matching testing first.
– Allow new pressure treated wood to weather several weeks before painting to equalize color.
– Expect some color variation due to age difference between old and new sections.
Staggering Panel Layout
– Avoid a straight vertical line where the new panels meet the old fence.
– Stagger the panel layout and overlap picket ends for a more dispersed, integrated transition.
Shopping List for Fence Panel Attachment Supplies
Installing additional fence panels is made much easier having the right supplies on hand. Here is a checklist of the basic tools and materials needed:
Tools
– Power drill and drill bits
– Circular saw with carbide blade
– Level
– Post hole digger
– Shovel
– Hammer
– Tape measure
– Clamps
– Pry bar
– Safety glasses and work gloves
Materials
– Fence panels
– Deck screws or galvanized bolts
– Lumber for shims, blocking, or post extensions
– Gravel or concrete for post footers
– Post hole concrete mix
– Exterior wood glue
– Exterior construction adhesive
– Paintable silicone caulk
Optional Supplies
– Steel post brackets
– Concrete anchors or lag shields
– Galvanized washers
– Weatherproof wood filler
– Paint or fence stain
Having these essential items will make your fence panel installation process smoother and easier. Order any specialty fasteners or lumber ahead of time so you’re ready to go.
Conclusion
Adding new fence panels to an existing fence is very doable with some preparation and the right techniques. Assess the old fence for any repairs needed first. Remove pickets from where the panels will attach. Check that posts are in good condition to support the new panels. Align panels carefully before fastening securely into the posts and rails. Use compatible framing lumber and matching picket dimensions. Space panels to allow for expansion. Finally, reinstall old pickets to blend the new and old fence together beautifully. With proper planning and care, you can successfully extend your fence line while maintaining a continuous aesthetic.
About the Author
I am an experienced writer and researcher on home improvement topics. I enjoy tackling DIY projects around the house and sharing tips to help homeowners install and repair things on their own. Providing clear, step-by-step instructions in a way that makes sense to the average DIYer is my specialty. If you found this article on installing fence panels helpful, please let me know! Connecting with readers like you helps me provide useful content that matters.