Yes, it is possible to create a knockdown texture on walls using a roller instead of a spray gun. Knockdown texture provides a lightly textured, orange-peel type finish that helps hide imperfections on walls and ceilings. While spray equipment provides the most consistent results, knockdown texture can be rolled on using some careful techniques.
Page Contents
What is Knockdown Texture?
Knockdown texture, also sometimes called popcorn texture, refers to a wall or ceiling finish that has a lightly bumpy, orange-peel type texture. It is created by spraying on a mud-like material made of drywall joint compound thinned with water. Immediately after spraying, the texture is knocked down or flattened using a wide drywall knife or trowel to give it its characteristic rounded, flattened bumps.
Knockdown texture helps hide imperfections in drywall. It also provides visual interest and depth on plain wall and ceiling surfaces. The flattened bumps reflect light differently than a smooth surface, creating a mottled effect.
This bumpy texture finish has been popular for walls and ceilings for decades, both in residential and commercial spaces. It provides a lightly textured look that is softer than some other spray textures like popcorn or acoustic ceiling textures.
Benefits of Using a Roller for Knockdown Texture
While knockdown texture is usually created by spraying on a thinned mud mixture, it’s also possible to replicate the texture using a paint roller. Here are some of the benefits of using a roller vs a spray texture gun:
- Easier for DIYers – Texture spray guns require some skill to use properly. Using a roller is easier for DIYers or inexperienced pros.
- Less messy – Overspray can create a lot of mess with spray equipment. Roller application contains the mess.
- No compressor required – Texture sprayers need an air compressor to run. Rollers just need simple painting supplies.
- Better for small jobs – It’s easier to roll smaller areas than to set up spray equipment.
- More control – Rolling on the texture allows you to better control the coverage and thickness.
For large jobs or ceilings, a texture sprayer is still the best approach. But for smaller DIY projects or walls, using a roller can be an effective alternative.
How to Roll On Knockdown Texture
Here is a step-by-step guide to applying knockdown texture with a roller:
1. Prepare the wall surface
Make sure the drywall surface is properly prepared and primed before application. Fix any dents or imperfections. Sand glossy surfaces to ensure proper adhesion. Remove dust.
2. Mix the texture compound
In a bucket or roller pan, thin down pre-mixed drywall joint compound with water following the manufacturer’s instructions. The mixture should be the consistency of a thick paint to roll on properly.
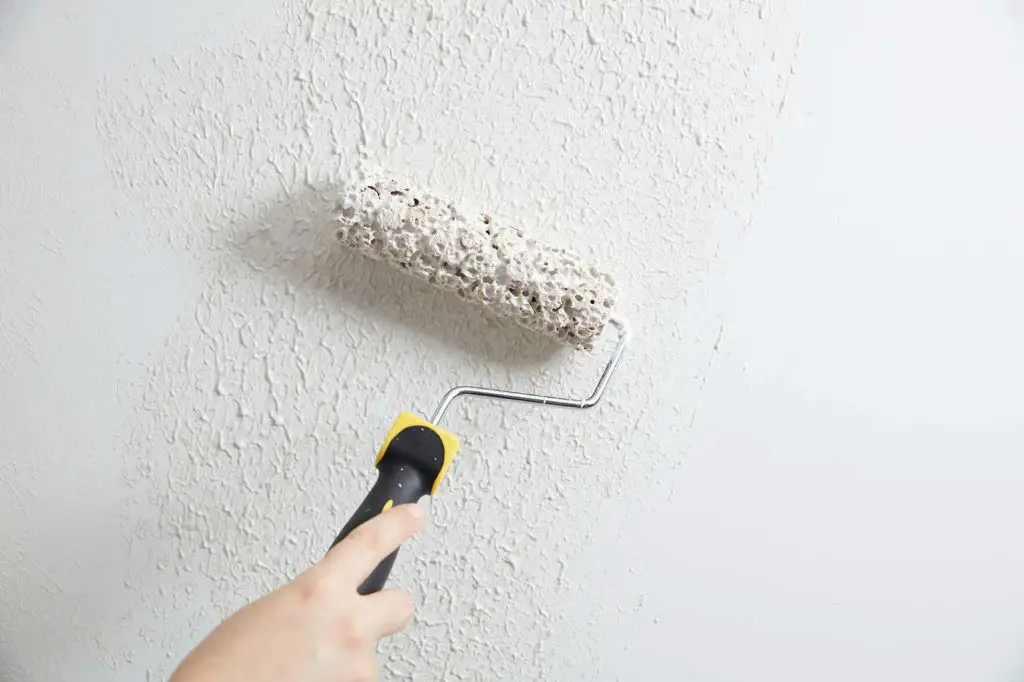
3. Load the roller with texture mix
Completely saturate the roller cover in the prepared texture mix so it holds a good amount. An open-style roller cover with a 3/4″ nap usually works best.
4. Roll on the texture
Begin rolling on the thinned joint compound in random directions, being careful not to create any distinct patterns. Overlap passes and reload the roller as needed to build up the desired texture thickness. The texture should be applied in layers, allowing time in between for it to partially dry.
5. Knock it down
Once the texture thickness looks good, allow it to sit for 5-10 minutes so it firms up slightly. Then use a wide drywall knife or trowel to gently knock down any high points in the texture. Work systematically across the surface. The goal is to flatten the texture while still leaving bumps and divots for the knockdown look.
6. Let it fully dry
Allow the texture to dry overnight before painting or doing any finishing work. Drying time will vary based on temperature, humidity, and thickness.
7. Prime and paint
Once dry, apply a coat of drywall primer formulated for textured surfaces. This helps the paint adhere properly. Then apply at least two finish coats of interior paint in the desired color.
Tips for Rolling Knockdown Texture
Here are some helpful tips to get great results rolling on knockdown texture:
- Test your technique on cardboard or an inconspicuous area first.
- Wear protective eyewear and clothing – texture mix can splatter.
- Load the roller fully to apply enough texture with each pass.
- Apply thicker texture for dramatic knockdown, or thinner for a subtle look.
- Knockdown in the same direction for a uniform finish.
- Feather out edges by rolling over them again lightly after knockdown.
- Let each layer dry partially before applying the next layer.
- Make sure the mix is fully dry before priming to prevent bubbling.
Common Problems and Solutions
Here are some common issues that may arise with roller-applied knockdown texture and how to prevent them:
| Issue | Cause | Solution |
|---|---|---|
| Uneven texture | Rolling in distinct patterns | Roll in random directions without a set pattern |
| Too thin/weak texture | Mix ratio off or not enough layers | Ensure proper mix consistency and build adequate thickness |
| Texture falling off | Surface not prepped or primed properly | Sand surface smooth and apply primer before texturing |
| Flaking when painting | Not fully dried before priming/painting | Allow thicker areas to dry overnight before finish coating |
| Hard texture ridges | Not knocked down consistently | Carefully scrape down all high points after application |
Advantages of Knockdown Texture
Here are some of the benefits that make knockdown texture a popular wall and ceiling finish:
- Hides imperfections – The bumpy texture helps conceal flaws in drywall joints or damage.
- Visual interest – It adds natural depth and dimension to plain flat walls and ceilings.
- Easy to create – It can be applied by both homeowners and professionals with minimal equipment.
- Durable – Properly applied knockdown texture is long-lasting and hardwearing.
- Light diffusion – The texture helps scatter light to prevent harsh reflections.
- Versatile – Can be applied heavily or subtlely for different looks, from rustic to refined.
- Low maintenance – Does not require special cleaning – just occasional dusting or vacuuming.
For these reasons, knockdown remains a sought-after wall and ceiling finish for many residential and commercial spaces today.
Best Applications for Knockdown Texture
Knockdown texture works well in many different rooms throughout a home or building. Here are some of the best applications for knockdown walls and ceilings:
- Living rooms – Provides laidback, casual feel in main living areas.
- Bedrooms – Soft, understated look helps relax and unwind.
- Dining rooms – Rustic vibe fits with many dining aesthetics.
- Entryways – Immediately introduces a textural element in foyers.
- Bathrooms – Moisture-resistance makes it ideal for humid bathroom conditions.
- Kitchens – Stands up to knocks and scrapes around busy kitchens.
- Hallways – Distracts from flaws in high-traffic common areas.
- Offices – Provides subtle visual interest without being overly distracting.
- Media rooms – Helps absorb sound in home theaters.
Knockdown can work in any room but really shines when used thoughtfully to enhance specific spaces based on their size, lighting, use, and overall aesthetics.
Conclusion
Knockdown texture provides a timeless, versatile way to add natural character to any residential or commercial space. While traditionally applied with spray equipment, it can also be rolled on using some simple techniques for smaller DIY projects or when spray application is not an option. With the right wall prep, mixing, rolling, and knockdown technique, even homeowners can learn how to apply flawless knockdown texture.