Filling a hole in the ceiling can seem daunting, but with the right materials and some basic DIY skills, it is often a straightforward task. In this article, we will go over the steps for filling common ceiling holes, things to consider before starting, and tips for achieving the best results.
Page Contents
- 1 What causes holes in ceilings?
- 2 Should you repair ceiling holes yourself?
- 3 How to fill a small ceiling hole
- 4 Tools and materials needed
- 5 Step 1: Prepare the hole
- 6 Step 2: Measure and cut the drywall patch
- 7 Step 3: Secure the patch
- 8 Step 4: Apply joint compound
- 9 Step 5: Finish with a third coat
- 10 Step 6: Prime and paint
- 11 Tips for patches that blend seamlessly
- 12 When to call a professional
- 13 Fixing other common ceiling damage
- 14 Conclusion
What causes holes in ceilings?
There are a few common causes of holes developing in ceilings:
- Installing or removing light fixtures
- Electrical work for switches, outlets, wiring etc.
- Plumbing repairs or installing new pipes
- Ventilation work like installing bathroom fans or range hoods
- General home repairs and renovations
- Settling of the house over time
When these types of projects require access to the space above the ceiling, it often results in holes or gaps that need patching afterwards. Additionally, normal shifts in the structure of a house over decades can cause cracks and holes to form. Keeping an eye out for small holes as they develop and repairing them quickly is important to prevent larger collapses or damage.
Should you repair ceiling holes yourself?
For small holes, filling them is generally a straightforward DIY project. However, there are a few factors to consider before determining if you should tackle ceiling hole repairs yourself:
- Location of the hole – Holes directly above a staircase or high traffic area may be riskier for a DIY project.
- Size of the hole – Large holes, especially those over 1 foot wide, are best handled by professionals.
- Cause of the hole – If the hole is caused by a leaking pipe or other leak, the source of the leak needs to be addressed first.
- Accessibility – Being able to safely reach the hole from a ladder or scaffold is key.
- Complexity – Holes around lights, vents or wiring may require working around other elements.
- Your DIY experience – If you are very inexperienced with drywall repairs, you may want to hire a professional.
For simple, accessible holes under 1 foot wide, a DIY repair is likely feasible as long as you have the right materials and take safety precautions.
How to fill a small ceiling hole
Here is an overview of the basic process for filling a minor ceiling hole yourself:
- Clear the area around the hole so you have room to work and get stable ladder access. Turn off power if working around light fixtures.
- Use a utility knife to cut any loose drywall edges so the hole has clean 90 degree angles.
- Measure the hole then cut a drywall patch slightly larger than the hole dimensions.
- Secure the patch in place with drywall screws driven into the joists or ceiling anchors.
- Apply joint compound over the seams and screws and let dry.
- Apply a second and third coat of joint compound, feathering and smoothing each out wider.
- Sand the final coat smooth and wipe away dust.
- Prime and paint the patch to match the ceiling.
It is important to take safety precautions when working on a ladder and to follow all manufacturer’s instructions when using materials like joint compound. But with some care and patience, these steps can be used to fill many minor ceiling holes.
Tools and materials needed
Here are the basic tools and materials you will need to fill a ceiling hole:
- Ladder
- Safety equipment – goggles, mask, gloves
- Utility knife
- Drywall saw
- Measuring tape
- Pencil
- Drywall screws
- Drywall anchors or butterfly anchors if not hitting a joist
- Drywall patch material – sheets or drywall repair clips
- Joint compound
- Joint tape if the hole is over seams
- Putty knife
- Sandpaper
- Dust mask
- Prime paint
- Ceiling paint
Joint compound, anchors, patch pieces and tools can all be found at your local hardware store. Make sure to get paint in a color that matches your existing ceiling.
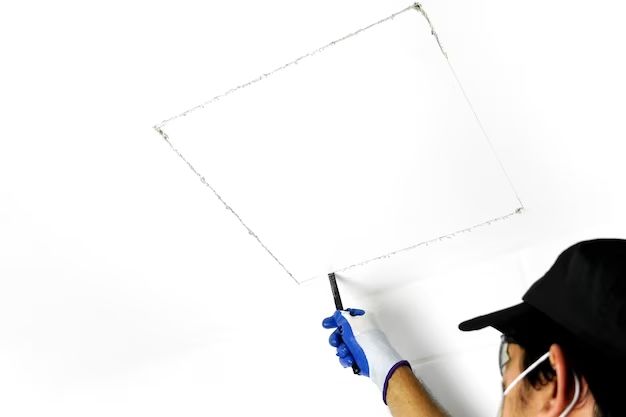
Step 1: Prepare the hole
Before cutting any drywall, make sure the power is disconnected if you are working around light fixtures or wiring. Then thoroughly clear the area of any items, furniture or debris so you have room to move around safely.
Use a drywall saw to cut the ragged gypsum edges of the hole into clean 90 degree angles. This helps the patch sit flush to the existing ceiling. Cut away any loose drywall or material back to where the drywall is firmly attached.
Use a vacuum to clear away any dust or debris before beginning repairs.
Step 2: Measure and cut the drywall patch
Measure the length and width of the ceiling hole and add 2-4 inches to each measurement. Cut a drywall patch to these dimensions out of new drywall material using a utility knife and straightedge.
The patch should be larger than the hole on all sides to allow room for the joint compound. For smaller holes under 3 inches, you can use drywall repair clips instead of a full drywall sheet patch.
Step 3: Secure the patch
If the hole borders a ceiling joist, you can secure the patch right to the wood with drywall screws. For areas between ceiling joists, use hollow drywall anchors and screws to hang the patch instead.
Drive screws into the solid drywall around the hole perimeter, not just the center, so the patch is evenly and firmly attached. The screw head should sit slightly below the surface of the patch material.
Step 4: Apply joint compound
Use a putty knife to apply a layer of joint compound over the seams around the patch and drywall screw holes. Feather out the compound several inches beyond the patch edges.
Let the joint compound fully dry as directed by manufacturer instructions, usually 24 hours. Then apply a second coat, extending the feathering out even farther with this layer.
Step 5: Finish with a third coat
After the second coat dries, apply one final thin coat focused just over the seams to hide any indentations. Feather the edges of this coat to create a smooth blend with the existing ceiling.
Let the joint compound dry fully before sanding. Use light sanding with fine grit sandpaper to smooth the patch area. Then wipe away all dust with a dry cloth.
Step 6: Prime and paint
Lightly prime the sanded patch and let the primer dry fully. Then apply two finish coats of ceiling paint, allowing each to dry between coats. Paint using a small paintbrush and paint roller, feathering the fresh paint several inches beyond the primed patch area.
Make sure to match the ceiling color as closely as possible. Maintain consistent lighting while the paint dries to ensure an even color across the patched area.
Tips for patches that blend seamlessly
Here are some additional tips to help your ceiling hole patch blend in seamlessly:
- Use joint tape for patches over drywall seams to prevent cracks.
- Thin batches of joint compound slightly with water for easier feathering.
- Avoid applying too much compound over screw holes to prevent lumpiness.
- Sand lightly between coats for better adhesion.
- Prime using high quality drywall primer before painting.
- Use a small paintbrush to work paint into the edges.
Take your time applying multiple thin coats of compound and sanding between layers. Patience leads to the smoothest finish.
When to call a professional
While minor ceiling holes are a good DIY project, there are times it is best to call a professional:
- If the hole borders a joist but you are unable to access the area above the ceiling for repairs.
- For holes or cracks larger than 12 inches across.
- If you need to cut joists or framing to access the hole area.
- If the hole may have been caused by a leak that requires further investigation.
- If the ceiling drywall is sagging, water damaged or shows signs of mold.
- For popcorn style heavily textured ceilings.
- When working around delicate wiring, ductwork or plumbing.
A professional can determine any underlying issues causing damage and has tools to cut precise drywall patches and work in tight spaces. They can also match heavily textured ceilings.
Fixing other common ceiling damage
In addition to holes, cracked or peeling drywall tape joints are another common ceiling repair needed. Here is how to fix ceiling drywall tape issues:
- Use a utility knife to cut away any loose drywall tape or compound.
- Remove any remaining material and roughen the drywall underneath with sandpaper.
- Wipe away dust then apply new joint tape over the seam.
- Apply a thin layer of joint compound over the tape.
- Let dry fully then apply a second coat, feathering it out wide.
- Apply a final thin finishing coat just over the seam and blend edges.
- Sand once fully dry then prime and paint.
Pay attention to any seams or edges that are cracked or peeling regularly. Addressing issues early makes repairs much simpler.
Conclusion
Repairing minor holes and damage yourself can save on expensive professional repairs. With some patience, the right materials and safe work practices, you can successfully patch ceilings and prevent further damage. Pay attention to any warning signs like continuing leaks or expanding cracks which require further investigation. But for most basic ceiling repairs, the process is straightforward. Just take your time feathering and smoothing the joint compound until the patch blends seamlessly into the ceiling surface.