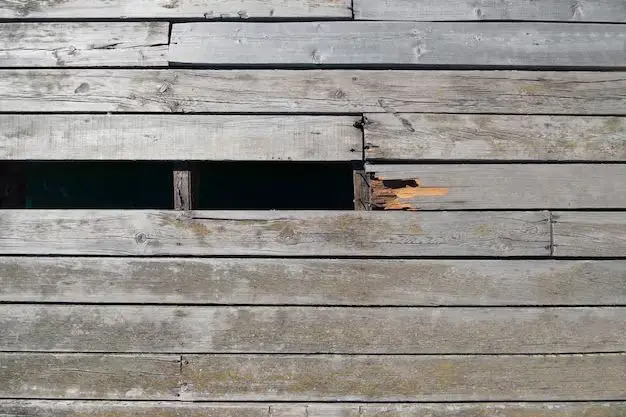
Yes, it is possible to fix a hole in a hardwood floor. Hardwood floors are durable and long-lasting, but damage and wear still occur over time. Holes in hardwood floors can happen due to drops, furniture legs, pets, high heels, and more. While holes may seem daunting to repair, there are several effective methods for fixing them and restoring your hardwood floor. With the right materials, tools, and techniques, you can fill holes in hardwood and make them look like new again.
Page Contents
Causes of Holes in Hardwood Floors
There are several common causes of holes developing in hardwood flooring:
Furniture Legs
The constant weight and pressure from furniture legs can gradually cause dents and holes in hardwood floors. Areas under tables, couches, beds, and chairs are particularly susceptible. Using felt pads under furniture legs can help prevent this damage.
Pet Claws
Dogs and cats walking across hardwood can lead to scratched surfaces and punctured holes from their claws. Keeping pets’ nails trimmed can reduce scratches and holes.
High Heels
Walking on hardwood floors in stiletto or narrow high heels concentrates a lot of pressure in a small area. Over time, heels can puncture holes in flooring. Wearing lower heels or booties indoors minimizes damage.
Falling Objects
Items dropped on a hardwood floor, like tools, dishes, toys, etc. can chip or puncture the wood surface upon impact. Larger/heavier falling objects create bigger holes.
Moisture Damage
Excessive moisture from spills, pets, plants or leaks can warp hardwood planks and cause them to lift or develop holes. Keeping moisture away from hardwood is key.
General Wear & Tear
With decades of walking, moving furniture, etc. general wear and tear takes a toll on hardwood floors over time. High traffic areas eventually develop worn spots and holes.
Tools and Materials Needed
Fixing a hardwood floor hole requires using the right tools and materials for the job. Here are the typical supplies needed:
Putty Knife
A putty knife assists with applying wood filler into the hole and removing excess. Opt for a knife with a blade at least 2 inches wide.
Wood Filler
Wood filler, sometimes called plastic wood, is specifically designed to repair hardwood damage. Pick a filler that matches your floor’s wood color.
Sandpaper
After the filler dries, use sandpaper to smooth and blend it level with the existing floor. Pick varying grits like 80, 100 and 120.
Rubber Mallet
If the hole is near a floorboard seam, gently tapping planks with a rubber mallet can help re-secure any loosened boards.
Wood Plugs
For a hole wider than 3 inches, you may need to cut and glue in a wood plug to match the surrounding floor planks.
Wood Glue
Wood glue adheres replacement wood plugs into the floor hole. Opt for waterproof PVA glue. Cure the glue fully before sanding.
Touch-up Stain
Using stain that matches the floor color helps blend repairs. Apply over fillers and plugs before the final protective coat.
Polyurethane
Applying a clear polyurethane coat over the repair protects the area and gives an even sheen. Use the same finish as on your existing floor.
Step-by-Step Directions
Fixing a hardwood floor hole involves a process of cleaning, filling, sanding and refinishing. Here is a step-by-step guide:
Step 1 – Clean and Prepare
Use a vacuum and cloth to remove any dirt or debris from the damaged area. Make sure the hole is completely clean and dry before filling. For stubborn dirt, use a wood cleaning product recommended for your floor type.
Step 2 – Fill the Hole
For small holes under 3 inches wide, fill using wood filler. Press the filler into the hole with a putty knife, overfilling slightly. Let the filler dry and harden completely per the manufacturer instructions, usually about 8-12 hours. The filler will shrink slightly as it dries.
Step 3 – Sand the Filler Down
Once dry, use 80-grit sandpaper to sand the excess filler down level and smooth with the surrounding floor. Then use 100-grit and 120-grit sandpaper to blend and feather out the edges. Sweep up dust as you work.
Step 4 – Stain the Area
If your floor has a stained finish, apply stain matching the color over the filler using a small foam brush. Let the stain dry completely before continuing.
Step 5 – Apply Protective Coat
Use a clean cloth to apply 2-3 thin coats of polyurethane over the repair and slightly beyond, allowing drying between coats. This seals the area and gets an even sheen.
Step 6 – Inspect and Clean Up
Once the finish has fully cured, inspect the area from multiple angles. Make any touch-ups needed. Vacuum dust and debris and you’re done! Enjoy your hole-free floor.
Filling Larger Holes
For holes larger than 3 inches across, wood filler alone is not sufficient. Larger holes require cutting and installing a replacement wood plug:
Step 1 – Measure the Hole
Use a ruler to measure the length and width of the hole at widest points. Transfer these dimensions to an index card or piece of cardboard.
Step 2 – Trace the Hole Shape
Place the cardboard over the hole and use a pencil to carefully trace an outline following the hole edges. This creates a template.
Step 3 – Cut the Replacement Plug
Use the template to mark and cut a wood plug from a flooring plank leftover or salvaged wood. Cut slightly oversized.
Step 4 – Glue in the Plug
Apply wood glue around the hole edges and on the plug. Insert the plug into the hole, tapping gently with a rubber mallet. Wipe excess glue.
Step 5 – Trim the Excess
Once glue is dry, use a handsaw to trim any excess plug sticking above the floor surface. Sand until smooth and even with the floor.
Step 6 – Stain & Finish
Stain and apply protective coats over the plug and surrounding area, as with smaller hole repairs. Blend and smooth edges.
Hardwood Floor Hole Repair Tips
Follow these tips for great results filling hardwood floor holes:
Match Wood Type
Use the same species of wood as your existing floor for any replacement plugs, if possible. This ensures the closest color, grain and texture match.
Work With the Wood Grain
Position replacement wood plugs oriented with the wood grain running in the same direction as surrounding boards. This maintains visual consistency.
Leave Drying Time
Allow adequate time for all repairs to fully dry before sanding or finishing. Rushing the process can lead to gummy surfaces, poor adhesion or texture irregularities.
Blend Edges Gradually
When sanding repairs, create a slight taper from the filler or plug down to the surrounding floor level. This helps transitions appear seamless.
Add Protective Padding
Use felt pads on table and chair legs in repaired areas to prevent premature wear or re-damage. Limit use of narrow high heels.
Consider Refinishing Entire Floor
For multiple repairs or very worn floors, talk to a flooring professional about sanding and refinishing the entire floor for best results.
When to Call a Professional
While DIY hardwood floor hole repair is possible, there are some cases where you may want to hire a professional flooring contractor:
- Holes larger than 4 inches across
- Multiple holes very close together
- Damage over 25% of floor area
- Replacement wood not matching existing flooring
- No experience with wood floor repairs
- Concerns over mess or project timeline
- Need for major sanding or refinishing
Flooring pros have specialized tools, materials and skills to handle more extensive damage or challenging repairs. Their expertise can ensure repairs are structurally sound and blend seamlessly. Get quotes from at least 3 contractors before hiring.
Cost to Repair Hardwood Floor Holes
The cost to repair holes in hardwood floors depends on factors like hole size, flooring quality, number of holes and DIY skills. Some typical repair cost estimates:
| Repair Type | Average Cost Range |
|---|---|
| Small Hole with Wood Filler | $10 – $30 |
| Large Hole with Wood Plug | $30 – $70 |
| Multiple Holes | $100 – $500 |
| Professional Repair Service | $200 – $1000+ |
DIY repairs provide significant savings over hiring flooring contractors. But pros may be needed for tricky, intricate damage or refinishing tasks.
Preventing Holes in Hardwood Flooring
Avoiding holes and damage to begin with is the best approach for hardwood floor care:
- Use area rugs in high traffic zones
- Keep pet nails trimmed short
- Immediately clean up spills and moisture
- Place protective pads under furniture legs
- Sweep regularly to prevent gritty buildup
- Avoid walking in very high heels
- Pick up items instead of sliding them across the floor
- Rearrange furniture and rotate area rugs periodically
With vigilant care and maintenance, you can help your hardwood floors last for decades hole-free. But if damage does occur, repairs are very doable using the techniques outlined above. With a little patching and refinishing, holes can disappear and restore your floor back to its original beauty.
Conclusion
Holes in hardwood floors can happen but don’t need to be an eyesore or ruin your flooring. With the right filler products, touch up stains and clear coat finishes, holes can be patched and blended seamlessly. Small holes under 3 inches can be filled with colored wood filler putty, while larger holes require cutting and gluing custom wood plugs. Refinishing repairs to match the surrounding floor results in a hole-free floor. Preventative care like padding furniture legs also helps minimize damage and holes over the long-term.