Yes, it is possible to fix deep scratches in wood. There are several methods that can be used depending on the severity and location of the scratches. The most important thing is to properly prepare the scratched area before attempting any repairs.
Page Contents
- 1 What causes deep scratches in wood?
- 2 How deep is too deep to repair?
- 3 How to prepare deep scratches for repair
- 4 Filling shallow scratches
- 5 Wood fillers for deep scratches
- 6 Using wood filler to repair deep scratches
- 7 Filling severe deep gouges
- 8 Fixing Finish Damage from Deep Scratches
- 9 Preventing Deep Scratches in Wood
- 10 Conclusion
What causes deep scratches in wood?
There are a few common causes of deep scratches in wood:
- Dragging heavy or sharp objects across the wood surface – Furniture legs, tools, etc can dig into the wood as they are dragged across, leaving behind scratches.
- Pet claws – Cat and dogs claws can cause deep gouges and scratches in wood floors and furniture.
- Furniture impressions – The pressure from furniture legs resting in one spot for a long time can indent and scratch the floor over time.
- Sanding mistakes – Using too coarse of sandpaper or applying too much pressure can rapidly scratch and gouge wood.
- Weather damage – Temperature changes and moisture can cause wood to expand and contract, leading to cracks and checking that allows scratches to form more easily.
How deep is too deep to repair?
Light surface scratches less than 1/32″ (0.8 mm) deep can be repaired with simple furniture markers and touch up pens.
Moderately deep scratches between 1/32″ – 1/16″ (0.8 – 1.6 mm) can be sanded and refinished to effectively remove the scratch.
Very deep scratches more than 1/16″ (1.6 mm) deep are difficult to fully repair, but can be improved through filling and refinishing. The deeper the scratch, the more difficult it will be to blend the repair with the surrounding wood.
For scratches that have penetrated through veneers and into substrate material, extensive repairs will be required involving patching and replacing the damaged wood.
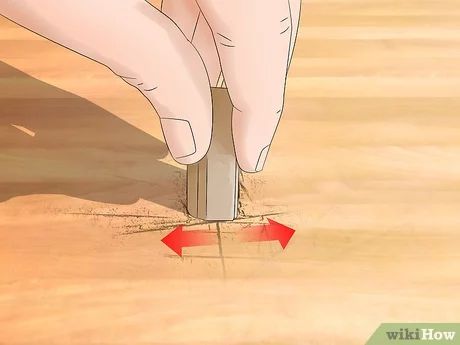
How to prepare deep scratches for repair
Proper preparation is crucial for achieving the best results when fixing deep scratches in wood. Here are some tips:
- Clean the area – Remove any dirt, debris, wax, or finish from the scratched area using denatured alcohol applied with a cloth.
- Sand scratches lightly – Use 220 grit sandpaper to sand the length of the scratches to remove loose edges and create a surface for the filler to adhere to.
- Avoid rounding over scratches – Be careful not to sand too aggressively so that the scratch edges get rounded over. You want to maintain a clean edge.
- Wipe clean after sanding – Use a vacuum and clean cloth to remove all sanding dust from the scratched area and surrounding wood after sanding.
- Mask surrounding area – Apply painters tape around the scratched section to prevent accidentally repairing finish on good wood.
Properly prepping the damaged area is the most important step for an effective wood scratch repair. Always take time to clean, sand, and mask off the scratches before attempting to fill them. Rushing this step can ruin the final repair results.
Filling shallow scratches
For light surface scratches less than 1/32 inch (0.8mm) deep, you likely won’t need to use wood filler. These shallow scratches can often be concealed using:
- Wood touch up markers – Markers that blend with the wood color can disguise light scratches.
- Furniture repair crayons – Crayons can fill and color light scratches for a seamless appearance.
- Colored wax sticks – Rubbing colored wax over scratches can fill and mask their appearance.
- Fine tip paint pens – For narrow hairline scratches, fine point pens in matching colors work well.
When using any of these methods, apply them sparingly and wipe off any excess. You want to just fill the scratch rather than overlapping a lot of coloring onto the surrounding wood.
Applying wood filler
For deeper scratches between 1/32″ – 1/16″ (0.8 – 1.6mm), a wood filler putty is needed to properly fill in the damaged wood. Here are some application tips:
- Use a putty knife – A flexible putty knife allows you to press filler down into the scratch.
- Apply in thin layers – Build up thin layers, allowing each to dry before adding more. Avoid thick globs.
- Overfill slightly – Apply 10-20% more filler than needed to account for shrinkage as it dries.
- Allow proper cure time – Give the filler at least 8-12 hours to fully cure before sanding.
- Sand smooth – Use 220 grit paper to smooth the dried filler flush with surrounding wood.
Applying wood filler properly takes some finesse. It’s important to tightly pack the filler into scratches while avoiding excess overlap on good wood.
Wood fillers for deep scratches
Not all wood fillers are ideal for deep scratch repairs. For best results, use a high performance epoxy wood filler or two part wood filler. Here are some good options:
Two part epoxy wood fillers
- PC Woody – Formulated for deep repairs up to 1⁄2″ deep.
- Abatron WoodEpox – Low odor epoxy putty for gaps up to 1” wide.
- Bondo Wood Filler – Strong two part epoxy, dries very hard for deep damage.
Epoxy wood fillers bond tenaciously to damaged wood while drying very hard. The two part formulas are ideal for filling and rebuilding deep scratches and gouges.
Synthetic wood fillers
- Famowood Glazing Putty – Builds quickly for filling deep scratches.
- Elmer’s Carpenter’s Wood Filler – Excellent sandability when dry.
- Minwax High Performance Filler – Stainable filler for color matching repairs.
Synthetic wood fillers based on acrylic, epoxy, or lacquer work well for deeper repairs up to 1⁄4 inch deep. They sand easily when cured and accept stains to help blend repairs.
Natural wood fillers
- Durham’s Water Putty – Natural cellulose based putty.
- Elmer’s Natural Wood Filler – Made from real pine wood fibers.
- Sculpt Nouveau WoodPatch – Powder and liquid activator kit.
Natural wood fillers made from cellulose or actual wood particles provide good results for deep scratches without plastics. They require careful sanding when dry to smooth and blend repaired areas.
Using wood filler to repair deep scratches
Here is a step-by-step process for properly filling deep scratches with wood filler:
- Clean and lightly sand the damaged area.
- Force wood filler deeply into the scratches using a putty knife.
- Overfill the scratches slightly with the filler.
- Allow to fully cure overnight before sanding.
- Use 220 grit sandpaper to smooth the filler flush with the wood.
- Vacuum sanding dust and wipe clean.
- Apply desired finish coatings to the repaired area.
- Gently blend finish into surrounding wood to match sheen.
The key is packing the wood filler tightly into the scratches so it bonds well. Sanding carefully when dry provides a smooth surface for recoating to blend the repair.
Filling severe deep gouges
For very deep scratches or gouges that penetrate over 1/16 inch into the wood, more extensive repairs may be required:
- Damaged wood may need to be patched with wood filler.
- Filler application in layers may be needed for a smooth finish.
- Epoxy consolidants can stabilize badly damaged wood.
- Wood pieces or splines may need to be fitted into the gouge.
- Extensive sanding and finish work is needed to blend repairs.
Major gouges with missing wood require rebuilding the damaged section using wood putty, fitted patches, or fillers combined with epoxy adhesives. These severe repairs also need careful finish sanding and blending of coatings.
Using filler and paint for bad scratches
If the wood is scratched completely through the finish exposing raw wood, using wood filler and paint is another option:
- Fill deep scratches and gouges with wood filler as normal.
- Sand smooth when dry and wipe away dust.
- Spot prime if bare wood is exposed before painting.
- Apply paint coat over repairs to match color.
- Blend paint into surrounding finish.
The painted filler helps integrate repairs into the existing finish for improved concealment. This works well if the scratches are too severe to realistically match the stained or clear coated wood.
Fixing Finish Damage from Deep Scratches
In addition to physically filling deep scratches in the wood, the finish coatings will also need to be repaired:
- Filled areas will need finish reapplied.
- Sand and feather out finish around scratches to smooth.
- Spot finish repaired areas to match sheen.
- Apply finish topcoats evenly over repairs as needed.
- Gently blend finish repairs into surrounding good finish.
Properly blending the repaired finish helps conceal visible scratch lines after the wood is filled. Take care not to overlap finish onto good areas.
Finish Options for Refinishing Scratches
| Finish Type | Products to Use |
|---|---|
| Oil-Based Polyurethane | Minwax, Varathane, Minwax Fast-Drying Polyurethane |
| Water-Based Polyurethane | Minwax Water Based Oil-Modified Polyurethane, Varathane Premium Water-Based Polyurethane |
| Wax Finish | Howard Feed-N-Wax, Minwax Paste Finishing Wax |
| Shellac | Zinsser Bulls Eye Shellac, KILZ Klear Multi-Surface Water-Based Sealer |
Choose a finish product that matches or is compatible with the existing wood finish. Test in an inconspicuous area first.
Preventing Deep Scratches in Wood
While scratches can be repaired, it’s better to prevent them from happening in the first place whenever possible:
- Use furniture pads and felt protectors under heavy furniture.
- Lift objects when moving instead of sliding.
- Keep pet nails trimmed to minimize scratching.
- Avoid abrasive cleaners that can damage finishes.
- Apply finish topcoats annually to protect from wear.
- Remove shoes with exposed metal taps or cleats before walking on wood.
With some care and maintenance, you can help keep wood flooring and furniture looking scratch-free for years. But when damage does occur, there are effective methods to make repairs.
Conclusion
Deep scratches in wood can be repaired through filling, sanding, refinishing, and blending repaired areas into the surrounding wood. For best results:
- Properly clean and prepare the damaged wood before filling.
- Use high performance epoxy or synthetic wood fillers for deeper repairs.
- Force filler deeply into scratches and allow full curing time before sanding.
- Carefully sand dried filler smooth and flush with the existing wood.
- Spot apply finish coats over repairs and blend into surrounding good finish.
With some patience and finessing of techniques, even very deep wood scratches can be minimized for improved appearance and enjoyment of wood surfaces. Proper prep work, using the right fillers, sanding smoothly, and blending finishes are the keys to success.