Page Contents
- 1 Quick Answer
- 2 The Role of Grout in Tile Installation
- 3 Problems When Installing Marble Tile without Grout
- 4 Exceptions Where Grout May Not be Necessary
- 5 Grouting Options for Marble Tile
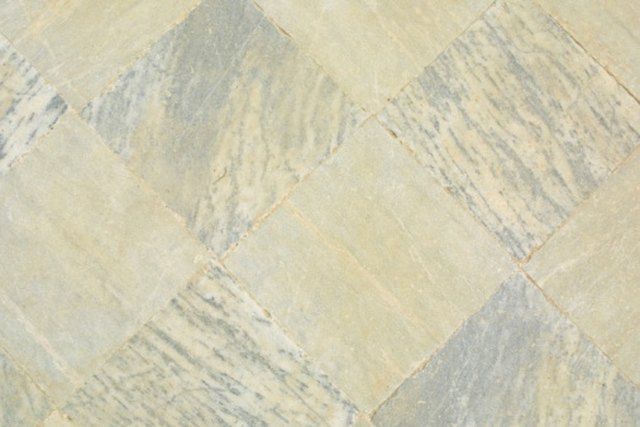
- 6 Marble Tile Installation Process
- 7 Maintenance for Ungrouted Marble Tile
- 8 Hiring a Professional for Marble Tile Installation
- 9 Conclusion
Quick Answer
It is possible to install marble tile without grout, but it is not recommended. Grout is an important part of any tile installation for several reasons:
- Grout fills the spaces between tiles, which helps prevent moisture from getting underneath the tiles and causing damage.
- Grout creates a smooth, even surface and helps tiles stay in place.
- Grout lines hide any minor imperfections or inconsistencies between tile edges.
- Grout provides a decorative element and allows you to add color and visual interest.
Installing marble tile without grout can lead to cracked, uneven, or loose tiles in the future. The exceptions are when installing pebble tiles or mosaic sheets that have plastic mesh backing rather than individual tiles. For most marble tile projects, properly grouting the tiles is highly recommended.
The Role of Grout in Tile Installation
Grout serves several important functions in any tile installation:
Seals Spaces and Prevents Moisture Damage
The grout between tiles fills the joints and spaces so moisture cannot seep underneath the tile and get to the subfloor or backing material. This helps prevent the growth of mold or mildew, deterioration of the backing, and loosening of the tiles over time. Grout creates a water-resistant surface.
Holds Tiles in Place
In addition to sealing the spaces, grout adheres to the sides of the tile pieces, keeping everything tightly locked together in the floor or wall. This prevents tiles from shifting, cracking, or coming loose when walked on. The grout essentially binds the whole installation together.
Allows for Consistent Spacing and Alignment
As the grout hardens between tiles, it keeps everything spaced evenly. The grout lines act as guides to align the tile so the entire installation has straight, uniform grout lines across the whole surface.
Covers Imperfections
Natural stone tiles like marble often have slight variances in thickness or edge finishing. The grout lines conceal any minor gaps or inconsistencies between tiles for a smooth overall look.
Provides Decorative Element
In addition to its functional purpose, grout introduces decorative value. Different grout colors can accent the tiles or create patterns. Contrasting grout lines also add visual interest and dimension.
Problems When Installing Marble Tile without Grout
Attempting to install marble tile without grout can lead to a variety of issues down the road:
Tiles May Crack or Chip
When tile is laid without anything securing it in place, the tiles can shift and move independently. This movement can cause cracking or chipping over time as the tiles rub against each other or get stepped on. The grout between tiles minimizes movement and damage.
Tiles May Become Loose
Similar to the issue above, tiles without grout keeping them in place can start to lift or lose adhesion. Foot traffic and shifts in the flooring or wall can eventually cause loose, detached tiles. Grout holds everything together.
Moisture Can Get Under Tiles
With open joints between the tiles, moisture will inevitably get through. Any spills, flooding, or leaks can seep right under the tiles leading to mold growth, rotten backing, and hazards like mildew or ruined subflooring.
Joint Spacing May Be Inconsistent
Without grout as a guide, the tile spacing across the installation is likely to be uneven. Jagged joints and imperfect alignments will be very obvious. Grout provides uniform spacing.
Subfloor or Wall Irregularities Will Show
Any imperfections or uneven spots on the underlying surface will be visible through the ungrouted tiles. Grout helps mask subfloor or wall flaws for a flat appearance.
Overall Look is Not Professional
A marble floor or wall without clean grout lines will look DIY or amateur. Most homeowners expect a neat, finished look that grout provides.
Exceptions Where Grout May Not be Necessary
There are a few scenarios where installing marble or other tiles without grout is acceptable:
Pebble Tile Floors
Pebble-style tile is small, rounded mosaic tiles meant to be loose and have joints between them. They have a mesh backing sheet instead of individual tiles. The pebbles shift slightly underfoot for traction.
Pre-Grouted Tile Sheets
Some mosaic tile sheets at big box stores have built-in grout lines between the small tiles. These can be installed as full sheets without adding grout between them.
Dry Environments
In very dry climates or interior vertical installations not exposed to moisture, grout may not be as necessary for the moisture-protection benefits. Joints can be left if tiles are mechanically fastened.
Temporary Projects
A temporary creative accent wall or craft project may not require proper grouting as it will not face long-term exposure or wear.
These exceptions are rare. For nearly all marble tile floors and walls, grout is highly recommended, if not required outright per building codes. The grout finishes the installation and prevents widespread deterioration or damage.
Grouting Options for Marble Tile
There are some factors to consider when choosing grout for a marble tile installation:
Sanded vs. Unsanded Grout
Sanded grout contains fine sand particles and is best for joints wider than 1/8th inch. The sand allows it to be firm and resistant to shrinking or cracking. Unsanded grout is suitable for smaller mosaic tiles with narrower joints.
Grout Color
Lighter grout colors enhance the marble and avoid high contrast. White or off-white is common. Grey or tan can also complement marble nicely.
Epoxy Grout
For heavy use areas like kitchens, epoxy grout is extremely durable, water-resistant, and stain-proof. It requires careful application but lasts for years.
Matching Grout Lines on Walls and Floor
For marble tile extending from floors to walls, matching the wall and floor grout width and color creates a seamless, consistent look.
Sealing Grout
Sealing the grout makes it resistant to stains and moisture damage. This provides extra longevity and keeps the grout looking new.
Marble Tile Installation Process
Installing marble tile correctly involves careful preparation and proper application of mortar and grout:
Step 1 – Surface Prep
The subfloor or wall backing must be smooth, clean, and securely fastened. Any repairs should be made prior to tile installation.
Step 2 – Apply Mortar
A layer of thinset mortar is applied evenly across the area to be tiled. Mortar should fully cover the backing surface.
Step 3 – Set and Level Tiles
Tiles are firmly pressed into the fresh mortar one by one. Spacers keep consistent grout line width. Tiles are leveled and aligned.
Step 4 – Clean and Seal Tiles
Once the mortar has cured, the tiles are cleaned with water and pH-neutral cleaner. Tiles are sealed to resist staining.
Step 5 – Apply Grout
Grout is worked into the joints between tiles with a rubber grout float or squeegee. Excess is immediately cleaned off tiles.
Step 6 – Clean and Seal Grout
Once grout has cured, haze is cleaned off the tiles. The grout can then be sealed for protection and water-resistance.
The end result is a durable, moisture-resistant tile installation that should last for decades with proper care and maintenance.
Maintenance for Ungrouted Marble Tile
On the rare occasion marble is installed without grout, extra care and maintenance will be required:
- Check for loose, cracked, or damaged tiles. Rebond or replace as needed.
- Inspect for moisture damage or mold growth. Treat affected areas promptly.
- Use caulk or flexible sealant to fill any joints or gaps that develop.
- Have spare matching tiles for quick replacement of broken tiles.
- Consider added mechanical anchoring like tile screws to reinforce tiles.
- Clean by sweeping versus mopping to avoid getting moisture in joints.
- Apply sealing products formulated for stone and tile floors.
Without grout, an ungrouted marble tile installation is at much higher risk for ongoing problems and deterioration. Grout provides longevity and reduces maintenance needs.
Hiring a Professional for Marble Tile Installation
For best results, a professional tile contractor should install marble tile:
Benefits of Hiring a Tile Installation Contractor
- Experts properly assess the space and conditions to recommend appropriate materials and installation methods.
- Contractors have the right tools, such as wetsaws for precise tile cutting.
- They know all the tricks for a long-lasting installation, including proper sealants and expansion joints.
- Professionals have experience working with delicate natural stone to avoid cracking or chipping.
- A smooth subfloor and proper slope is created for drainage.
- Issues like loose tiles or grout cracks can be repaired if any problems develop after installation.
What to Look for in a Tile Contractor
- Reputable contractor with positive reviews.
- Extensive experience specifically with natural stone tiles.
- Provides a detailed written quote with materials and costs.
- Willing to offer references or examples of past marble tile projects.
- Offers a workmanship warranty on the installation.
- Company is licensed, insured, and compliant with regulations.
Hiring a true tile professional for a marble tile installation project provides expertise and quality workmanship to make sure the tiles will look and perform beautifully for decades. They handle all details from prep to finish.
Conclusion
Installing marble tile without grout is possible but not ideal in most cases. The exceptions are mainly pebble tiles or temporary projects. For nearly all marble floor and wall tiles, properly grouting the joints is highly recommended. Grout seals the installation from moisture, keeps tiles firmly in place, allows for uniform spacing, hides imperfections, and provides decorative accent. Attempting to go without grout can lead to cracked tiles, uneven alignment, mildew growth, and a very amateur appearance. For best results, a professional tile contractor should install marble tile with proper grout. They will ensure a beautiful, long-lasting end result.