Making an arched doorway is absolutely possible as a DIY project. Arched doorways are a beautiful architectural feature that can add elegance and style to any room. While constructing an arched opening does require some specialized techniques and materials, it is not as daunting as it may seem. With the right planning, tools, and a bit of patience, many homeowners can successfully complete an arched doorway project. In this article, we will walk through the entire process step-by-step, from assessing your needs to installing the finished arched opening. We will also provide tips for choosing the right materials, calculating measurements, building supports, cutting the arcs, and finishing the project. By the end, you should have a solid understanding of how to build your own arched doorway.
Page Contents
Things to Consider Before Starting
Here are some key considerations when deciding to make an arched doorway:
Doorway Location and Size
First, determine where you want the arched doorway and how big it should be. Arches come in all shapes and sizes, from small accent arches to wide dramatic ones. Think about the overall look you want to achieve and how the arch will fit with the surrounding architecture. Measure the wall space to find the maximum width and height for the arch. This will impact themethods and materials required.
Doorway Use
Consider how the doorway will be used. Will it be a passage, closet, or decorative niche? This affects the width needed for comfortable passage or storage. It also determines if a door is needed or if an open archway is acceptable. For closets and rooms, the doorway must accommodate a swinging door.
Arch Design
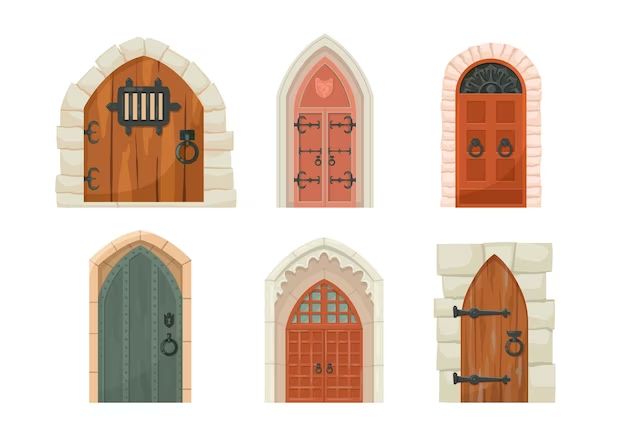
There are many possible arch shapes, including rounded Roman, pointed Gothic, and flattened elliptical arches. The design affects the complexity of construction. Simple half-circle arches are easier for DIY projects. More complex shapes may require an experienced mason.
Weight-Bearing Factors
Arched openings require extra support. Determine if the wall is load-bearing or decorative. Load-bearing walls need a properly distributed arch support structure. Materials like steel lintels may be required to carry the weight.
Budget
Arched doorway projects can range from inexpensive to high-end. Simple wood or brick arches cost less than detailed stonemasonry arches. Be realistic about project costs and available time for a DIY arched opening.
Materials Needed
To build an arched doorway, you will need:
- Wood boards or plywood for the temporary support structure
- The permanent framing lumber for the arch such as pressure-treated wood
- Arch building materials such as brick, stone, or concrete
- Finishing materials like drywall, trim molding, and paint
- Tools for measuring, cutting, and shaping such as a circular saw, jigsaw, chisels, sandpaper, etc.
- Safety equipment like goggles, gloves, and a respirator mask
- Miscellaneous supplies like construction adhesive, nails, and screws
The specific materials depend on the arch design, size, and wall type. For load-bearing arches, specialized heavy-duty materials are needed. Consult structural guidelines before selecting materials.
Step-by-Step Instructions
Here is an overview of the key steps to build an arched doorway:
Plan the Design
Sketch the shape and size of the arch. Calculate the measurements of the curve using the height and width. This will help plan the construction process and cut materials accurately.
Build the Temporary Support Structure
Construct a wood support frame to temporarily hold the weight of the opening. Use double 2×4 or 2×6 boards to make the base and cross supports.
Mark and Cut the Arch
Trace the arch pattern onto the wall with pencil. Make a guide using cardboard or wood. Carefully cut the drywall or plaster along the arched line using a drywall saw or jigsaw. Cut through any wall studs encountered along the arch path.
Install the Permanent Framing
Add the permanent arch framing using pressure-treated lumber. Cut lumber pieces to length and screw into place. The framing provides the curved structure to hold bricks or other veneer.
Build the Arch
Start laying bricks, stones, or blocks along the arch. Use construction adhesive and let mortar dry completely. For concrete, build a rebar support and pour concrete into the forms.
Install Finishing Trim
Add molding, drywall, plaster, or other finishes to make the arch blend with the wall. Extend finishes from the surrounding walls across the archway. Caulk and paint for a seamless look.
Seal and Paint the Arch
Apply waterproof sealant to the finished arch materials. Paint the arch and wall using rollers and trim brushes for best results. Allow paint to dry fully before regular use.
Remove Temporary Supports
Once mortar and materials are fully cured, carefully remove all of the temporary plywood or wood bracing. The finished arched doorway is now ready to enjoy!
Tips for Building an Arch
Follow these tips to help your arched doorway project go smoothly:
– Go slowly when cutting the opening and double check all measurements.
– Fully brace and reinforce the temporary support structure so it can withstand weight and pressure while building.
– Allow adequate drying time for all mortar, concrete, paint and finishes. Rushing this risks cracks or collapsed arches.
– Have another set of hands to help position heavy materials like stone or concrete blocks into place while building the arch.
– Use wedge-shaped mortar joints between masonry blocks to account for the curved shape.
– Smooth curved edges with a sanding block for a professional finish.
– Prime painted surfaces before applying finish paint coats for a clean look.
– For load-bearing arches, follow structural engineering guidelines for proper weight distribution.
Mistakes to Avoid
Steer clear of these common arched doorway mistakes:
– Cutting the arch opening too small for the planned door size. Always leave extra room.
– Having an arch that is too pointed at the top for the width. This risks collapse.
– Undersized temporary supports that allow sagging or cracking while building.
– Applying finishes before mortar is fully cured which causes cracks.
– Removing temporary bracing prematurely before the arch is self-supporting.
– Using the wrong mortar or adhesive products for the masonry materials.
– Not pre-drilling arched lumber which can cause it to split when nailed or screwed.
– Failing to properly waterproof the arch before finishing which allows moisture damage.
– Using the wrong tools which results in uneven or sloppy cuts.
Cost to Build an Arched Doorway
The cost to build an arched doorway depends on several factors:
Design Complexity
A simple half-round arch is cheapest. More complex elliptical or Gothic arches cost more.
Materials
Brick, block, or poured concrete arches are generally cheaper than natural stone or precast concrete.
Size of Opening
Larger arched openings require more materials and support structures.
Hiring a Contractor
Contractor fees for special skills like masonry or carpentry will increase the total project cost compared to DIY.
Here is an approximate cost breakdown:
| Element | Cost |
|---|---|
| Rough Opening Materials and Labor | $300 – $800 |
| Arch Structure and Building | $400 – $2,500 |
| Finish Trims and Painting | $200 – $1,000 |
| Total Project Cost | $1,000 – $5,000 |
For a simple 3 foot wide brick arch, expect around $1,500 total as a DIY project. Elaborate stone arches can cost $5,000 – $10,000 or more professionally installed.
Alternatives to Consider
Here are some alternatives to building an arched doorway from scratch to consider:
Pre-Hung Arched Door Unit
Order a prefab arched door already mounted in a frame sized to your opening. Installs faster than building a custom arch.
Faux Archway
Use trim pieces and drywall to add a rounded faux arch shape around a standard square door frame.
Arched Opening Kit
Purchase a DIY arched opening kit with pre-cut lumber pieces to trace the arch and simplify installation.
Interior Arched Transom
Rather than a full arched doorway, add a decorative arched transom window above a standard square door.
Hire an Architect
Have a qualified architect or structural engineer design and oversee the project for complex or load-bearing arches.
Conclusion
Building your own arched doorway is an intermediate DIY project that adds stylish appeal to any room. With careful planning to size and locate the arch, gathering the right tools and materials, and step-by-step construction, most homeowners can achieve a successful arched opening. Using the techniques above and avoiding common mistakes will help your arched doorway project go smoothly from start to finish. The finished arched doorway will provide an elegant accent you can enjoy for years to come.