Making your own baseboard trim can be a great way to save money while customizing your home. Baseboard trim serves both decorative and practical purposes – it covers any gaps between the floor and wall while adding an aesthetic finish. Purchasing pre-made baseboard can get quite expensive, especially for larger rooms, so many homeowners consider making their own. With some basic woodworking skills and tools, you can create custom baseboard trim tailored exactly to your space. Here’s what you need to know about making DIY baseboard trim.
Page Contents
- 1 What tools and materials do you need to make baseboard trim?
- 2 How do you determine the measurements?
- 3 How do you cut and shape the materials?
- 4 How do you install DIY baseboard trim?
- 5 How do you finish and protect DIY baseboards?
- 6 What are some design considerations for DIY baseboard?
- 7 What are the costs of DIY versus pre-made baseboard?
- 8 Conclusion
What tools and materials do you need to make baseboard trim?
To make your own baseboard trim, you will need:
- Wood – Popular choices include pine, poplar, oak or medium density fiberboard (MDF). MDF is a smooth composite wood that takes paint very well.
- Table saw – For safely and accurately cutting wood boards to size.
- Miter saw – Makes angled end cuts for seamless joints.
- Jigsaw – For cutting detailed shapes or openings.
- Router – Adds decorative edges or patterns.
- Sander – Smooths the wood surface for painting/staining.
- Wood filler – Fills any cracks or imperfections.
- Primer/paint – Preps and colors the baseboard.
- Finishing nails – Secures trim to the wall.
- Wood glue – Bonds trim joints.
- Caulk – Seals gaps for a polished look.
Having access to basic woodworking tools like a miter saw, jigsaw, and router will enable you to customize and shape the baseboard however you’d like. You can achieve simple, straight board trim with just a miter saw, but a router opens possibilities for added molding details.
How do you determine the measurements?
The first step is to measure the length of each wall where you want to install baseboard trim. Use a tape measure to find the precise length in inches or feet. Remember to account for openings like doorways – you will cut trim pieces to fit around these breaks in the wall.
Record all the measurements so you know exactly how much material to purchase. Having extra length is always better than not having enough.
The height of the baseboard is also important for aesthetics. Typical height is 4-6 inches, but you can go taller or shorter. Standard lumber widths (1×4, 1×6, 1×8, etc.) make convenient starting sizes. Compare samples to visualize proportions in the space.
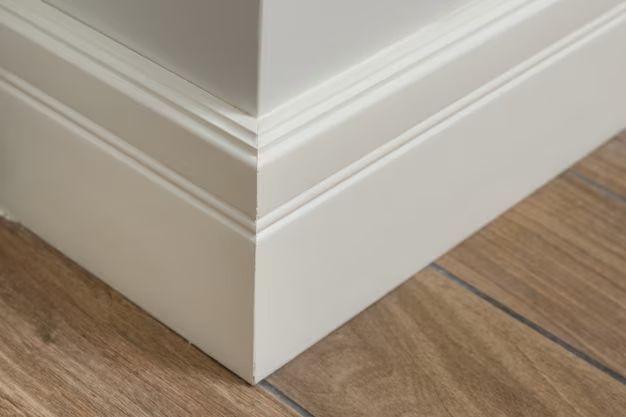
In addition to wall lengths and height, pay attention to corners when measuring. You will need to cut precise 45 degree mitered seams for tight-fitting joints at each corner.
How do you cut and shape the materials?
With your measurements complete, you can start cutting the wood boards to size using tools like a miter saw, table saw, jigsaw, and/or router:
- Miter saw – Makes 45 degree angled end cuts to join trim at corners. Adjust the saw angle according to your measurements for precise fits.
- Table saw – Cut long boards to length by adjusting the fence to your measured wall length.
- Jigsaw – For notched openings around fixtures, outlets, etc. Mark openings and cut with the jigsaw.
- Router – Add edge details like decorative grooves, rounded over edges, or other profiles.
Take your time cutting each piece and testing the fit. Precisely matching corners and ends ensures your trim boards blend seamlessly. Scraps of wood can be used for small filler pieces.
You may need to make minor adjustments through sanding, shaving wood, or re-cutting miters for a perfect fit. Use wood glue at the joints and nail in place. The trim should feel stable on the wall and have tight seams.
How do you install DIY baseboard trim?
Once all the pieces are cut and shaped, installing your custom baseboard involves:
- Prepping the wall surface – Fill any holes/gaps and sand. Primer helps baseboards adhere.
- Applying adhesive – Run a bead of wood glue along trim ends and joints before nailing.
- Nailing – Pre-drill and nail through the baseboard into the studs and wall surface using finishing nails.
- Filling holes – Use wood filler to patch any visible nail holes.
- Sanding – Lightly sand again, then wipe away dust.
- Priming/painting – Apply primer and your choice of paint color(s).
- Caulking – Fill any remaining gaps between boards and corners with painter’s caulk for a seamless look.
- Adding trim caps/molding – Install any coordinating quarter-round or additional trim pieces.
Take care to nail into studs whenever possible for a secure hold. Nailing through just the drywall risks the trim pulling loose over time. Approximately every 16-24 inches is a good nailing interval.
How do you finish and protect DIY baseboards?
Applying a quality primer and paint provides an attractive finish and protects your wood trim. Use painter’s caulk at all seams and corners to minimize cracks from expansion/contraction.
Consider these tips for your baseboard finish:
- Use painter’s (acrylic latex) caulk for the best flexibility.
- Lightly sand trim between coats for maximum adhesion.
- Use an enamel or semi-gloss sheen for durability and easy cleaning.
- Always follow manufacturer drying times between coats.
- Finish with clear polyurethane for extra water and stain protection.
Well-prepped and finished baseboard trim will last for many years before needing touch-ups. Caulk and paint can easily be renewed as needed to repair scratches or scuffs over time.
What are some design considerations for DIY baseboard?
Beyond just straight boards, you can apply these design techniques for custom baseboard trim:
- Add shoe molding – Attaching a small quarter-round trim piece along the bottom of baseboard covers any gaps from uneven floors.
- Use cap molding – Transition to a different profile along the top for more detailing.
- Incorporate two heights – Mixing taller and shorter heights adds interest.
- Paint different colors – Coordinate with your wall color for a bold look.
- Include wood accents – Frame with decorative molding strips.
- Make full wainscoting – Take baseboard trim up to chair rail height or above.
- Add rosettes/medallions – Frame intersections with a carved floral embellishment.
Let the overall style of the space guide your baseboard design choices. For modern rooms, simple and straight may suit best. Traditional spaces can handle more ornate details and molding profiles.
What are the costs of DIY versus pre-made baseboard?
One advantage of making your own baseboard trim is potential cost savings. Here is a comparison:
DIY baseboard
| Material | Estimated Cost |
|---|---|
| Wood boards | $2-4 per linear foot |
| Molding accents | $1-3 per linear foot |
| Paint/primer | $30-50 total |
| Caulk, glue, nails | $20-30 total |
Pre-made baseboard
| Material | Estimated Cost |
|---|---|
| MDF baseboard | $3-6 per linear foot |
| Pine baseboard | $5-9 per linear foot |
| Oak baseboard | $9-12 per linear foot |
As you can see, pre-made baseboard ranges from about $3 per linear foot for basic MDF up to $12 per foot for premium oak boards. The material cost for DIY can be $2-4 per foot, but you also need to factor in tools, hardware, and finish materials. For large rooms, the cost of pre-made trim gets quite high, so making your own can yield decent savings.
Conclusion
Installing custom baseboard trim you make yourself is an intermediate woodworking project, but offers great reward. The ability to tailor your trim exactly to your space makes a DIY approach very attractive. And you can realize substantial cost savings, especially for larger rooms.
With accurate measurements, the right tools, and attention to detail in your cuts and joins, you can achieve seamless, quality results. Don’t be afraid to take on this project yourself – the customized outcome is well worth the effort!
If you lack the tools and DIY skills, hiring a finish carpenter is a good solution. They can precisely mill and install trim to your specifications. While not cheap, paying for expert results may fit your budget better than buying expensive pre-fab trim.
Whatever approach you take, new baseboard trim can make a huge visual impact and add beauty to any room. Evaluate your time, skills, and budget to decide whether DIY baseboard is the right solution for your home.