The short answer is no, you should not nail above a fuse box. Fuse boxes contain important electrical wiring and components that could be damaged if punctured by a nail. However, there are some key considerations when working around fuse boxes that are worth covering in more detail.
Page Contents
- 1 What is a fuse box?
- 2 Dangers of nailing around a fuse box
- 3 Required safe distances around a fuse box
- 4 When is nailing allowed near a fuse box?
- 5 How to nail safely near fuse boxes
- 6 Modifying wall around fuse boxes
- 7 Replacing a fuse box with a circuit breaker panel
- 8 Cost to replace a fuse box
- 9 Safety tips when working around fuse boxes
- 10 Signs your fuse box needs replacement
- 11 Conclusion
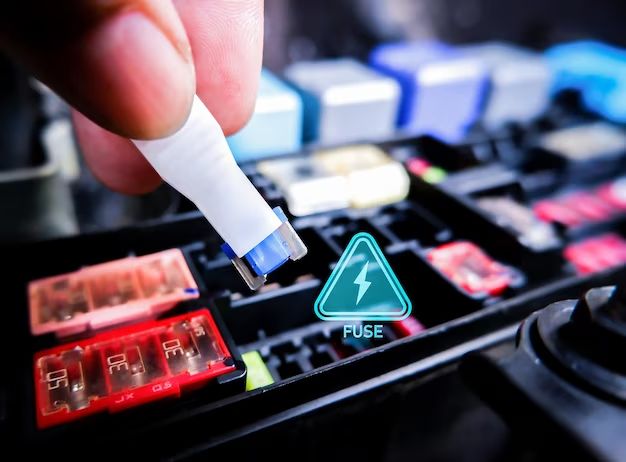
What is a fuse box?
A fuse box is an older type of electrical service panel found in many homes built before the 1960s. It contains fuses or circuit breakers that control and protect the electrical circuits in the home. Some key facts about fuse boxes:
- Contains fuses that screw into sockets or circuit breakers that switch on/off
- Fuses burn out to interrupt power in case of overloads
- Circuit breakers trip and can be reset to restore power
- Each fuse or breaker controls one or more electrical circuits
- Common locations are laundry rooms, kitchens, basements, and garages
- Older versions use fuses, newer ones use breakers
Dangers of nailing around a fuse box
Nailing into a wall too close to a fuse box can cause several potential dangers:
- Nail could puncture electrical wires inside the wall
- Damage to wiring can lead to fires or shocks
- Nails can damage fuse box components like fuses or breakers
- Interruptions to power in parts of the home
- Injury from electrical shocks is possible
Always keep nails well away from the fuse box and any visible electrical wiring to avoid these risks. Even nails that miss wires can vibrate and damage components over time.
Required safe distances around a fuse box
Most building codes and electrical standards require the following safe distances when nailing around a fuse box:
- At least 3 feet clearance in front of the fuse box opening
- No nailing within 6 inches horizontally from the sides
- No nailing within 12 inches vertically above or below
Maintaining these clearance zones ensures you can safely access the fuse box. It also keeps nails well away from any interior wiring running vertically or horizontally from the panel. Check your local building codes for exact requirements.
When is nailing allowed near a fuse box?
The only time nailing is permitted close to a fuse box is if you can visually confirm there is adequate clearance. Examples:
- Opening the fuse box shows no wiring in the nailing zone
- Nailing into an adjacent wall with wiring entering from a different direction
- Accessing the wall from the opposite side reveals no wires in the path
Even then caution is needed, as old wiring may be hidden. Safer practice is to keep nails at least 6 inches away at minimum. Never nail blindly without carefully checking first.
How to nail safely near fuse boxes
If you need to nail into a wall near a fuse box, here are some tips for doing it safely:
- Turn off the power at the main breaker before nailing
- Inspect inside the fuse box for any wiring runs
- Check the opposite wall surface for protruding wires
- Probe the nailing area with a thin nail to feel for hidden wires
- Keep nails at least 6 inches horizontally and 12 inches vertically from the panel
- Use a stud finder to locate studs and nail into them
- Use shorter nails (no longer than 1 inch)
- Restore power only after nailing and inspecting for damage
Taking precautions will minimize electrical risks and property damage. Hiring an electrician is recommended if you have any concerns.
Modifying wall around fuse boxes
Some home improvement projects involve modifying walls near fuse boxes – including:
- Removing wall sections for rewiring or access
- Adding insulation and vapor barriers
- Installing drywall over old siding
- Enclosing walls for soundproofing
- Exterior wall upgrades like siding replacement
These require special care around fuse boxes, like:
- Using manual tools instead of power tools near wires
- Avoiding large cuts parallel to wiring path
- Keeping any vapors away that could corrode wiring
- Monitoring wires during work to not bend or damage
- Proper fireblocking and seals around panels
- Testing new insulation does not impede heat dissipation
Check permitting requirements beforehand, and have an electrician review any major wall work near fuse boxes first.
Replacing a fuse box with a circuit breaker panel
Many homeowners opt to replace outdated fuse boxes with modern circuit breaker panels. Reasons include:
- Fuse boxes are outdated and prone to issues
- Difficult to find replacement fuses
- Circuit breakers are more convenient to reset
- Breaker panels allow easier circuit upgrades
- Improved safety with advanced breakers
- Added resale value to the property
When replacing a fuse box, key steps include:
- Hiring a licensed electrician for the work
- Selecting the right size panel based on electrical needs
- Installing any additional wiring, grounding and connections
- Properly removing the old fuse box
- Transferring over any required circuits
- Obtaining proper permits and inspections
Homeowners should never attempt fuse box replacement without professional help given the risks and complexity involved.
Cost to replace a fuse box
The costs to replace a fuse box with a circuit breaker panel often range from $800 to $3,000 depending on factors like:
- Home’s location (higher labor rates in some areas)
- Electrician’s hourly rate and minimum fees
- Size and type of new breaker panel needed
- Additional wiring required based on home’s layout
- Conduit and wiring upgrades required
- Removal and disposal fees for old fuse box
- Permit fees charged by the city/county
- Amount of drywall repair needed
Many electricians offer free estimates, so be sure to get multiple quotes before deciding on a fuse box replacement.
Safety tips when working around fuse boxes
| Scenario | Safety Tips |
|---|---|
| Nailing or drilling into walls | – Turn off power at main breaker – Check for wires in the area first – Keep at least 6 inches safe distance |
| Running wires near fuse box | – Consult an electrician – Do not run parallel to fuse box – Cross perpendicular to panel if needed |
| Painting around fuse box | – Cover panel completely before painting – Avoid paint dripping into interior – Don’t paint over warnings and labels |
| Adding insulation around fuse box | – Keep insulation at least 3 inches away – Check insulation is fire rated – Ensure good fuse box ventilation |
| Cleaning dusty fuse box | – Turn off power first – Use handheld vacuum and soft brush – Avoid wiping off or disturbing wires |
Always exercise extreme caution and only take on tasks you are qualified for. Hiring a professional electrician is highly recommended whenever in doubt.
Signs your fuse box needs replacement
Some clear signs that your home’s fuse box is outdated and due for replacement include:
- Frequent blown fuses that require replacement
- Circuits repeatedly tripping off for no apparent reason
- Scorch marks or melted wires around the fuse sockets
- Evidence of moisture corrosion or rust
- Strange buzzing, sizzling or humming sounds
- Flickering lights, outlets or appliances not working
- Smell of burning or hot plastic from the panel
- No ground wire connectors present in the box
- No open slots available for additional circuits
- Fuse amperages too low for today’s appliances
Any of these warnings signs means it’s time to upgrade to a modern circuit breaker panel. Continuing to use an outdated, overburdened fuse box is a serious safety hazard.
Conclusion
Nailing or drilling into walls near fuse boxes can pose a serious electrical hazard and should be avoided. There are specific clearance distances that must be maintained to ensure safety. Always turn off power, double check for wires, and use extreme caution when working around fuse boxes. Upgrading outdated fuse boxes to new circuit breaker panels is highly recommended for improved safety and reliability. Hiring professional electricians ensures proper installation when working around fuse boxes in any capacity.