Page Contents
Quick Answer
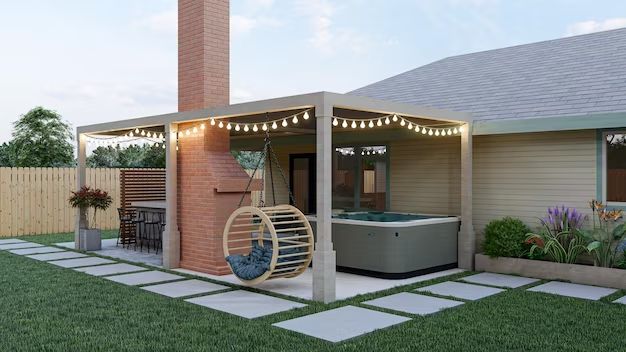
Yes, it is possible to put a pergola on top of a paver patio. Pergolas provide shade and visual interest to outdoor spaces, making them a popular addition to paver patios. The key considerations when installing a pergola on pavers are:
- Ensuring the patio surface is strong enough to support the weight of the pergola
- Selecting appropriate footings that can anchor through the paver surface
- Allowing for drainage so rainwater does not pool under the pergola
- Leaving enough space around the pergola for easy access and maintenance
As long as the pergola structure is well-supported and secured, a paver patio can make an excellent base for a pergola. Proper installation is key to creating a safe and visually appealing addition.
Assessing Patio Strength
The most important factor when installing a pergola on a paver patio is ensuring the patio surface can handle the added weight load. Pergolas are relatively heavy structures, with the weight focused on the posts that transfer the load to the ground below. Typical pergola weight can range from:
- 200-500 lbs for small 8×8 ft pergolas
- 500-1500 lbs for medium 10×12 ft pergolas
- 1500-3000 lbs for larger 12×16 ft pergolas
This pergola weight is concentrated on the 4 corner posts, which transfer the forces straight down onto the patio surface below. A typical 6×6 inch wood pergola post can exert 500-800 lbs of pressure on each concentrated point.
For a paver patio to safely support a pergola, the substrate and base layers beneath the pavers must be compacted gravel strong enough to handle these vertical pressure loads. If installed improperly over weak soil, the pergola posts could settle unevenly or sink into the ground.
Some best practices when assessing patio strength include:
- Check that patio substrate was compacted to 95% standard proctor density
- Confirm base layer is 6-8 inches of compacted gravel
- Inspect for cracked or sunken pavers, a sign of inadequate base
- Test surface with heavy static loads to simulate pergola posts
For large pergolas or soil conditions that require extra strength, extending footings through patio surface and down to undisturbed soil is recommended.
Patio Base Material Guidelines
| Base Material | Minimum Compacted Thickness (inches) |
| 3/4″ Crushed Stone | 6 |
| 3/8″ Crushed Stone | 8 |
| ASTM No. 57 Stone | 4 |
| ASTM No. 2 Stone | 6 |
Choosing Appropriate Footings
Once the paver strength is verified, the next key step is selecting footings that can securely anchor the pergola posts. Two main footing options exist for pergolas over paver patios:
Surface Mounted Footings
Surface mounted options sit directly on top of the paver surface. They typically include:
- Paver pedestals – Plastic or metal bases that anchor to paver surface with adhesive, pins, or compression. Often adjustable height.
- Concrete footings – Poured concrete pads or blocks on paver surface. Weighs down posts.
- Attached frames – Metal plates or frames bolt directly through paver joints. Minimal ground contact.
Surface mounted footings transfer weight over a larger area versus concentrated posts. But the pergola structure remains detached from the ground below.
Embedded Footings
For heavier pergolas or added anchoring, footings can extend through the paver surface into the ground below. Options include:
- Excavated concrete piers – Holes cored through pavers allow poured concrete piers secured into substrate.
- Helical piles – Screw anchors drilled through pavers and twisted into soil.
- Auger footings – Anchors inserted into drilled holes, set in concrete or epoxy.
Embedded footings provide robust anchoring and resistance against frost heave or lateral movement. But installing them requires altering the paver surface.
Footing Comparison Table
| Footing Type | Surface Contact | Security | Installation Impact |
|---|---|---|---|
| Paver Pedestals | Higher | Moderate | Minimal |
| Concrete Pads | Higher | Moderate | Minimal |
| Attached Frames | Lower | Lower | Minimal |
| Concrete Piers | Higher | Higher | Moderate |
| Helical Piles | Lower | Higher | Moderate |
| Auger Anchors | Lower | Higher | Moderate |
The optimal footing type depends on pergola size, patio construction, and site conditions like soil type, frost depth, and exposure to wind or heavy snow loads. Consulting local building codes for pergola requirements is also advised.
Allowing for Drainage
Pergolas provide shelter from the sun and rain. But allowing water to properly drain off and away from a pergola is critical for both safety and longevity.
Some key drainage tips for pergolas over patios include:
- Slope top horizontal supports very subtly for water runoff
- Seal any wood surfaces with water-repellent finishes
- Keep posts a few inches off patio surface for airflow
- Direct rain gutters away from posts and patio edge
- Use permeable grout/fill around concrete footings
- Backfill pier holes with gravel and sand for quick drainage
Poor drainage can lead to pergola damage, wood rot, algae growth, or water pooling and splashing up onto the structure. Taking steps to direct rainwater runoff away from the pergola and patio area is key.
Allowing Access and Maintenance
While pergolas provide useful shade, they also take up space. It’s important when situating a pergola over a patio to leave enough room for easy access, traffic flow, and maintenance.
Some guidelines include:
- Minimum 6 feet between pergola posts and any walls/structures
- 3 feet between pergola edge and walking paths for clearance
- Space between posts for patio furniture to fit comfortably
- Removable roof sections if covered for overwintering
- Access doors or ample space to reach all areas for repairs
Planning adequate space around the pergola perimeter prevents a cramped, closed-off feeling on the patio. This also allows convenient access for seasonal removal, gutter cleaning, lighting repairs, and other maintenance needs.
Installation Process Overview
Installing a pergola over an existing paver patio typically involves the following key steps:
- Evaluate patio strength and drainage: Inspect base construction and look for any sunken or cracked pavers. Test surface load capacity. Assess rainwater runoff.
- Finalize pergola design: Choose size, materials, and footings based on site evaluation. Meet local building codes for permanent structures.
- Excavate holes for embedded footings: Remove pavers as needed to dig holes for concrete piers or other anchors. Repair paver base layer if damaged.
- Install footings: Set helical piles, concrete piers, pedestals or pads for posts to attach to.
- Attach vertical posts: Anchor posts to footings. Check corners for level and plumb.
- Add lateral supports: Attach overhead horizontal beams. Install rafters. Add roof joists if needed.
- Attach roof covering: Add lumber slats or other water-shedding roof materials.
- Seal and protect wood: Stain, seal, and treat all lumber against moisture, rot, and UV damage.
Careful prep, strong footings, quality building practices, and weatherproofing are key to constructing a long-lasting pergola over a paver patio. Consulting a professional contractor is also advised for more complex installations.
Conclusion
Installing a pergola on top of a paver patio is an attractive way to add shade and visual appeal to an outdoor living space. With proper structural support from compacted base layers beneath the pavers, and secure footings anchoring the pergola posts, patios can support pergolas safely. But careful attention must be paid to drainage so rainwater does not undermine the structure or pool on the patio surface. Allowing ample space for access and maintenance is also critical. With careful planning, preparation, and high-quality construction techniques, pergolas can make excellent additions to paver patios, extending their function and enjoyment.