Page Contents
Quick Answer
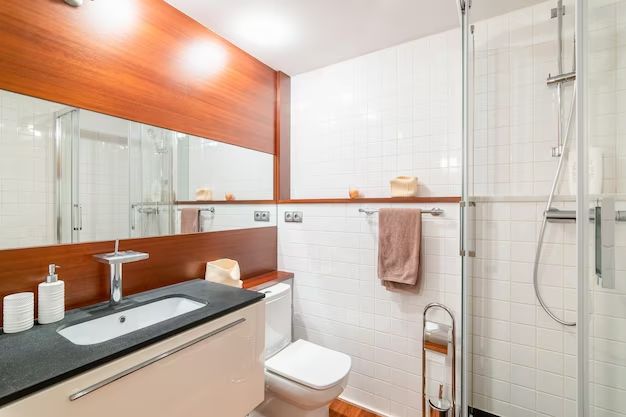
Yes, you can install paneling on bathroom walls. However, there are some important considerations when using paneling in a bathroom due to the high humidity. Care should be taken to choose appropriate materials, allow for proper ventilation, and properly prepare and seal the walls first. With the right prep work and moisture-resistant panels, paneling can be an attractive, budget-friendly option for bathroom walls.
What Types of Paneling Can Be Used in Bathrooms?
Not all types of paneling are suitable for bathroom use. Here are some of the best options:
PVC Paneling
PVC (polyvinyl chloride) panels are plastic-based and naturally waterproof. This makes them a great choice for bathroom walls as they will not warp or deteriorate when exposed to moisture over time. Look for panels specifically designed for high-humidity areas.
Tileboard Paneling
Tileboard paneling has a built-in ceramic tile finish laminated onto the panels. This provides a water-resistant surface that resembles real tile. Choose tileboard panels labeled for bathroom use.
MDF with Moisture-Resistant Coating
Standard MDF (medium density fiberboard) will swell and delaminate when exposed to moisture. However, MDF panels pre-treated with a water-resistant coating can work in bathrooms when properly sealed. Opt for MDF rated for humid environments.
Vinyl-Wrapped Panels
These have a vinyl film laminated onto a substrate like MDF or plywood. The vinyl provides a waterproof barrier that prevents moisture damage. Vinyl-wrapped panels made specifically for bathrooms will hold up better than standard versions.
Moisture-Resistant Drywall
Drywall panels treated with water-repellent chemicals offer a more traditional look. Greenboard drywall is the standard moisture-resistant type. A more advanced option is purple XP drywall, offering extra mold resistance.
Cement Board
Backerboard or cement board contains either fiberglass or cement reinforcements for strength. It is highly moisture-resistant and commonly used behind tiles as a waterproof substrate. It can also be finished with paint or wall panels for a bathroom.
Preparing Bathroom Walls for Paneling
Proper prep work is crucial before installing any type of paneling in a bathroom:
Fix Any Moisture Issues
Address existing leaks, condensation, or moisture damage first. Paneling will not resolve those underlying problems.
Clean and Sand Walls
Give walls a thorough cleaning to remove grease, soap buildup, and other residues. Scuff sand glossy paint for better adhesion.
Seal Drywall and Concrete
Apply waterproof drywall sealer or concrete sealant to create a moisture barrier. Allow proper drying time.
Use Adhesive and Backerboard on Tiles
Remove existing tiles and use thinset mortar to attach cement backerboard to the studs as a sturdy underlayment.
Following these steps helps paneling last longer in a bathroom environment.
Installing Paneling on Bathroom Walls
The installation process will vary slightly depending on your paneling material:
PVC Panels
PVC bathroom panels use a tongue and groove system or adhesive strips. Follow manufacturer instructions carefully. Use silicone caulk on seams for waterproofing.
Tileboard Panels
Cut panels to size with a utility knife or circular saw. Apply construction adhesive to the back of the panels and press into place on walls. Nail panels along the top and bottom edges only.
Moisture-Resistant MDF
Use moisture-resistant construction adhesive to attach MDF panels directly to prepared walls. Nail into wall studs around panel edges. Seal all seams with silicone caulk.
Vinyl-Wrapped Panels
Vinyl panels typically have interlocking edges or glue strips for installation. Measure carefully and cut with a table saw or circular saw. Lock panels together tightly. Seal trim with caulk.
Cement Backerboard
Cut panels with a utility knife or score and snap. Fasten to wood or metal wall studs with cement board screws. Place fiberglass mesh tape over seams and finish with thinset mortar.
Always follow manufacturer’s directions closely for best results. Allow adhesive and caulk to fully cure before using shower or tub.
Tips for Maintaining Bathroom Paneling
Proper maintenance will keep your bathroom paneling looking fresh longer:
– Wipe down panels after showering to prevent soap scum buildup and hard water spots. Use a squeegee on glass shower doors.
– Use a mild bathroom cleaner to disinfect panels and prevent mold growth in humid conditions. Avoid harsh chemical cleaners.
– Re-caulk around panel edges and plumbing fixtures when cracks appear to prevent moisture intrusion behind panels.
– Ensure exhaust fan is working properly and run it during and after showering to control humidity.
– Make sure any leaks or condensation issues are addressed quickly to limit water damage.
– Check for loose panels, damage, or deterioration annually and re-adhere or replace individual panels as needed.
– Consider re-sealing the panels every 2-3 years in bathrooms that get heavy, frequent use.
Proper installation and care will help bathroom wall panels maintain their good looks for many years. Address any moisture issues promptly to prevent irreversible damage. With a quality moisture-resistant product and good ventilation, paneling can be an attractive, easy-to-clean wall covering for bathrooms.
Conclusion
Paneling can be used to provide an updated, water-resistant wall covering in bathrooms when proper products and installation techniques are followed. The key considerations are choosing appropriate paneling materials rated for high humidity, preparing the wall surfaces properly, allowing for adequate ventilation, and performing regular maintenance to prevent moisture damage over time. With careful planning and periodic upkeep, paneling can be a durable and decorative wall covering option even in damp bathroom spaces. Proper moisture prevention is crucial for success.