Putting tile on stair risers is possible, but it requires some special considerations compared to tiling a flat floor. The vertical surface and exposure to foot traffic means stair riser tiles need a very strong bond and may be subject to more cracks or damage over time. With proper preparation and installation, tile can be an attractive and durable material for covering stair risers.
Page Contents
- 1 What are stair risers?
- 2 Challenges of tiling stair risers
- 3 Best practices for tiling stair risers
- 4 Tile options for stair risers
- 5 Preparing and measuring the risers
- 6 Cutting tapered tile edges
- 7 Tiling the risers
- 8 Grouting considerations
- 9 Adding trim and sealant
- 10 Tile repair and maintenance
- 11 Conclusion
What are stair risers?
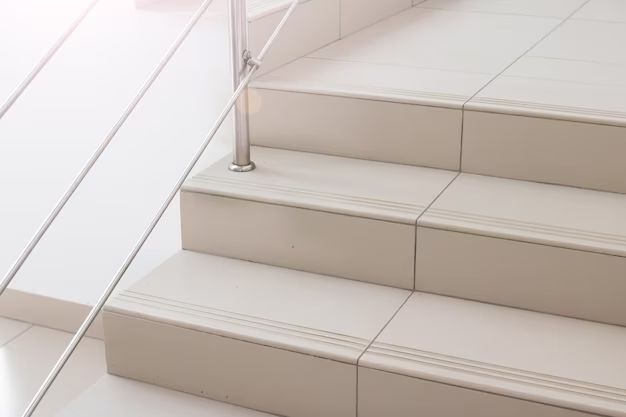
Stair risers are the vertical parts of the stairs that face you as you go up and down. The tread is the horizontal part you step on, while the riser is the upright section. In most standard staircases, the risers are rectangular boards installed between the treads.
Covering risers with tile can provide some advantages over wood or drywall:
- More durable and water-resistant surface
- Easier to clean than carpeting
- Opportunity to match tread tile and create a coordinated look
Tile also allows for creative patterns, designs, colors, and textures on the risers. This can enhance the overall look of the staircase.
Challenges of tiling stair risers
Tiling material on the vertical riser faces some different challenges than floor tile installation:
Stable bond
Gravity pulls downward on floor tiles, pressing them into the mortar or adhesive. On walls or risers, gravity pulls the tile face downward, which can compromise adhesion over time. High quality setting materials and proper trowel techniques are important.
Weight and hardness
The riser needs to support the weight of the tile without flexing. Heavier tiles like natural stone or thick ceramic increase the stress. Lightweight tiles or mosaics are easier options.
Foot traffic and impact
Stair risers see a lot of scuffing from shoes. Hard surfaces like stone tiles or porcelain withstand impacts better than softer tiles.
Angle and dimensions
Risers tilt back at an angle rather than being flat like a floor. Cutting tapered edges and fitting the right sizes takes precision.
Cracks
Stairs flex slightly with use. Rigid tiles don’t flex, so cracking or loosening is a risk over time. Flexible grout and sealants help absorb movement.
Best practices for tiling stair risers
Proper prep and installation techniques can help tile adhere securely on risers and minimize future issues:
Clean surface
Remove any existing paint, wallpaper, debris, carpeting, or tack strips so the tile bonds directly to the riser surface.
Primer coat
Priming with a latex bonding agent improves adhesion.
Mortar bed
On uneven wood risers, applying a mortar scratch coat creates a smooth and consistent base.
Proper thinset
Use a premium, polymer-modified thinset adhesive made for walls and wet areas. Pay attention to open times and tackiness.
Back-buttering tiles
Spreading a layer of thinset on the back of each tile helps ensure 100% mortar coverage and a strong bond, reducing voids.
Small grout lines
Minimizing the width of grout lines means less chance of cracking. 1/8 inch is ideal.
Flexible grout and caulk
Choose unsanded grout for walls and use silicone caulk where tiles meet another surface. Both allow for slight movement.
Sealing
Use a penetrating sealer on porous tile like natural stone to prevent staining and improve durability.
Movement joints
Control joints between sections allow independent movement and prevent cracking from transmitting across the whole riser.
Tile options for stair risers
Choosing the right stair riser tile improves durability and aesthetics:
Porcelain
Porcelain is very hard, dense, and resistant to moisture and heavy impacts. Matte finishes aren’t slippery. Large format sizes can speed installation.
Ceramic
Lighter than stone but harder than clay, ceramic comes in numerous styles and usually has a durable glazed surface. Mosaics offer patterns.
Natural stone
Granite, marble, and travertine offer luxurious appeal. Softer sedimentary stones like limestone are less durable. Seal to prevent staining.
Glass
Glass tile adds reflective color and light. Opt for tempered glass and pay attention to slip resistance. Metal tile trim may be needed.
Mosaic
Small mosaic sheets make installing complex designs simple. Grout carefully to keep tiles aligned and prevent sheet movement.
Preparing and measuring the risers
Carefully plan and measure each riser before tiling:
- Inspect for damage, rot, flaws. Repair as needed.
- Clean thoroughly and sand to remove glossy paint or finishes.
- Fill any holes or cracks with patching compound.
- Prime entire surface with a bonding agent.
- Take precise measurements including the angle and taper.
- Plan tile layout to minimize small cuts and gaps.
Having all risers the exact same dimensions makes installation much easier. Cut a basic template out of cardboard to test angles and fit.
Cutting tapered tile edges
Most stair risers require cutting some tiles along the top or bottom edge to fit the tapered angle:
Snap tile cutter
Score and snap cutters easily make straight cuts. Position tiles upside down for angled cuts.
Wet saw
A compact wet saw with a rotating diamond blade creates precise angled cuts. Water cools and captures dust.
Grinder
For quick freehand cuts, an angle grinder with a diamond tile blade cuts curves and notches. Use water and wear a respirator.
Nippers
Tile nippers chip away small sections for detailed contours and fitting around obstacles. Sharpen the carbide jaws as needed.
Leaving a slight gap between the tile edge and trim strip accommodates variations in the wall angle.
Tiling the risers
Once prepped and planned, use these best practices for setting tile on stair risers:
- Dry fit tiles first before applying any thinset.
- Trowel on thinset adhesive using the notched side to fully coat the back of each tile.
- Use tile spacers between each tile for consistent grout line width.
- Check tiles for level and alignment as you go up the riser.
- Gently tap tiles into the thinset mortar to flatten and adhere.
- Allow thinset to cure fully before grouting, usually 24-48 hours.
- Avoid walking on steps during tile installation and curing.
Forcutting outlet holes or fitting tiles around obstacles, make cardboard templates and test cuts on spare tiles first.
Grouting considerations
Grout fills the joints between tiles. On stairs, minimize the width of grout lines for durability:
- Use unsanded grout for joints 1/8 inch and smaller.
- Wider joints up to 1/4 inch may require sanded grout.
- Apply grout by fully packing joints so no voids remain.
- Take care to keep grout off the tile faces for easier cleanup.
- Seal grout once fully cured for water and stain resistance.
At transitions between riser tile and baseboard trim, use flexible silicone caulk instead of grout.
Adding trim and sealant
Metal or plastic edge trim finishes a tiled riser installation and helps protect tile edges:
- Measure and cut trim strips to fit snugly along top and bottom of risers.
- Pre-drill trim and use appropriate screws to attach it securely.
- Caulk gap between trim and tiles with mildew-resistant silicone.
- Use matching caulk between tile and wall base trim pieces.
- Seal all caulk joints smoothly with a moistened finger.
Trim strips come in aluminum, stainless steel, PVC, or vinyl. Match the metal color and finish for desired style.
Tile repair and maintenance
Tiled stair risers require some periodic maintenance:
- Inspect grout and caulk. Reapply or repair as needed.
- Re-seal grout and porous tile every 1-2 years.
- Spot clean tile as needed with mild cleaner and water.
- Promptly replace any cracked or damaged tiles.
- Have loose or compromised tiles rebonded before they detach fully.
Take care not to let moisture penetrate behind tiles, as this can compromise adhesion or damage the substrate over time.
Conclusion
Installing tile on stair risers brings attractive, durable surfacing but requires careful prep and installation methods. Choosing appropriate tile materials, proper thinset mortar, grout spacing, and trim finishes allows tile risers to withstand heavy use. With some periodic sealing and maintenance, tile risers can last for many years on a staircase.