Yes, you can put varnish in a sprayer. Varnish is a clear wood finishing product that provides a protective, glossy coat to wooden surfaces. Using a sprayer to apply varnish can allow for an even, professional-looking finish. There are some considerations when putting varnish in a sprayer, such as thinning the varnish, selecting the right sprayer, and proper spray technique. But with some preparation and practice, sprayers can be an excellent tool for applying varnish.
Page Contents
- 1 Should You Thin the Varnish?
- 2 Selecting the Right Sprayer for Varnish
- 3 Spraying Technique for Varnish
- 4 How Many Coats of Varnish Should be Applied?
- 5 Can You Spray Water or Oil-Based Varnish?
- 6 What PSI Should You Use to Spray Varnish?
- 7 What Nozzle Size Should be Used?
- 8 How Do You Clean a Sprayer After Varnish?
- 9 Conclusion
Should You Thin the Varnish?
One of the first steps is determining if the varnish needs to be thinned before placing it in a sprayer. Varnish is available in different viscosities, from thin wiping varnishes to thicker brushing and spraying varnishes. Here are some general guidelines on thinning varnish:
- Wiping varnishes – These are already thin and formulated for low viscosity application with a rag or cloth. They do not need to be thinned further for spraying.
- Brush-on varnishes – These have a heavier viscosity for brush application. They will need to be thinned with the manufacturer’s recommended thinning agent before spraying or the sprayer may clog.
- Spray varnishes – These varnishes are already formulated in viscosity optimized for spray application. Most spray varnishes do not require thinning before spraying unless specified on the manufacturer’s instructions.
The best way to know if a varnish needs thinning is to check the product label and manufacturer recommendations. If no thinning instructions are provided, it is usually safe to thin sparingly with the recommended thinner by around 10% as needed. Excessive thinning can reduce the protection provided by the varnish.
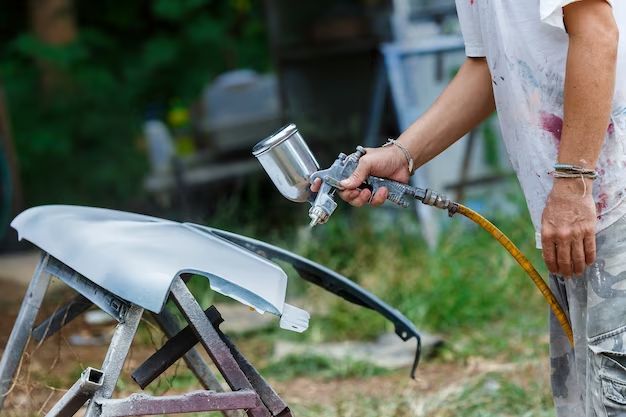
Selecting the Right Sprayer for Varnish
Choosing a suitable sprayer setup is important when spraying varnish. Here are some common options:
Airless Sprayers
Airless sprayers use hydraulic pressure to push varnish through a small nozzle at high pressure. This creates a fine spray pattern without need for compressed air. Advantages of airless sprayers:
- Allows spraying of thicker, unthinned varnish
- Provides consistent, even coverage
- Minimizes overspray compared to HVLP sprayers
Airless sprayers require varnish with a viscosity of 30-40 seconds on a Zahn cup #2 test. Unthinned brushing varnishes may exceed this viscosity and require thinning.
HVLP Sprayers
High Volume, Low Pressure (HVLP) sprayers use compressed air and lower pressure for applying lighter coatings. Benefits include:
- Can spray thinner varnishes without dilution
- Provides good control for spraying corners or edges
- Uses less varnish overall
HVLP sprayers work best with varnish thinned to 20-30 seconds on a Zahn cup #2 test. Unthinned varnish may require excessive thinning.
Air-Assisted Airless Sprayers
Air-assisted airless sprayers combine airless and HVLP technology, using hydraulic pressure with air cap atomization. Advantages:
- Can spray a wide range of varnish viscosities
- Reduced overspray compared to HVLP
- Good for spraying unthinned brushing varnishes
This flexibility makes air-assisted airless a good all-around choice for spraying different varnish types.
Cup Gun Sprayers
Cup gun sprayers are inexpensive HVLP sprayers with a small cup capacity. They can spray thinned varnish but have limited spray capabilities for larger projects.
When selecting a sprayer, consider the varnish viscosity, project size, and your experience level. An airless or air-assisted airless sprayer is usually the best choice for spraying unthinned varnish.
Spraying Technique for Varnish
Proper technique is crucial when spraying varnish for an even finish. Here are some tips:
- Apply light coats, moving the sprayer at a constant speed 6-8 inches from the surface. Let the varnish lightly mist onto the surface.
- Avoid holding the sprayer in one place too long or applying too much varnish. This can create drips and runs.
- Maintain overlap of around 30% between spray passes to ensure even coverage.
- Apply coats perpendicular to the previous coat, changing direction with each layer.
- Always spray edges and corners first. Then work from top to bottom in 3-4 foot widths.
- Let each coat fully dry before applying the next. Check manufacturer guidelines for recoat times.
- Keep the sprayer the same distance from the surface and move at a constant pace.
- If spraying vertical surfaces, apply light coats to avoid sagging.
Applying too much varnish in one coat or spraying from too far away can cause an uneven finish. Patient, careful spraying technique leads to the best results.
How Many Coats of Varnish Should be Applied?
Most surfaces require 2-3 thin coats of varnish for adequate protection and an even gloss. Heavily used surfaces like tabletops may benefit from up to 4 coats. Here are general guidelines for coats:
| Surface | Recommended Coats |
|---|---|
| Indoor furniture or trim | 2-3 coats |
| Cabinets, bookshelves | 2-3 coats |
| Outdoor furniture | 3-4 coats |
| Tabletops, desks | 3-4 coats |
| Floors | 3-4 coats |
Applying too many coats can lead to drips or sagging. Sand lightly between coats to ensure proper adhesion. A sprayed finish should not exceed 4-5 wet mils total thickness. Allow proper drying time between coats for full curing.
Can You Spray Water or Oil-Based Varnish?
Both oil-based and water-based varnishes can be sprayed, with a few considerations:
Oil-Based Varnish
- Provides a glossier, more amber tone
- Requires mineral spirits for cleanup and thinning
- Longer drying time between coats
- Prone to yellowing over time
- More fumes than water-based
Oil-based varnishes provide a protective, attractive finish. Proper ventilation is key when spraying.
Water-Based Varnish
- Lower odor and fewer fumes
- Faster drying time between coats
- Easier cleanup with soap and water
- Less prone to yellowing
- Finish less glossy than oil-based
Water-based varnish is excellent for indoor use. It dries fast with little odor.
Both types can be sprayed successfully. Consider the project location, desired look, and your ventilation when choosing oil or water-based.
What PSI Should You Use to Spray Varnish?
Nozzle pressure when spraying varnish depends on the sprayer type:
- Airless sprayers: 1500-3000 PSI
- HVLP sprayers: 25-40 PSI
- Air-assisted airless: 300-800 PSI fluid pressure, 10 PSI air cap
Going above or below ideal PSI ranges can result in:
- Too low – poor atomization, orange peel effect
- Too high – excessive overspray, loss of control
Starting on the low end of the pressure range allows for easier control. Increase pressure slowly if more atomization is needed.
When using compressed air HVLP sprayers, use the lowest air pressure to minimize overspray. Adjust fluid control knob so only a light mist develops.
Cleaning any varnish-clogged nozzles or filters prevents spray issues. Always check for nozzle wear regularly.
What Nozzle Size Should be Used?
For airless sprayers, smaller nozzle sizes in the .009-.015 inch range are best for spraying varnish. This allows enough pressure to properly atomize the varnish while minimizing overspray.
For HVLP sprayers, look for nozzle sizes around 1.3-1.5mm. This provides good varnish flow with finer atomization.
General nozzle size guidelines:
- Unthinned varnish – Smaller nozzles, .009-.011 inches
- Thinned varnish – Larger nozzles, .013-.015 inches
- HVLP sprayers – 1.3-1.5mm nozzles
Testing spray patterns on cardboard helps dial in the ideal nozzle size. Adjust pressure and fluid flow as needed for the nozzle used.
How Do You Clean a Sprayer After Varnish?
Thorough cleaning keeps sprayers in good condition after spraying varnish. Follow these steps:
- Remove nozzle and tip to access buildup behind them.
- Rinse sprayer and cups with appropriate solvent – mineral spirits for oil-based, water for water-based.
- Spray solvent through nozzle repeatedly until it sprays clear.
- Disassemble parts and clean residue with solvent-dampened rags.
- Rinse all parts with solvent again.
- Check filter and clean if needed.
- Reassemble sprayer once fully dried.
Cleaning sprayers immediately after use prevents dried varnish from clogging the system. Always check manufacturer guidelines for cleaning specific models. Proper maintenance keeps sprayers working efficiently for many varnishing projects.
Conclusion
While it requires some care, varnish can be sprayed effectively to achieve professional-looking results. With the right preparation, spray technique, and a quality sprayer, projects will gain excellent protection and an attractive finish. Pay attention to details like varnish viscosity, sprayer settings, and coat thickness for optimal results. Following the manufacturer’s instructions also helps avoid spray issues. With practice and care taken to properly prepare and apply the varnish, sprayers become a versatile tool for flawless varnished surfaces.