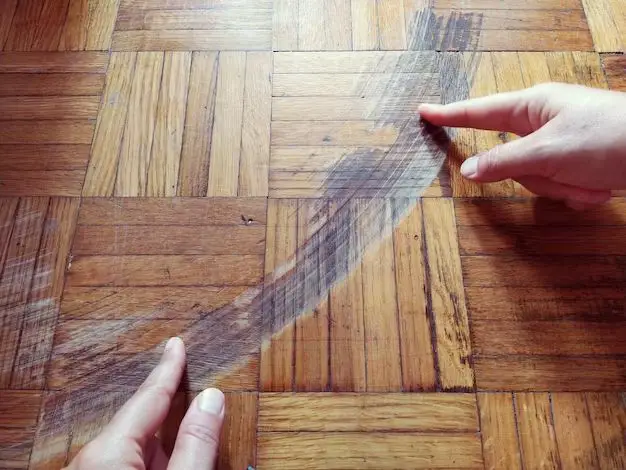
Vinyl flooring is a popular flooring choice for many homeowners due to its durability, water resistance, and affordable price point. However, vinyl floors are still susceptible to scratching from daily wear and tear. Light scratches can detract from the look of vinyl floors, while deeper scratches can become tripping hazards. Luckily, there are ways to repair scratched vinyl flooring to restore its appearance and function.
Page Contents
- 1 What causes scratches on vinyl floors?
- 2 Can you repair scratches in vinyl flooring?
- 3 How to repair superficial scratches
- 4 Fixing deeper gouges and scratches
- 5 Professional help for extensive damage
- 6 Tips for scratch prevention
- 7 Home remedies to avoid
- 8 When to replace vinyl flooring
- 9 Cost to repair vs. replace vinyl floors
- 10 Conclusion
What causes scratches on vinyl floors?
There are a few common causes of scratches on vinyl flooring:
- Dragging furniture or appliances without protection for the floors
- Pet nails
- High heels or other shoes with exposed metal taps
- Toys with sharp or rough edges being dragged across the floor
- Grit or debris getting trapped under furniture legs or chair legs and grinding into the surface
- Dropping heavy or sharp objects that gouge the vinyl
Preventing scratches starts with proactively protecting the floors from damage. Use furniture pads under chair and table legs. Sweep regularly to remove grit and errant toys. Keep pet nails trimmed. Lift furniture instead of sliding when moving. However, even with diligent care, scratches are likely to occur eventually.
Can you repair scratches in vinyl flooring?
The good news is that yes, minor to moderate scratches can be repaired in vinyl flooring. The ease and success of the repair depends on:
- Depth of the scratch – Surface level scratches are the easiest to repair. Deep gouges penetrating through the clear vinyl wear layer are more difficult.
- Color and pattern of the floor – Solid color floors are the easiest to touch up. Variegated patterns may show imperfections after scratch repairs.
- Location of the scratch – Highly visible areas like entryways require more precision for an imperceptible repair.
With the right materials and techniques, even more severe scratches can sometimes be repaired. The worst case is having to fully replace a vinyl plank or tile if the damage is beyond repair. However, repairs are feasible in most cases.
How to repair superficial scratches
For light surface scratches that have not removed the clear vinyl wear layer, these basic steps can reduce their appearance:
- Clean the scratched area thoroughly to remove any dirt or debris in the scratch.
- Apply a small amount of acetone or nail polish remover on a clean cloth and gently rub it along the length of the scratch. This can help smooth down any raised edges.
- Select a wax filler stick or crayon that closely matches the color of your vinyl flooring. Test on an inconspicuous spot first.
- Rub the filler stick into the scratch, applying gentle pressure to fill the groove. Remove any excess.
- Buff the area with a clean dry cloth to blend the repair.
The scratched area should now appear less noticeable. This simple fix works best for hairline scratches and scuffs. The repair may wear down over time but can be easily reapplied.
Fixing deeper gouges and scratches
For scratches that remove the vinyl wear layer and expose the substrate, a more involved repair process is required. Here are the steps:
- Thoroughly clean the damaged floor area and let it dry completely.
- Choose a vinyl floor patch compound that blends into your existing floor color and pattern.
- Fill or seal any gaps in the scratch so the liquid compound does not seep through to the subfloor.
- Prepare the patch compound according to package directions.
- Use a plastic applicator or putty knife to fill the scratch with the liquid compound so it is slightly overfilled.
- Let the patch fully cure based on product directions, usually 24 hours.
- Once cured, sand down the patched area with fine grit sandpaper so it is flush with the rest of the floor.
- Clean and dry the repair again.
- Use acetone or denatured alcohol on a cloth to remove residue and blend edges.
- Apply vinyl sealant to the sanded patch and surrounding floor area to restore the gloss.
With care, you can achieve repairs for deep scratches that are barely noticeable. Allow the sealant coating time to fully cure before regular foot traffic.
Professional help for extensive damage
In cases of severe scratching or gouging that remove large sections of the vinyl wear layer, professional help may be needed. Flooring contractors have specialty tools and materials to bond new vinyl into damaged sections for a seamless appearance. This entails:
- Removing enough of the damaged vinyl so the patch will have a smooth transition.
- Applying adhesive primer to the floor substrate.
- Cutting a vinyl patch that precisely fits the repair area.
- Bonding the new vinyl patch in place with adhesive.
- Seam sealing for waterproofing.
- Adding sealant coating for uniform sheen.
With the right materials and expertise, vinyl flooring specialists can work wonders. While diy repairs are great for minor scratches, extensive damage often warrants calling in the pros.
Tips for scratch prevention
Avoiding scratches in the first place is the best solution for maintaining beautiful vinyl floors. Here are proactive tips:
- Attach felt pads to all furniture legs and move carefully.
- Keep pet nails trimmed to minimize scratching.
- Remove shoes with metal taps or exposed screws indoors.
- Place walk off mats at entrances to trap grit.
- Use rolling furniture movers instead of dragging.
- Pick up any dropped objects immediately.
- Set down appliances gently rather than letting them drop.
- Rearrange area rugs periodically to minimize uneven wear.
Being cautious and proactive helps, but some scratches will likely still occur given enough time. Knowing your repair options allows you to restore the appearance of scratched vinyl floors.
Home remedies to avoid
When researching vinyl scratch repairs online, you may encounter suggestions like using toothpaste, olive oil, vinegar, or baking soda. Unfortunately, most home remedies do not work well. Toothpaste is too abrasive, while oils and vinegars can damage the floors and leave residue. Baking soda also does not provide enough filler or pigment to adequately repair scratches. Investing in quality commercial vinyl repair products will provide much better results.
When to replace vinyl flooring
While many scratches and scuffs can be repaired, extensive damage may eventually warrant replacing part or all of your vinyl flooring. Signs it may be time for replacement include:
- Multiple planks or tiles are heavily scratched, cracked, or curling at the seams. Repairing each section is no longer practical.
- Large sections of wear layer are missing, making repairs appear patchy.
- Discoloration or staining is extensive.
- You desire a new flooring look rather than restoring the old.
If the floor has reached a point where repairs would be only temporary or cosmetic, replacement should be considered. Installing new vinyl planks or tiles can entirely transform the space.
Cost to repair vs. replace vinyl floors
| Repair or Replacement | Estimated Cost |
|---|---|
| Spot repair small scratches | $10 – $30 |
| Repair deep scratches and gouges | $50 – $150 |
| Professional vinyl scratch repair | $200 – $600 |
| Full vinyl floor replacement | $4 – $8 per sq.ft installed |
For minor scratching, repairs are very affordable. Even extensive DIY repairs cost significantly less than full replacement. However, there is a point at which replacement becomes the better value proposition if repairs are no longer effective. Evaluating the extent of damage and remaining lifespan of the floor should factor into the decision.
Conclusion
Scratches in vinyl floors are common but can be repaired in most cases. Light scratches can be buffed and filled relatively easily. Deeper scratches require patching compounds and sealants but produce hidden repairs. While home remedies are often not effective, quality vinyl repair products yield great results. Prevention helps avoid scratches, but knowing your options for repairs can restore vinyl floors to like-new condition.