Replacing the bottom heating element in an oven is a repair that many homeowners can do themselves. The bottom element is responsible for the heat that comes from the bottom of the oven and is essential for baking and broiling. Over time, these heating elements can burn out or break, leaving the bottom of the oven without heat. Thankfully, this is a straightforward DIY repair as long as you have some basic tools and follow safety precautions.
Page Contents
- 0.1 Is it Worth Replacing the Bottom Oven Heating Element?
- 0.2 How Much Does it Cost to Replace an Oven Bottom Heating Element?
- 1 Can You Replace it Yourself?
- 2 Steps for Replacing Bottom Heating Element
- 2.1 1. Turn off power and gas supply:
- 2.2 2. Remove oven bottom panel:
- 2.3 3. Locate bottom heating element:
- 2.4 4. Disconnect element terminals:
- 2.5 5. Remove old heating element:
- 2.6 6. Install new heating element:
- 2.7 7. Reconnect terminals:
- 2.8 8. Confirm proper operation:
- 2.9 9. Replace oven bottom panel:
- 2.10 10. Check for gas leaks if applicable:
- 3 Professional Replacement vs DIY
- 4 Conclusion
Is it Worth Replacing the Bottom Oven Heating Element?
Before deciding to replace the bottom heating element, it’s worth considering whether it needs to be replaced at all or if the oven has other issues. Here are some signs that the bottom element specifically needs replacement:
- The bottom of the oven doesn’t get hot even when the oven is on.
- The top of dishes/food cooks faster than the bottom.
- The bottom heating element does not glow when the oven is on.
- There are visible cracks or damage on the bottom heating element.
If you notice these signs, replacing the heating element is likely to solve the problem. Other issues like an inaccurate oven temperature or a faulty thermostat would require other repairs.
As long as the rest of the oven is still in good working order, replacing the bottom heating element can extend the life of your oven. It’s much more affordable than purchasing a whole new oven.
How Much Does it Cost to Replace an Oven Bottom Heating Element?
If you hire an appliance repair technician, expect to pay $200-$300 for parts and labor to replace an oven heating element. However, if you’re willing to do it yourself, the parts cost between $40-$60 on average. So it can be a very budget-friendly repair.
Here’s a breakdown of the approximate costs:
- Bottom heating element part: $40-$60
- Miscellaneous parts like housing, screws, etc: $10-$20
- Appliance technician labor costs (if hired): $150-$200
Keep in mind that costs can vary based on the oven brand, model, and source of the replacement part. Checking online appliance parts stores for your specific oven make and model will give the most accurate price estimate.
Overall though, replacing the heating element is a fraction of the cost of a new oven. So it’s worth investing in some elbow grease to extend the life of your existing oven.
Can You Replace it Yourself?
Replacing the bottom heating element is a reasonably straightforward DIY job. With some basic tools and safety precautions, most homeowners can handle it themselves. Here are some things to consider:
Difficulty Level
On a scale of 1 to 10, replacing an oven’s bottom heating element is around a 4 in terms of difficulty. It doesn’t require extensive technical skills, but following safety precautions during disassembly/reassembly is crucial. Also, there are usually 10-15 steps involved depending on the exact oven model. So it’s not quite as simple as changing a lightbulb, but it’s very doable for most homeowners.
Safety Concerns
Ovens have high voltage components so electrocution is a major safety risk. Always unplug the oven before working on it. Verify the power is off with a voltage tester. Many ovens also utilize natural gas, so gas leaks are another hazard if you disconnect any gas lines. Work slowly and carefully.
It’s also important to let the oven fully cool before starting work to avoid burns. Wearing personal protective equipment like gloves and eye protection is also a good precaution. Proper reassembly and confirming no gas leaks are also critical safety steps.
Tools Needed
You’ll need some basic tools like:
- Screwdrivers
- Wrenches
- Pliers
- Gloves
- Safety goggles
- Voltage tester
A multimeter can also help diagnose if the heating element needs replacement and confirm it’s working after the repair. Having the right tools for your oven’s specific model is also important. Consult the owner’s manual or an online DIY guide for details.
Time Required
Plan on at least 1-3 hours for this repair. It’s not fast, but very manageable compared to more complex appliance repairs. The exact time will depend on your oven model and your DIY experience level. Go slowly, follow all safety steps, and don’t be afraid to take breaks. Rushing increases the risk of mistakes.
Steps for Replacing Bottom Heating Element
While the exact steps vary across oven models, the overall process is similar. Here are the basic steps:
1. Turn off power and gas supply:
Unplug oven or shut off circuit breaker to ensure the power is off. Shut off gas supply as well for gas ovens. Verify with a voltage tester. Allow the oven to fully cool if it’s been used recently.
2. Remove oven bottom panel:
The access panel is usually on the bottom of the oven. It may be secured with screws, clips, or other fasteners. Removing it exposes the internal components.
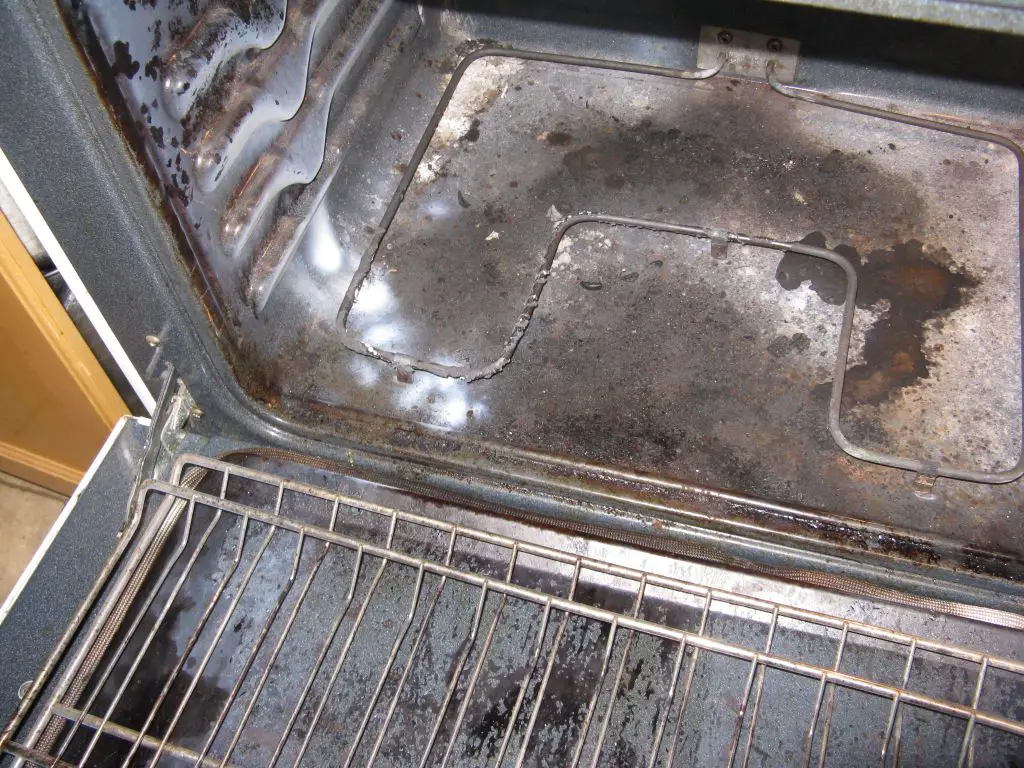
3. Locate bottom heating element:
The bottom element is along the floor of the oven cavity. It may have a housing or cover around it. Identify the terminals that connect it to the power supply.
4. Disconnect element terminals:
There are usually 2 wires/terminals connecting the element to the oven’s electrical system. Carefully disconnect these. Make note of where they connect for reassembly.
5. Remove old heating element:
Remove any screws, brackets or other fasteners holding the element in place. Carefully slide out the old element. Note its position and orientation for the new one.
6. Install new heating element:
Slide the new element into the oven cavity in the same position as the old one. Reattach any fasteners and brackets to hold it securely.
7. Reconnect terminals:
Attach the terminals to the power supply wires in the same configuration as the old element. This varies by model but is usually quite straightforward.
8. Confirm proper operation:
Turn the power and gas back on. Verify that the oven heats up properly and the new element glows. You want to confirm function before reassembling!
9. Replace oven bottom panel:
Once operation is confirmed, carefully replace the access panel using any screws/clips. Make sure to seal it properly so heat stays inside the oven.
10. Check for gas leaks if applicable:
For gas ovens, apply a soapy water solution around gas connections and look for any bubbles indicating leaks. Tighten connections if any leaks are present.
Proper safety during disassembly, installation, and reassembly are the hardest parts. Take it slowly and get help if needed. With some patience and care, most homeowners can handle this repair DIY!
Professional Replacement vs DIY
Is DIYing this repair worth it, or should you hire a professional? Here’s a comparison of the pros and cons:
| Professional Replacement | DIY Replacement |
|---|---|
|
|
For many homeowners, DIYing this repair is preferred due to the cost savings and ability to work at their convenience. However, if you don’t feel comfortable working inside the oven, hiring a pro can provide peace of mind.
Get estimates from multiple appliance repair technicians in your area and compare that to the DIY parts cost. This can help inform your decision. If tackling it yourself, have patience, follow oven precautions, and don’t be afraid to consult a repair guide. In most cases though, replacing a bottom oven heating element is well within reach of an intermediate DIYer.
Conclusion
Replacing the bottom heating element in your oven is usually a necessary repair when it stops heating properly. Thankfully it’s one of the more straightforward oven repairs, even for DIYers. As long as safety precautions are followed, most homeowners can handle this repair themselves and save significant money compared to hiring an appliance technician.
The exact steps will vary based on your make and model. But in general, it involves disconnecting power, removing the access panel, swapping out the bad element for a new one, testing operation, and careful reassembly. Patience and following safety procedures are key. But with a few basic tools and 1-3 hours of time, you can likely replace your bottom oven heating element and get your appliance heating properly again.