Yes, it is often possible and recommended to replace hose ends as they wear out before the hose itself. Hose ends (also called hose fittings or couplings) connect hoses to fixtures, tools, and each other. As the most used part of the hose, they endure the most wear and tear. Replacing just the ends can extend the life of the hose and save money compared to replacing the entire hose. This article will discuss when to replace hose ends, the various types of ends, how to remove old ends, and how to attach new ones.
Page Contents
When to Replace Hose Ends
There are several signs that indicate it’s time to replace your hose ends:
– Cracks or splits in the plastic or metal. This allows water to leak out.
– Corrosion, rust, or mineral deposits. This weakens the structural integrity.
– Stripped threads or crimp rings. Prevents a secure connection.
– Worn down sealing washers. Allows leaks.
– Difficulty securing connections. Indicates worn out coupling threads.
– Leaks. The most obvious indicator something isn’t sealing properly.
– Reduction in water flow. Signals an obstruction in the fitting.
Replacing ends exhibiting any of these issues will restore proper function and extend the usable life of the hose.
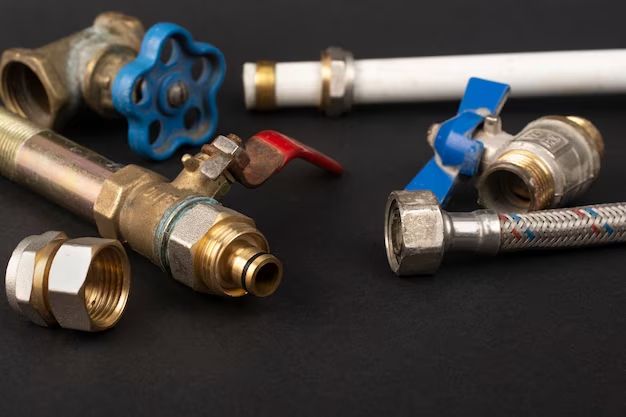
Types of Hose Ends
There are many styles of hose ends, but several common types include:
Male Threaded Ends
– Made of brass, stainless steel or plastic
– Have exposed male threads to connect to female threaded fittings
– Common for garden hoses
Female Threaded Ends
– Made of brass, stainless steel or plastic
– Have internal female threads to connect to male threaded fittings
– Allow connection of sprinklers, nozzles, etc.
Quick Connect Ends
– Made of plastic with a spring loaded collar
– Push-to-connect design for connecting without threading
– Popular on contractor grade hoses
Crimp Ends
– Consist of fittings and metal crimp rings
– Designed for flexible rubber hoses
– Crimped on with a crimping tool for a permanent leak-proof connection
Clamp Ends
– Feature a circular metal clamp tightened with a screw
– Allow easy swapping of ends without crimping
– Used on low-pressure vinyl hoses
How to Remove Old Hose Ends
The method for removing worn out hose ends depends on the type:
Threaded Ends:
1. Unscrew the end fitting from the male or female threaded connection.
2. Use tongue-and-groove pliers or a pipe wrench to unthread ends that are on too tight.
3. Apply penetrating oil if end is stuck on and won’t unthread.
Quick Connect Ends:
1. Push down the outer locking collar while pulling the end to detach it.
Crimp Ends:
1. Cut off the crimped metal rings using wire cutters.
2. Pull the end fitting out of the hose.
Clamp Ends:
1. Loosen the circular clamp screw and pull the end off.
Once removed, inspect the hose where it connects. If it is worn out or damaged, a section may need to be cut off before attaching the new end.
How to Attach New Hose Ends
Follow these tips for properly installing replacement hose ends:
– Check that the new end is the correct type and size for the hose and application.
– Make sure the hose is cut cleanly and squarely for optimal seating in the fitting.
– Use sharp shears or a hose cutter to avoid crushing or flattening.
– Only cut the length needed for damaged hose removal.
– Use soapy water or silicone spray to lubricate o-rings and threads.
– Hand tighten threaded connections first before using a wrench for final tightening.
– Position crimp rings 1-2 inches from the end of the hose.
– Use the proper crimping tool according to the fitting type and size.
– Avoid over-tightening clamps which can crush the hose.
– Seal threads with Teflon tape or pipe joint compound to prevent leaks.
– Check for leaks by pressurizing the hose. Tighten or reseal as needed.
Following the manufacturer’s instructions for proper installation is recommended when replacing hose ends. Consulting a professional can also be helpful for crimp and clamp ends. With the right techniques and parts, you can successfully replace hose ends and prolong the life of your hoses.
Reasons to Replace Hose Ends Instead of the Entire Hose
There are several advantages to replacing just the ends rather than the whole hose:
Cost Savings
Hose ends range from a few dollars to $10-$15. Complete hoses can cost $25 on upward to over $100 for long, high-end hoses.
Convenience
It takes minimal time and tools to swap ends. Replacing a full hose requires unfastening the whole length, retrieving new fittings, etc.
Less Waste
Reusing good hose saves it from landfills. New hoses use more raw materials and packaging.
Maintain Length
Keeping original hose length avoids having to cut a replacement hose to size.
Preserve Strength
An older hose that still has integrity can be retained instead of starting new with unknown hose quality.
Sentimental Value
Some irreplaceable vintage rubber hoses can have ends updated to keep them usable.
As long as the hose shows no leaks, brittleness, bulging, or other damage, replacing just the ends is the best option.
Tips for Extending Hose Life
Besides replacing ends, here are other tips to maximize the lifespan of your hoses:
– Inspect hoses regularly for wear, leaks, cracks, etc.
– Store hoses neatly coiled up without kinks that can weaken the inner lining.
– Drain and purge water after each use to avoid internal corrosion and damage from freezing temperatures.
– Protect from sunlight exposure which accelerates cracking and deterioration of the outer rubber.
– Use hose reels or hangers to avoid kinking hoses over spigots, hooks, or sharp edges.
– Keep ends capped when not in use to prevent debris buildup in couplings.
– Consider detachable End-Guardz that allow replacing just the threaded end portion.
– Use swivel end fittings to prevent twisting and maintain smooth water flow.
– Position hoses safely away from traffic areas to prevent damage from being run over or tripped over.
– Repair small leaks with waterproof tape designed for hoses.
Following preventive maintenance and handling best practices allows you to maximize the usefulness of your hoses for years to come by just replacing the ends periodically.
When to Just Replace the Whole Hose
While ends typically wear out first, there comes a point when the whole hose needs complete replacement:
– When there are leaks or bulges in the main hose material itself. Ends can’t fix this.
– When the hose couplings get stretched out from age and can’t form a tight seal with new ends.
– When the hose has become very stiff and cracked. This indicates internal liner damage.
– When cleaning and replacing ends repeatedly fails to stop major leaks.
– When vital markings indicating size, pressure rating, etc. have worn off, making new ends guesswork.
– When a hose has sentimental value but has deteriorated too far past its usefulness, despite swapping ends.
The hose shell, diameter, length, and internal tube need to have integrity for changing just the ends to work. Hoses that are very worn out or damaged along the main length will need fully replaced.
Conclusion
Replacing worn out hose ends is an economical and efficient way to extend the useful life of hoses. As long as the hose itself remains in good condition, simply swapping ends can restore function and avoid the need to purchase entire new hoses. With some basic tools and supplies, it is possible for homeowners to replace hose ends themselves following manufacturer’s instructions. Knowing when ends need replacing, what style of ends the hose uses, and proper installation techniques allows you to update hoses just where needed. Considering preventive hose maintenance and storage can also help maximize lifespan.