Replacing the bottom of kitchen or bathroom cabinets is often necessary when they become damaged or worn out over time. The bottom of cabinets takes a beating from spills, cleaning products, water damage, etc. Many homeowners wonder if replacing just the bottom of the cabinet is possible, rather than buying a whole new cabinet. The good news is that cabinet bottoms can usually be replaced on their own without having to remove and replace the entire cabinet! Here’s a quick overview on the process.
Page Contents
- 1 What You’ll Need
- 2 Step 1: Remove Contents and Doors
- 3 Step 2: Remove the Existing Bottom
- 4 Step 3: Cut the New Bottom
- 5 Step 4: Install the New Bottom
- 6 Step 5: Reinstall Doors, Drawers and Contents
- 7 Tips for Replacing Cabinet Bottoms
- 8 Cost to Replace Cabinet Bottom
- 9 Should I Replace the Entire Cabinet?
- 10 How Long Does it Take to Replace a Cabinet Bottom?
- 11 Signs You Need a New Cabinet Bottom
- 12 Can I Replace Cabinet Bottom with Drawers?
- 13 What Type of Wood is Best for Cabinet Bottoms?
- 14 Conclusion
What You’ll Need
- New cabinet bottom material (plywood, MDF, etc)
- Table saw or circular saw
- Drill
- Screws
- Wood glue
- Sandpaper
- Paint/stain to match existing cabinets
You’ll need some basic tools and supplies to replace a cabinet bottom. The new bottom can be made from plywood, MDF or another sturdy material. Make sure it’s the same thickness as the existing bottom. A table saw makes cutting the pieces easy, but a circular saw will also work. Screws, wood glue, sandpaper and matching paint/stain are also needed.
Step 1: Remove Contents and Doors
Before starting, empty the cabinet and remove the doors and drawers. This provides easier access to the bottom. Set the hardware aside and label it so you can re-install everything properly later. With the cabinet emptied out, you’re ready to move on to removing the bottom.
Step 2: Remove the Existing Bottom
The next step is removing the cabinet’s current bottom. Start by unscrewing it from the sides, back and any interior shelves or dividers. Locate and remove any screws, nails or glue at these contact points. Go slowly to avoid damaging the rest of the cabinet if anything is stuck. With all fasteners removed, you can now pry off or slide out the old bottom.
Step 3: Cut the New Bottom
Now its time to fashion the new replacement bottom. Using measurements you took, cut the new bottom material to size with a table saw or circular saw. Try to make the cuts as straight as possible for a nice clean fit. It’s also a good idea to sand the edges smooth. The bottom may need some minor adjustments once you test fit it later.
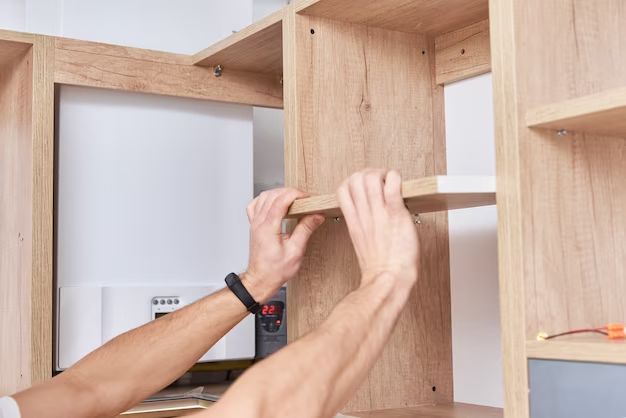
Step 4: Install the New Bottom
Test fit the new bottom in the cabinet. Make any necessary adjustments for a nice tight fit. Once its sized correctly, you can install it permanently using wood glue and screws. Apply glue to contact surfaces and clamp in place. Drill pilot holes and drive screws through the bottom into the sides, back and interior components. Wipe up any excess glue squeeze out. Allow the glue to dry per the manufacturer’s instructions.
Step 5: Reinstall Doors, Drawers and Contents
With the new bottom securely installed, you can start to reassemble the cabinet. Reattach the doors, drawers and any shelving/hardware that was removed. Make sure everything is level and operating smoothly. Finally, reload the contents back into the freshly upgraded cabinet. Enjoy your renewed cabinets!
Tips for Replacing Cabinet Bottoms
Here are some helpful tips to make your cabinet bottom replacement project go smoothly:
- Carefully measure the existing bottom and cut new material to the exact size.
- Save removed hardware like shelf clips or supports to reinstall later.
- Sand and paint/stain the new bottom prior to installation for best results.
- Shim gaps if the new bottom doesn’t fit perfectly tight.
- Take your time unfastening the old bottom to avoid cabinet damage.
- Use wood glue and clamps to hold the new bottom tightly while fastening.
- Drill pilot holes before driving screws to prevent splitting the wood.
Following these tips will help you complete a seamless bottom replacement that restores life to your worn cabinets.
Cost to Replace Cabinet Bottom
The cost to replace the bottom of a cabinet will depend on a few factors:
- Size of the cabinet – Larger cabinet bottoms will cost more.
- Materials – Solid wood or plywood will be more expensive than composite boards.
- Labor – Hiring a carpenter or handyman will add labor charges.
- Accessories – New hardware, fittings, touches of paint etc. will add to cost.
- Location – Prices are generally higher in major metro areas.
On average, expect to spend $50-200 to replace a standard 30-inch base cabinet bottom with simple plywood and DIY labor. Hiring a professional may cost $200-500 or more. Here’s a table with estimated price ranges:
| Cabinet Size | DIY Bottom Replacement Cost | Pro Bottom Replacement Cost |
|---|---|---|
| 15-inch | $30-100 | $100-300 |
| 30-inch | $50-200 | $200-500 |
| 45-inch | $75-250 | $300-700 |
As you can see, DIY provides significant savings. But for larger jobs or if you’re not handy, hiring a carpenter may be worth the cost.
Should I Replace the Entire Cabinet?
When faced with a damaged or worn out bottom, many wonder if they should just replace the whole cabinet. Here are some factors to consider:
- Condition of the rest of the cabinet – If sides, doors, and top are all still structurally sound and in good shape cosmetically, replacing just the bottom can make sense.
- Effort required – Taking out one bottom is much easier than removing and replacing an entire unit.
- Matching cabinets – It may be hard finding an exact match if it’s part of an existing set.
- Cost – Bottom replacement is far less expensive than a whole new cabinet.
- Flooring issues – New cabinet may not fit same footprint without floor modifications.
In many cases, replacing only the damaged bottom is a more practical and economical option if the rest of the cabinet is salvageable. But if multiple components are worn out, replacing everything may be the better long-term solution.
How Long Does it Take to Replace a Cabinet Bottom?
The time required to replace a cabinet bottom can vary based on skill level and cabinet size, but the basic steps will take most DIYers 2-5 hours:
- Removing contents: 30-60 mins
- Taking out old bottom: 30-90 mins
- Cutting and fitting new bottom: 1-2 hours
- Installing new bottom: 30-60 mins
- Reassembling cabinet: 30-60 mins
- Total Time: 2-5 hours
Professionals with the right tools and experience can often complete the job in half a day or less. Rushing through the process risks damaging the cabinet, so it’s smart to allot a full afternoon or weekend when DIYing. Have patience and work carefully for best results.
Signs You Need a New Cabinet Bottom
Here are some signs that indicate it’s time to replace the bottom of your cabinet:
- Visible water damage – Warping, swelling, discoloration
- Rotting or mold growth
- Peeling laminate or cracking at seams
- Major stains that have soaked into the wood
- Sagging from excessive weight or age
- Inability to properly support contents without bowing
- Infestation of pests or bugs
Catching damage early makes bottom replacement much easier. But even severely damaged bottoms can often be swapped out with minimal impact to the rest of the cabinet. Addressing problems quickly also prevents further damage from leaks, moisture and pests.
Can I Replace Cabinet Bottom with Drawers?
It is possible to replace a standard cabinet bottom with a set of drawers. This transforms a stationary cabinet into more functional and accessible storage. However, there are some important considerations:
- The cabinet sides, back and front frame must all be in good structural condition to support drawer slides and weight.
- Drawer slides and roller mechanisms will need to be purchased and properly installed.
- The interior cabinet dimensions must accommodate drawer boxes of the size you want.
- The cabinet door will need to be modified or replaced to access the drawers.
- Plumbing or electrical may require relocating if present in cabinet area.
Overall, it’s generally simpler to just replace the bottom with another solid panel. But for contractors or experienced DIYers, undercabinet drawers can be a great way to optimize storage in certain circumstances.
What Type of Wood is Best for Cabinet Bottoms?
The most durable and attractive options for replacing a cabinet bottom include:
- Plywood – Affordable and stable. Multiple laminated sheets resist warping.
- MDF – Made from compressed wood fibers. Smooth surface good for painting.
- Particle Board – Budget option. Not as hardy but usable.
- Solid Wood – Attractive but expensive. Prone to movement.
- Exterior-Grade Plywood – For high moisture areas like laundry rooms.
Plywood is generally the best bet for most DIYers. Pre-finished maple or birch plywood offers an attractive ready-to-install option. MDF and composite boards work well for simple flat panel replacement. Avoid solid wood unless you have ample budget and woodworking expertise.
Conclusion
Replacing just the bottom of a cabinet is usually a much quicker and economical alternative to installing completely new cabinets. With some basic DIY skills, you can swap out a damaged bottom in an afternoon and restore your cabinets on a budget. Pay attention to signs of wear and address issues early before they spread. And consider undercabinet drawers if you’re up for a more advanced upgrade while you’re replacing the bottom panel. With the right approach and materials, you can easily breathe new life into your kitchen or bath with bottom-only cabinet replacements.