Page Contents
Quick Answer
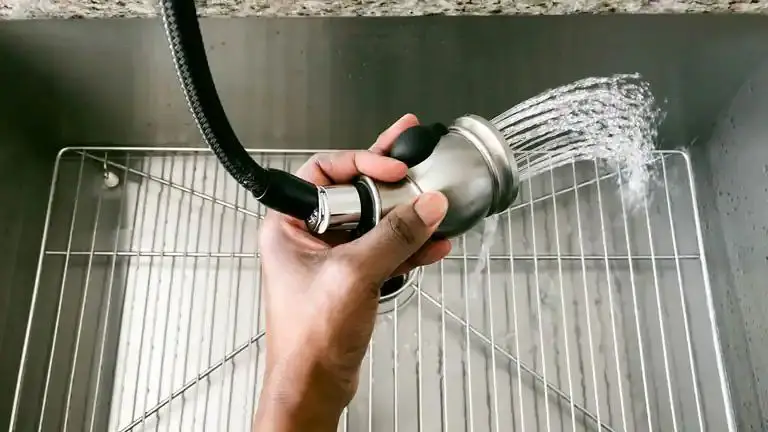
Yes, it is possible to replace the hose on a kitchen sink sprayer. The process involves disconnecting the old hose, removing it from the sprayer head and faucet, and then installing a new hose in its place. With some basic tools and plumbing skills, this is a straightforward DIY project that can be completed in less than an hour.
Steps to Replace a Kitchen Sink Sprayer Hose
Here are the key steps involved in replacing a kitchen sink sprayer hose:
- Turn off the water supply lines under the sink and relieve pressure by turning on the faucet momentarily. This prevents water from spraying out when you disconnect the hoses.
- Disconnect the sprayer hose from the faucet sprayer outlet using a wrench or pliers to loosen the connection nut. You may need to spray some lubricant on the nut first if it is stuck.
- Disconnect the other end of the old hose from the sprayer head by unscrewing the fitting.
- Thoroughly clean the ends of the faucet outlet and sprayer head to remove any buildup and ensure a tight seal with the new hose.
- Connect one end of the new hose to the sprayer head and tighten it securely.
- Connect the other end to the faucet sprayer outlet and tighten the connection nut.
- Turn the water back on and check for leaks. Tighten any loose connections if needed.
- Test the sprayer to make sure it operates properly with good water flow and pressure.
What You Need
To replace a kitchen sink sprayer hose, you will need:
- Replacement sprayer hose (make sure to get the correct length)
- Adjustable wrenches or pliers
- Pipe tape or thread sealant
- Old towel or bucket to catch water drips
- Lubricant spray (WD-40 or similar)
The new hose needs to be the same length and have the same type of connector ends as the old one to ensure proper fit. Measure the old hose and take it with you when buying a replacement.
Sprayer Hose Types
There are two main types of connector ends found on sink sprayer hoses:
- Threaded nuts: The hose connections have threaded male and female nuts that twist together to secure the hose. This is the most common type.
- Quick connect fittings: The hose connections use push-to-connect fittings that click into place. No tools needed for assembly.
When shopping for a replacement hose, match the connector style you currently have. Hoses are available in different lengths, most commonly 18 inches to 60 inches.
Helpful Tips
– Wrap pipe tape or apply thread sealant to threaded connections to prevent leaks.
– Avoid kinking the hose by leaving some slack when routing it.
– Periodically inspect sprayer hoses for cracks and replace them at first signs of wear.
– When reconnecting to the faucet, make sure the washer is in place for a tight seal.
– Spray lubricant on stuck connection nuts and allow it to penetrate for easier removal.
Troubleshooting
| Issue | Cause | Solution |
|---|---|---|
| Leak at connections | Loose fitting | Tighten nuts or fittings |
| Missing washer | Check and replace washer if needed | |
| Low water pressure | Kinked or blocked hose | Inspect hose and straighten or clear debris |
| Clogged sprayer head | Disassemble and clean sprayer | |
| Sprayer not working | Disconnected or damaged hose | Reconnect or replace hose |
When to Call a Plumber
While a leaking or damaged sprayer hose is easy to replace yourself, there are some cases when you may need to call in a professional plumber:
– If you can’t find the exact replacement hose needed.
– For extensive corrosion or calcium buildup at the faucet connections.
– If adjustments are needed to the faucet pull-out sprayer assembly.
– For other complex faucet or sink sprayer repairs.
Hiring a plumber ensures the job is done properly and that your faucet and sprayer operate safely with no leaks.
Conclusion
Replacing a worn or leaking kitchen sink sprayer hose is a relatively quick and easy DIY project. With some basic tools and plumbing knowledge, you can disconnect the old hose and install a new one in under an hour. Key steps include shutting off water supply, disconnecting from faucet and spray head, cleaning fittings, applying thread tape, connecting new hose, and testing for leaks. Matching the hose length and connector style is important for proper installation. Periodically inspecting and replacing sprayer hoses can prevent extensive water damage from leaks. If the connections are severely corroded or you can’t replace the hose on your own, call a professional plumber for assistance.
Key Points:
- Kitchen sink sprayer hoses can be easily replaced by DIYers in less than an hour.
- The new hose must match the old one in length and connector style.
- Basic steps include turning off water, disconnecting old hose, cleaning fittings, applying thread sealant, connecting new hose, and leak testing.
- Call a plumber for help if connections are severely corroded or complex disassembly is required.
- Regular inspection and replacement of sprayer hoses prevents leaks and water damage.
Additional Information:
How to Disconnect a Sprayer Hose
To disconnect a sprayer hose from the faucet or spray head:
- Turn off hot and cold water shut-off valves under sink.
- Turn on faucet momentarily to relieve pressure.
- Disconnect hose end from spray head using adjustable wrench or pliers.
- Use wrench or pliers to loosen and unthread connection nut at faucet.
- Carefully maneuver hose out from sink cabinets.
Go slow on stuck connections and spray penetrating oil if needed. Avoid bending or kinking hose during removal.
Preparing Fittings for New Hose
It’s important to thoroughly clean the faucet outlet and sprayer head fittings before installing the new sprayer hose. Use a rag and abrasive scrubber to remove any buildup, rust, or old thread sealant. Wipe fittings clean and dry. Apply fresh plumber’s tape or liquid thread sealant according to instructions. This provides a leak-free seal when reconnecting the new hose.
How to Connect Sprayer Hose
Connecting the new sprayer hose is the reverse of removal:
- Apply thread sealant to faucet outlet and spray head threaded fittings.
- Hand tighten one end of hose to spray head port.
- Hand tighten other end to faucet outlet port.
- Finish tightening with wrench or pliers.
- Turn on water supply and check for leaks.
- Further tighten if any drips are visible at connections.
Do not over tighten connections. Remove excess thread sealant after assembling.
Sprayer Hose Care Tips
To maximize the life of your sprayer hose:
- Inspect hose regularly for cracks and leaks.
- Replace hose every few years or at first sign of wear.
- Route hose gently without sharp bends.
- Clean fittings thoroughly before installing new hose.
- Use thread sealant and tighten securely to prevent leaks.
- Shield hose from under sink cleaning chemicals.
Taking care of your sprayer hose allows it to last longer and prevent water damage from leaks.
Signs You Need a New Sprayer Hose
Some signs that indicate it’s time to replace a faulty sprayer hose:
- Visible cracks, bulges, kinks or holes in hose
- Leaking water at connections
- Corroded, worn or broken fittings
- Low water flow or spraying from hose
- Hose is over 5 years old
At the first signs of wear, go ahead and replace the hose to maintain optimal performance and prevent leaks. Keeping extra replacement hoses on hand makes the job quick and easy.