Page Contents
- 1 Quick Answer
- 2 What is Garage Door Weatherstripping?
- 3 Signs You Need New Weatherstripping
- 4 How to Replace Garage Door Bottom Weatherstripping
- 5 Tips for Replacing Garage Door Bottom Weatherstripping
- 6 Weatherstripping Materials and Costs
- 7 Hiring a Professional vs. DIY Replacement
- 8 Maintaining Garage Door Weatherstripping
- 9 Conclusion
Quick Answer
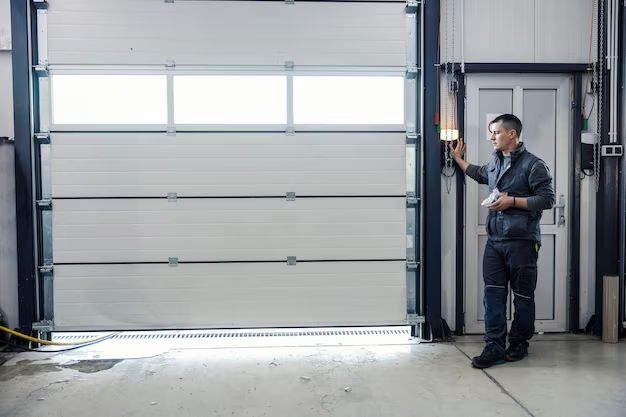
Yes, it is possible for a handy homeowner to replace the rubber seal at the bottom of their garage door. The rubber seal on the bottom of the garage door is called the weatherstripping. Over time it can become brittle, cracked, or detached from the door, allowing air, moisture, insects, and debris to enter the garage. Replacing damaged or missing weatherstripping is an important part of maintaining your garage door system. With some basic tools and supplies, this is a DIY project that most homeowners can tackle in an afternoon.
What is Garage Door Weatherstripping?
Garage door weatherstripping, also called a bottom seal, is the long strip of rubber or vinyl that runs along the bottom edge of your garage door. It serves several important functions:
- It provides a tight seal between the garage floor and door to block out drafts, dust, and moisture.
- It acts as a cushion to reduce noise when closing the door.
- It helps keep pests like mice, insects, and spiders from getting into the garage.
- It insulates the garage space and helps maintain temperature.
Quality weatherstripping should be made from durable, flexible material that can withstand years of opening and closing the door. Butyl rubber is commonly used since it is long-lasting and able to handle temperature extremes.
Signs You Need New Weatherstripping
Here are some signs that indicate it’s time to replace your garage door’s bottom weatherstripping:
- There are visible cracks, tears, or gaps in the seal.
- The seal has become brittle, dried out, or detached from the door in areas.
- You can see daylight under the door or around the edges.
- The garage feels drafty, and outside air leaks in.
- You hear loud noises when closing the door.
- Bugs, leaves, or debris are getting into the garage.
- The seal has obvious wear or damage.
Replacing compromised weatherstripping can provide better insulation, noise reduction, and pest control for your garage space.
How to Replace Garage Door Bottom Weatherstripping
Here is a step-by-step overview of how to remove old and install new garage door bottom weatherstripping:
- Purchase replacement weatherstripping. Measure the width and length of your current weatherstripping first to determine how much you need. Buy a high-quality product made for garage doors.
- Open the door fully. This provides access to work along the full length of the bottom seal area.
- Pry out the old weatherstripping. Use a flathead screwdriver or putty knife to gently pry up and remove the old seal from the door. Scrape off any residual adhesive or track.
- Clean the area thoroughly. Use a shop vacuum and cleaning solutions to remove dirt, debris, oil, and grease from the bottom of the door so the new seal adheres properly.
- Measure and cut the new weatherstripping. Cut your replacement rubber seal a few inches longer than the width of the door to account for compression. Use sharp scissors or utility knife.
- Peel off the adhesive backing. Removing the tape backing will expose the sticky adhesive surface needed to adhere the weatherstripping to the door bottom.
- Press the new weatherstripping in place. Starting at one end, firmly press the rubber seal to the cleaned door bottom while slowly unrolling the strip the full width of the door.
- Trim excess material. Trim off any extra weatherstripping at the ends so it aligns flush with door edges.
- Close the door and check the seal. Operate the door and make sure the new weatherstripping forms an even, tight seal along floor.
Installing new garage door bottom weatherstripping is usually a quick, easy DIY project. Just take care to accurately measure and cleanly install the replacement seal. With a good seal in place, your garage will be better protected from the elements.
Tips for Replacing Garage Door Bottom Weatherstripping
Here are some helpful tips to ensure your weatherstripping replacement project goes smoothly:
- Select high-quality weatherstripping designed specifically for garage doors rather than inexpensive generic stripping.
- Take accurate width and length measurements so you buy the correct amount needed for full coverage.
- Make sure the door bottom is free of dirt, oil, and debris so the seal adheres properly.
- Apply firm, even pressure when installing the new weatherstripping for optimal adhesion.
- Check for and flatten any bumps or bubbles in the seal as you adhere it.
- Make clean cuts and trim excess material so weatherstripping fits door edges flush.
- Open and close the door several times to test the new seal.
- Consider coating the new weatherstripping with petroleum jelly or silicone lubricant to increase longevity.
- Store any leftover weatherstripping properly for future repairs or adjustments.
Taking your time to do careful prep work and get an exact fit will help ensure you get an effective, long-lasting seal from your new garage door weatherstripping.
Weatherstripping Materials and Costs
Garage door weatherstripping is sold in large rolls by the foot or in kits with pre-cut lengths and corners. Here are some of the most common materials and price ranges:
| Weatherstripping Material | Cost per Linear Foot |
|---|---|
| Vinyl | $0.20 – $0.70 |
| Rubber | $0.40 – $1.50 |
| Foam | $0.30 – $0.90 |
| EPDM rubber | $1.00 – $4.00 |
| Silicone | $2.00 – $5.00 |
| Neoprene | $2.00 – $6.00 |
Foam and vinyl are cheaper options but may need to be replaced more frequently. Rubber, silicone, and neoprene are more durable materials that provide better seals and last longer. Expect to spend $20 – $60 for an average 16-20 foot garage door weatherstripping replacement kit.
Hiring a Professional vs. DIY Replacement
Installing new garage door weatherstripping is a project many handy homeowners can tackle themselves. However, there are some benefits to hiring a professional installer:
- A pro can properly diagnose the source of any sealing issues beyond just the weatherstripping.
- They have expertise working with different garage door brands, hardware, and seals.
- A contractor will have the right tools and materials for an efficient installation.
- You don’t have to worry about accurately measuring or cutting the seal yourself.
- Professionals can test balance and identify any adjustments needed for optimal operation.
- Your installation will likely include a warranty from the company.
That said, a DIY weatherstripping replacement can save money on labor costs. Expect to pay $150 – $300 to have a professional garage door company replace your bottom seal. Evaluate your skills and comfort level to decide if it’s a project you can take on yourself.
Maintaining Garage Door Weatherstripping
To maximize the life of your garage door’s weatherstripping and seals, be sure to:
- Inspect seals a few times per year for wear, cracks, or gaps.
- Test door operation regularly and lubricate hardware as needed.
- Clean the rubber seals periodically using mild soap and water.
- Avoid exposing seals to harsh chemicals or solvents.
- Repair sections of weatherstripping as soon as damage occurs.
- Adjust seals that become loose by refastening or applying supplemental adhesive.
- Plan on replacing weatherstripping every 4-6 years depending on material.
With proper maintenance and timely replacement, quality garage door weatherstripping should provide many years of reliable protection and improved energy efficiency.
Conclusion
Replacing worn or damaged weatherstripping on your garage door helps maintain a tight seal along the bottom of the door. This seal keeps out drafts, moisture, dirt, and pests for improved insulation. With basic DIY skills and the right materials, replacing the bottom weatherstripping is a straightforward project. Or call a professional installer if you want to ensure it’s done right. Be sure to properly maintain seals and monitor their condition over time. Effective weatherstripping is an important factor in garage door performance and longevity.