Page Contents
Quick Answers
Yes, you can use acrylic paint on a wood fence. Acrylic paint is a good choice for painting wood fences because it adheres well to wood, dries quickly, and is durable against weathering. There are some preparation steps you’ll need to take before painting a wood fence with acrylics, like cleaning the fence, sanding it, and priming it. But once prepped, the fence can be painted easily with acrylic paint using brushes, rollers, or a paint sprayer. Acrylic paint will provide good coverage and last a long time on a wood fence.
Choosing Acrylic Paint for a Wood Fence
When selecting acrylic paint for a wood fence, consider these factors:
Quality Level
Acrylic paint comes in different quality levels:
– Professional/artist-grade acrylics have more pigment for richer, longer-lasting colors. They are best for fine art painting.
– Student grade acrylics have less pigment and are more affordable. The colors are not as vibrant.
– Craft paints have the least pigment but are the least expensive.
For painting a wood fence, a student grade or craft paint will provide good enough quality at a lower cost. The fence will be outdoors exposed to sun and rain, so professional grade paint would be overkill.
Sheen Level
Acrylic paint comes in different finishes:
– Matte finish has no shine and hides surface imperfections well.
– Satin finish has a low luster sheen.
– Gloss finish has a shiny, reflective surface.
For exterior wood fences, a satin or matte acrylic paint is best. Glossy paint could look too shiny on a fence and show imperfections in the wood surface. Satin provides a nice low luster that looks classy. Matte hides imperfections well.
Color Options
Consider what color scheme you want for your wood fence. Lighter neutral colors like white, greys, and tans are popular for a clean, bright look. Darker neutrals like browns, blacks, and navy can create a dramatic, elegant aesthetic. Bold bright colors like reds, blues, greens, or yellows make a fun, lively statement. Accent trims in a contrasting color also look nice. Make sure to get color swatches or samples before purchasing paint.
Prepping a Wood Fence Before Painting
Proper prep work is crucial for acrylic paint to adhere well to a wood fence and last a long time. Here are key steps for prepping a wood fence for painting:
Cleaning
Use a power washer or garden hose with strong nozzle to remove any built-up dirt, mildew stains, cobwebs, pollen, and other debris. Let the fence fully dry after power washing before moving to the next steps.
Sanding
Lightly sand the wood with 120-150 grit sandpaper to rough up the surface a bit. This helps the paint adhere better. Be sure to sand in the direction of the wood grain. Remove all sanding dust.
Spot Prime
Use acrylic latex primer to spot prime any knots, sap streaks, or very resinous areas that are prone to bleeding through paint. Let spot primed areas fully dry.
Filling Holes & Cracks
Fill any holes, cracks, or other imperfections with exterior wood filler. Let dry fully and sand smooth.
Universal Wood Primer
Apply 1-2 coats of high quality acrylic universal primer to the full fence. Primer provides a consistent base coat and improves paint adhesion. Let dry fully before painting.
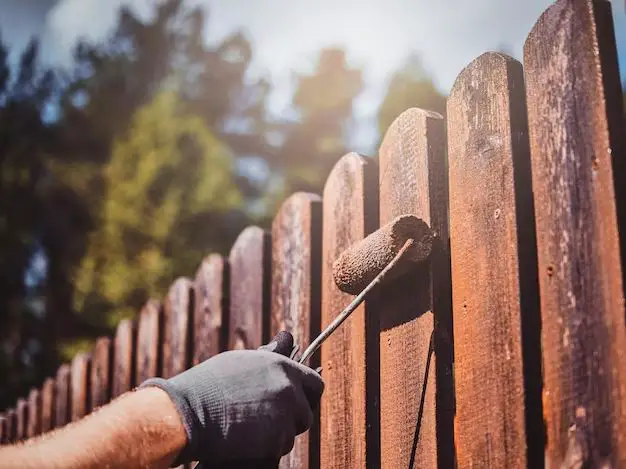
How to Apply Acrylic Paint to a Wood Fence
Once you’ve properly prepped the fence, applying the acrylic paint is straightforward. Here are some tips:
Brushes
Use quality nylon/polyester bristle brushes in 2-4 inch widths. Apply gently and evenly in the direction of the wood grain. Get into corners tightly. Let each coat fully dry between adding coats.
Paint Rollers
For large fence areas, use an exterior paint roller with a 1/2 or 3/4 inch nap. Roll gently in diagonal strokes overlapping by 50%. Re-wet and reload the roller pad frequently for even coverage. Let dry fully between coats.
Paint Sprayer
Airless paint sprayers allow you to coat fence boards very quickly and evenly. Practice first to get technique down. Spray perpendicular to boards in steady back & forth motion 6-8 inches away. Let each coat dry fully before adding another.
2 Coats Minimum
Plan on applying at least 2 coats of acrylic paint to the wood fence for good weather-resistant coverage. 3 coats is even better for super complete coverage and longevity. Let each coat dry fully first.
Pro Tips
– Maintain a wet edge and work in sections to prevent lap marks
– Work methodically board to board for complete coverage
– Use painter’s tape for crisp lines on trims and designs
– End each coat at natural stopping point like fence corners
– Check forecast – don’t paint in rain, dew, extreme heat
Acrylic Paint vs. Stain on Wood Fences
You may be wondering how acrylic paint compares to using wood stain on fences. Here’s a look at the pros and cons of each:
Acrylic Paint
Pros:
- Provides greater protection from elements
- Lasts many years without needing reapplied
- Available in any color – match any color scheme
- Looks fresh and clean when well maintained
Cons:
- Needs thorough surface prep and priming
- Can crack or peel if applied incorrectly
- Shows imperfections – requires fence be in good shape
Wood Stain
Pros:
- Easier, faster application with less prep
- Highlights natural wood grain
- More forgiving on worn, weathered fences
Cons:
- Doesn’t last as long – needs reapplied every 2-4 years
- Provides less weather protection
- Color options more limited
So in summary, paint requires more work upfront but provides better protection long-term. Stain is quicker but needs frequent reapplication.
Curing and Drying Acrylic Paint on Wood
When working with acrylic paint on wood fences, it’s important to understand drying versus curing:
Drying – The acrylic paint will feel dry to the touch in about 1-2 hours in normal conditions. But…
Curing – It takes 30 days for acrylic paint to fully cure and achieve maximum strength and durability.
The painted fence should not be scrubbed or have heavy objects lean on it during the curing period. Be patient for the first month after painting for the acrylic paint to cure fully.
Maintenance and Touch-Ups
A properly prepped and painted wood fence using quality acrylic paint should last 5-7 years before needing a full repaint. To maximize the lifespan:
– Inspect the fence each year and look for any damaged areas of paint. Spot paint as soon as you notice any cracking or peeling.
– Clean the fence gently with diluted mild soap and a soft brush once per year. Avoid power washing.
– Consider applying a fresh coat of acrylic paint every 3-4 years for optimal protection and aesthetics.
– For any paint touch ups, use the same original paint brand and color to ensure consistency. Always prep and prime the area first.
With regular inspection and some minor annual maintenance, your beautifully painted wood fence should stay looking great for years!
Conclusion
Acrylic paint is an excellent choice for adding color to wood fences. With proper preparation and application, acrylic paint adheres well to wood and provides outstanding protection from the elements. It can transform a plain wood fence into an eye-catching accent. Follow the tips provided on choosing quality acrylic paint, proper prep work like sanding and priming, and techniques for brushing, rolling or spraying. Allow the acrylic paint the full 30 days to cure and understand that drying time is different than curing. With annual inspections and touch-ups as needed, an acrylic painted wood fence will enhance your yard for many years to come. The preparation work is worth the long-lasting, rich colored result.
| Paint Type | Prep Work Needed | Durability | Maintenance Needs |
|---|---|---|---|
| Acrylic | High – clean, sand, prime | Excellent 5-7 years | Low – occasional touch-ups |
| Stain | Minimal | Moderate 2-4 years | Frequent reapplying |
