Page Contents
Quick Answer
It is possible to vent a microwave through the roof, but it requires some planning and effort. The main considerations are:
- Properly sized venting – Most over-the-range microwaves require a vent duct size of 3-1/4 x 10 inches or larger.
- Venting path – The ductwork must provide a relatively straight path to the outside.
- Roof venting kit – A roof venting kit specifically designed for microwaves is needed to weatherproof the venting.
- Professional installation – Due to cutting through the roof, it is highly recommended to have a professional install the venting.
With careful planning and installation, a rooftop vent can allow proper ventilation for a microwave installed over the range. Ductwork running through cabinets, floors and the attic is avoided by venting straight up through the roof.
Microwave Venting Needs
Microwaves have specific ventilation requirements for proper operation and to capture heat, grease, smoke and odors. Most microwave manufacturer installation guides recommend:
- Vent duct size of 3-1/4 x 10 inches or larger.
- Vent duct constructed of galvanized metal.
- Vent duct run less than 120 equivalent feet in length.
- No more than three 90-degree bends in the ductwork.
- Damper or louver on the exterior roof cap.
Microwave venting is important for:
- Proper airflow – The fan needs balanced airflow to function correctly.
- Grease filtering – The vent captures grease, smoke and odors from cooking.
- Heat dissipation – Venting removes heat generated by the microwave.
- Prevent moisture – Vapor and humidity are exhausted to the outside.
Without adequate venting, microwave performance can suffer in several ways. The fan becomes less effective, leading to longer cooking times. Grease and odors can recirculate through the kitchen. Excess heat buildup can cause the microwave to overheat. Trapped moisture can damage cabinets or walls around the unit.
Challenges of Roof Venting
While venting a microwave through the roof is possible, it presents some unique challenges:
- Straight ductwork path – The vent duct cannot have drastic bends or elbows back on itself.
- Sufficient duct size – Smaller ductwork can restrict airflow.
- Pitch of roof – The steeper the roof pitch, the more difficult to run a proper vent.
- Accessibility – Working high on the roof makes installing the vent harder.
- Weatherproofing – The exterior roof vent cap must seal tightly against leaks.
- Cutting the roof – Precise cuts are needed for the ductwork to fit properly.
Despite the difficulties, a professional installer can evaluate the specifics of your home and determine if rooftop venting will work. The benefits of a straight vertical vent duct have to be weighed against the challenges of running the ductwork horizontally and cutting holes through walls and cabinets.
Professional Installation Recommended
Here are some reasons why a professional installer is recommended for venting a microwave through the roof:
- Experience with roof venting – They have worked through the same scenarios before.
- Proper roof penetration – They know the techniques to seal and flash the ductwork.
- Meet building codes – An experienced pro will ensure all codes and permits are handled.
- Evaluate easiest path – They can find the optimal route for smooth ductwork.
- Reduce cost – Professionals may have wholesale access to venting materials.
- Warranty support – Most manufacturers require professional install for warranty.
Microwave manufacturers state in their installation guides that they will not warrant over-the-range microwaves unless they are installed by qualified professionals. Attempting ductwork through the roof as a DIY project can be difficult and may void the product warranty if done incorrectly. Hiring a professional ensures proper installation for optimal microwave venting.
Microwave Rooftop Venting Process
Here are the key steps involved in properly venting a microwave through the roof:
- Choose an approved rooftop venting kit – Purchase a pre-fabricated vent kit specifically designed for microwave ducting.
- Determine the ductwork path – Find the shortest route from microwave to roof with minimal bends.
- Run duct through attic – Install rigid galvanized ductwork from microwave up into the attic.
- Cut roof opening – Penetrate the roof along the duct path with proper clearance.
- Install roof cap – Seal shingles around ducting and mount weatherproof vent cap.
- Connect ductwork – Join attic ductwork to the bottom of roof vent.
- Secure connections – Tape all joints in the ductwork path.
- Install damper – Add damper assembly to allow airflow control.
Proper sequencing of steps is critical. The ductwork must be routed, roof opening cut and weatherproofed before the microwave is installed. All connections should be sealed to prevent air leaks or moisture entry.
Microwave Roof Vent Styles
There are two main roof vent styles used for microwave venting:
Roof Jacks:
- Box-shaped base flashing seals to roof.
- Standard sizes fit around ductwork.
- Top has adjustable cap for airflow.
- Provides support for exposed ductwork.
- Requires proper shingle installation.
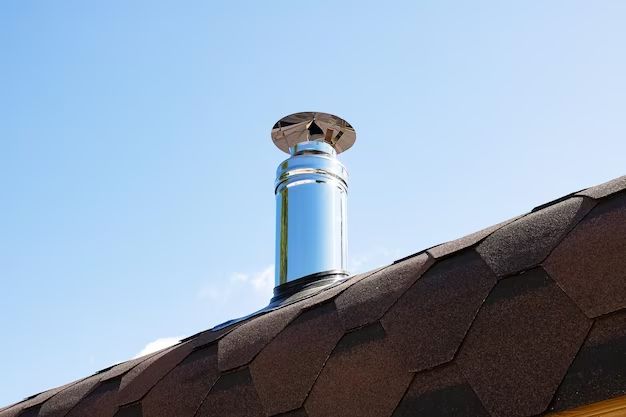
Roof Caps:
- Low profile, dome-shaped cap.
- Mounts directly to roof surface.
- Duct connects inside to draw air flow.
- Requires minimal penetration of roof.
- Used with concealed ductwork in attic.
Roof jacks allow you to run ductwork vertically above the roofline. Roof caps provide a sealed cover that fits over a small roof opening. An installer will recommend the best style for your specific roof type and venting approach.
Key Considerations for Roof-Vented Microwaves
Here are some important considerations when planning for roof venting:
Ductwork path:
- Needs to reach roof with minimal direction changes.
- Should avoid major structural elements.
- Consider soffit access or storage areas.
Roof type/condition:
- Pitch, sheathing and rafters must support vent.
- Low-slope or deteriorating roofs will be problematic.
- Lifting shingles repeatedly risks more damage.
Microwave fan CFM:
- Higher CFM requires more powerful venting.
- Long or restrictive ducts need more CFM.
- Standard models with 100-200 CFM may suffice.
Evaluating these factors will determine if rooftop venting is the most suitable approach. It offers benefits over sidewall or downward ventilation but requires extra installation considerations.
Conclusion
Venting a microwave through the roof is an effective way to eliminate ventilation issues associated with over-the-range microwave installations. It requires careful planning to route ductwork from the microwave up through attic space and penetrating the roof surface. Using an approved rooftop vent kit designed for microwave exhaust ensures proper weatherproofing. Due to the complexities of ductwork, rooftop penetrations and the need to meet code requirements, professional installation is strongly recommended for venting microwaves through the roof. With proper materials and expertise, the exhaust can be directed outside efficiently. This provides optimal airflow and extraction of smoke, grease and moisture.
Frequently Asked Questions
Can any microwave be vented through the roof?
Most over-the-range microwave models can be vented through the roof. The user manual will specify venting requirements. Standard vents are 3-1/4 x 10 inches or larger. Microwaves labeled for recirculating or non-vented operation cannot be modified for roof venting.
What size ductwork do I need?
Microwave manufacturer installation guides recommend a minimum duct size of 3-1/4 x 10 inches. This provides around 60-100 CFM airflow based on the run length and number of elbows. Larger custom microwave hoods may require 6 or 7-inch round ducting.
How difficult is cutting the duct opening in the roof?
Penetrating the roof with proper clearance holes for ductwork should only be attempted by an experienced professional roofer. They will determine the roof construction style and use appropriate techniques to flash and seal the opening against leaks.
Can I vent two microwaves through one roof duct?
No, combining two microwave vents into a single duct is against building codes and manufacturers’ installation requirements. Each over-the-range microwave must have its own dedicated duct from the unit to the exterior roof cap.
How high should the roof vent be installed?
Roof vents require a minimum clearance above the roofline based on the duct exiting. Typically 12 inches above the penetration point is adequate, but local building codes will determine the exact height needed.
Conclusion
Venting a microwave through the roof can be a complex DIY project, requiring roof penetration, proper ductwork, and weatherproofing skills. For optimal safety and results, hiring a professional installer is highly recommended. They have the expertise to evaluate your home’s layout, select compatible materials, and properly route ductwork to meet all codes and microwave manufacturer requirements. Although rooftop venting has challenges, it provides the most direct path outdoors for eliminating ventilation issues over the stove. With careful planning and execution, the microwave can operate free of airflow restrictions, grease buildup and humidity.