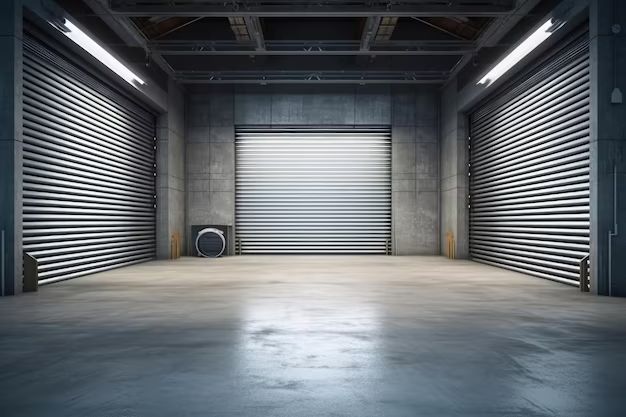
A garage can be a damp place that is prone to water damage and mold growth if not properly protected. While it may seem easier to waterproof a garage from the outside, it is possible to waterproof a garage from the inside as well. There are several methods for creating an interior waterproof barrier in a garage to prevent moisture from seeping in from the walls, floor, and ceiling.
Page Contents
- 1 Should You Waterproof a Garage?
- 2 Can You Waterproof a Garage from the Inside?
- 3 How to Waterproof Garage Walls from the Inside
- 4 How to Waterproof a Garage Floor from the Inside
- 5 How to Waterproof a Garage Ceiling from the Inside
- 6 Tips for Effective Interior Garage Waterproofing
- 7 Advantages of Interior Waterproofing
- 8 Disadvantages of Interior Waterproofing
- 9 Cost to Waterproof a Garage Interior
- 10 Conclusion
Should You Waterproof a Garage?
Waterproofing a garage is recommended for several reasons:
- Prevent water damage – Moisture seeping into a garage can lead to warped walls, damage to insulation, growth of mold, and deterioration of items stored inside. Waterproofing blocks this moisture.
- Reduce humidity and dampness – Waterproofing helps regulate humidity levels and prevents that damp, musty garage smell.
- Protect stored items – Creating a waterproof environment keeps stored items protected from moisture damage.
- Make the space usable – Eliminating dampness makes the garage more pleasant for projects, hobbies, and parking vehicles.
Garages are exposed to moisture from rain, snow, and groundwater. Even condensation from temperature changes inside the garage can create dampness issues. Without proper waterproofing, this moisture can cause extensive damage over time.
Can You Waterproof a Garage from the Inside?
Yes, there are several effective methods for waterproofing a garage from the interior side. Here are some options:
Apply Waterproof Paints and Sealers
Specialty waterproof paints and sealers can be applied directly to interior garage walls, floors, and ceilings. These paints contain waterproofing agents that seal concrete and block moisture penetration. Epoxy-based garage floor paint is one example. The key is using products specifically designed for interior waterproofing.
Install a Vapor Barrier
Applying a vapor barrier material directly to interior garage walls is an efficient waterproofing option. The vapor barrier blocks moisture from passing through. Common vapor barrier materials include polyethylene plastic sheeting, laminated paper, and spray-applied vapor barrier coatings.
Use Rigid Foam Insulation Panels
Insulation panels made of rigid foam also act as effective moisture barriers when installed on interior garage walls. The dense foam blocks water vapor from passing through. Panels are easy to install with adhesive and then finished with drywall or paneling.
Apply Waterproof Drywall Sealant
Sealing drywall with specialized waterproof drywall sealants is another good option. Silicone-based sealers can be rolled or brushed onto seams and corners. This seals them to prevent moisture penetration.
How to Waterproof Garage Walls from the Inside
Here are the basic steps for waterproofing garage walls from the inside:
- Clean walls thoroughly – Remove any dirt, debris, oil, or existing paint so the waterproofing can adhere directly.
- Make repairs – Seal any cracks or holes with caulk or repair compound so moisture cannot penetrate.
- Prime walls – Use the recommended primer for the waterproofing material.
- Apply waterproof paint or sealer – Roll on two coats, allowing proper drying time between coats.
- Install vapor barrier – Hang polyethylene sheeting or laminated paper, overlapping seams. Or apply waterproofing compound.
- Install foam insulation – Glue rigid foam panels to walls. Seal around edges with caulk.
- Install drywall – Screw sheets of drywall over the foam insulation.
- Finish seams – Tape, mud, and sand seams. Apply waterproof drywall sealer.
- Prime and paint – Roll on two finish coats of garage-specific paint.
This creates a layered moisture-proof barrier. The exact materials can be adjusted as needed. The key is covering walls completely to seal out moisture.
How to Waterproof a Garage Floor from the Inside
Garage floors are prone to moisture seeping through cracks and porous concrete. Here is how to waterproof from the inside:
- Clean thoroughly – Scrub floor with degreaser to remove oil and debris.
- Make repairs – Fill any cracks and holes with concrete patch compound.
- Etch concrete – Use etching solution or sander to rough up the concrete so paint can bond.
- Apply epoxy paint – Roll on two coats of heavy-duty, waterproof epoxy garage floor paint.
- Optionally apply polyurethane – For extra protection, apply a clear polyurethane coat over the cured epoxy.
- Optionally install floor sealer – Brush or roll waterproof concrete floor sealant for maximum moisture protection.
The combination of epoxy paint and polyurethane or sealant makes an impermeable moisture barrier. Always follow the manufacturer’s instructions for proper application and drying time.
How to Waterproof a Garage Ceiling from the Inside
Waterproofing the ceiling traps moisture before it can penetrate into the garage interior. Here are two approaches:
Install a Vapor Barrier
Staple sheets of 6mm polyethylene plastic to the underside of roof rafters. Overlap the seams by 6 inches and seal with moisture-resistant tape. The plastic sheeting blocks moisture from above.
Apply Waterproof Drywall Sealer
For finished garage ceilings, apply two coats of waterproofing sealant. This seals any gaps or joints that could allow moisture through drywall. Look for a spray-on silicone-based sealer ideal for overhead application.
Also check that ceiling insulation is fully enclosing the garage space. Blown-in cellulose or fiberglass insulation will help regulate humidity and temperature.
Tips for Effective Interior Garage Waterproofing
Follow these tips for the best results when waterproofing a garage from the inside:
- Address exterior problem areas first – Fix any roof, wall, foundation, or grading issues to stop major moisture sources.
- Improve ventilation – Make sure the garage has adequate ventilation to combat humidity and condensation.
- Maintain consistent temperatures – Reduce temperature fluctuations that can create condensation.
- Check for leak points – Inspect wires, conduit, pipes, and vents that punch through walls or ceilings.
- Look for cracks and gaps – Be thorough sealing any crevices that could let moisture in.
- Consider a dehumidifier – Adding a dehumidifier helps actively control humidity levels.
- Apply finishes carefully – Follow all directions to ensure paints, sealers, and barriers cure properly.
Taking steps to control moisture from both the exterior and interior will provide the most robust waterproofing solution.
Advantages of Interior Waterproofing
Waterproofing a garage from the inside offers these advantages:
- Less expensive – Interior waterproofing costs significantly less than exterior solutions.
- Convenience – It avoids the need to work on the exterior facade which may require equipment.
- Controlled application – Products can be applied carefully in ideal temp/humidity inside.
- Immediate benefits – Interior waterproofing prevents existing moisture issues quickly.
- Enhanced storage – Creating a moisture-free area makes garage storage safer.
- Improved air quality – Blocking dampness reduces musty odors and potential for mold.
- Added efficiency – Insulation also helps regulate temperatures year-round.
For a cost-effective way to protect against moisture damage, interior garage waterproofing is a smart choice. With the right combination of sealants, barriers, and ventilation, an existing garage can be transformed into a dry, usable space.
Disadvantages of Interior Waterproofing
While interior waterproofing has many advantages, there are also some potential drawbacks:
- Moisture sources remain – Exterior moisture problems are not fixed at the source.
- Difficult to identify leaks – It may be hard to pinpoint exact exterior leak locations from inside.
- Access challenges – Reaching every nook and cranny for thorough application can be tricky.
- Textured surfaces – Rough or uneven walls make achieving complete coverage difficult.
- Life span varies – Some solutions last longer than others before needing renewal.
- Labor intensive – Extensive surface prep and careful application is required.
- Toxic materials – Some waterproofing products contain harsh chemical fumes.
- Visually alter space – Barriers and thick paint can make the interior feel closed in.
While exterior waterproofing is more comprehensive, interior options still offer a cost-effective way to manage moisture in existing garages. Understanding both the advantages and drawbacks will lead to the right decision.
Cost to Waterproof a Garage Interior
The cost to waterproof an existing garage from the inside averages $7-$20 per square foot. This covers common materials like paint, insulation panels, and vapor barriers along with labor for surface preparation and installation.
Here are approximate costs for waterproofing a 400 square foot garage interior:
| Material | Low Cost Estimate | High Cost Estimate |
| Waterproofing paint | $1600 | $3200 |
| 6mm plastic vapor barrier | $800 | $1200 |
| Rigid foam insulation | $1200 | $2400 |
| Drywall sealing | $500 | $800 |
| Surface preparation and labor | $1200 | $2400 |
| Total cost estimate | $5300 | $10,000 |
As an DIY project, interior garage waterproofing costs $2-$6 per square foot for materials only. Hiring a contractor ranges from $6-$15 per square foot including installation labor and equipment.
Factors like garage size, moisture levels, and materials selected impact the overall project budget. Get multiple quotes to find the most competitive rate.
Conclusion
Waterproofing your garage interior is an effective way to protect it from water damage and create a more usable space free from dampness. While exterior waterproofing solutions are more comprehensive, interior options provide a convenient and affordable alternative, with a variety of barrier and sealing methods to choose from.
Focus on sealing any gaps, installing insulation, and applying specialty paints and sealants per the manufacturer directions. Combine interior waterproofing with adequate ventilation and dehumidification. Address any exterior moisture sources as well.
Taking the time to properly waterproof can extend the life of your garage while making it safer for storage and activities. With an investment of $7-$20 per square foot, you can transform your garage into a dry, pleasant environment.