Page Contents
Quick Answer
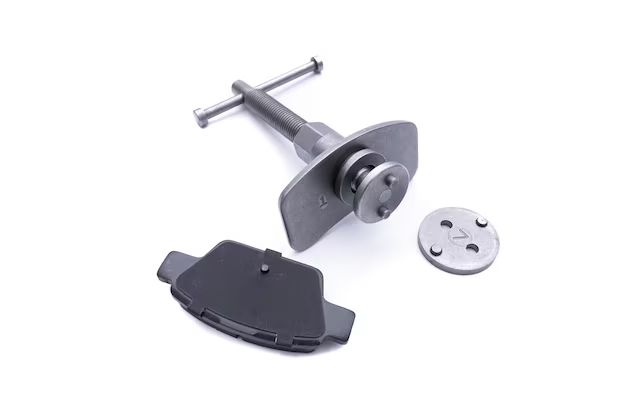
While some special tools can make replacing brake pads easier, it is possible to do the job with common hand tools for most vehicles. The most essential tools are a lug wrench, jack and jack stands, wrench/socket set, brake caliper tool, and brake piston compressor. With proper care and caution, brake pads can be changed safely using regular tools. However, for inexperienced mechanics, certain specialty tools are highly recommended for efficiency and to avoid damage.
Tools Needed to Replace Brake Pads
Here are the basic tools required to replace brake pads on most vehicles:
| Tool | Purpose |
|---|---|
| Floor jack | Safely raise the vehicle |
| Jack stands | Support the vehicle weight once raised |
| Lug wrench | Remove lug nuts to take off the wheel |
| Wrench/socket set | For bolts and hardware around brakes |
| Brake caliper tool | Compress caliper piston to push it back |
| Brake piston compressor | Push piston back into the caliper |
| Brake cleaner | Clean any brake dust and debris |
| Brake lubricant | Lubricate necessary components |
These are the fundamental tools for replacing brake pads and can get the job done on most vehicles. However, there are some speciality tools that can make the process much easier.
Helpful Specialty Tools
While not always necessary, here are some specialty brake tools worth investing in:
| Tool | Benefit |
|---|---|
| Locking pliers | Holds piston in place when compressing |
| C-clamp | Another option for compressing piston |
| Disc brake spreader | Easily retracts the brake pads |
| Brake pad spreader | Provides needed space to remove pads |
| Brake pad clip pliers | Quickly detach retaining clips and springs |
| Brake pad gauge | Checks pad wear to know when replacement is needed |
| Torque wrench | Tighten bolts to manufacturer specs |
These specialty brake tools make it much simpler for amateurs to replace pads properly. The right tools allow you to change pads quickly without damaging anything.
Can I Do It Without Special Tools?
Replacing brake pads without any specialty tools is challenging but possible in many cases. Here are some tips:
– Use a C-clamp instead of a dedicated brake piston tool to compress the caliper. Place wood blocks to prevent damage.
– Improvise with household items like spacers and clamps to separate brake pads. Avoid prying that can harm components.
– Tighten bolts carefully with a standard wrench/socket set. Don’t overtighten. Check torque specs.
– Thoroughly clean brake assembly components with brake cleaner spray and rags/brushes.
– Apply grease/lubricant by hand with a brush or rag where needed. Don’t over apply.
– Carefully examine all parts and look up diagrams to understand how they interact.
– Work slowly and methodically. Don’t force anything that seems stuck.
– Consult vehicle service manual for proper process if improvising.
– Have extra brake cleaner, shop rags, latex gloves and other basics on hand.
– Be prepared to make multiple trips to auto parts store if missing anything.
The above tips can help you successfully change brake pads without specialized tools. However, the job will take much longer and there is higher risk of mistakes. The right tools make the process vastly smoother.
Caution Working Without Specialty Tools
While possible, replacing brake pads without the right equipment has risks:
– Brake pistons can be easily damaged without the proper compressor tool.
– Makeshift prying tools can bend or crack caliper pieces.
– Not properly retracting brake pads risks scratching rotors when reassembling.
– Over-torqued or loose bolts cause issues like brake noise, vibration and reduced stopping power.
– Parts that aren’t fully cleaned and lubricated wear out faster.
– Vehicle weight on stands rather than lifted creates safety issues.
– General lack of efficiency leads to frustration and cut corners.
DIY mechanics should carefully weigh if improvising tools is worth the hassle and risks. For most brake jobs, having the specialty tools helps ensure it’s done right.
Essential Safety Tips
When replacing brake pads yourself, keep these vital safety tips in mind:
– Use wheel chocks and apply parking brake when lifting vehicle.
– Jack up vehicle only on manufacturer recommended lift points.
– Securely support raised vehicle on jack stands before working underneath.
– Wear protective gloves and eye wear when handling brake parts.
– Never crawl under a supported car. Use creeper if needed.
– Handle brake cleaner, lubricants and asbestos dust with care.
– Road test vehicle in empty parking lot before driving after service.
– Have another person available to help support components during the job if possible.
– Dispose of old brake parts properly to avoid environmental hazards.
– Consult vehicle repair manual if unsure of proper brake pad replacement procedure.
Rushing through a brake job or taking shortcuts risks injury, so exercise patience and caution. Making safety the top priority ensures you can change pads correctly.
Signs Your Brake Pads Need Replacement
Here are key signs it’s time to replace worn brake pads:
| Symptom | Cause |
|---|---|
| High-pitched squealing noise when braking | Built-in wear indicator tabs rubbing on rotor |
| Grinding or growling noises under braking | Pads worn down to metal backing plate |
| Car pulls to one side braking | Uneven pad wear between front or rear |
| Excessive brake pedal travel | Worn pads leaving increased gap |
| Reduced braking effectiveness | Less friction material contacting rotors |
| Brake pedal pulsation or vibration | Warped rotors from overheated pads |
| Visible damage or missing chunks of pad | Advanced wear, time for replacement |
Pay attention for these warning signs and have brake pads inspected when noticed. Continuing to drive on badly worn pads will damage rotors and reduce braking ability.
Inspecting Brake Pad Wear
Along with listening for audible symptoms, you can visually inspect brake pad wear by:
– Looking through openings in rim for thickness of friction material left.
– Removing wheels to examine outer pad surface not visible otherwise.
– Checking inner pads by looking through caliper opening above rotor.
– Noting any cracks, damage or missing portions.
– Comparing wear across inner and outer pads.
– Consulting vehicle maintenance schedule for recommended inspection intervals.
Get in the habit of periodically checking pad thickness so you know when they need replacement. Waiting too long risks metal-on-metal contact and damaged rotors.
Brake Pad Replacement Cost
The typical cost for just replacement brake pads ranges from $50-$150 for an axle pair:
| Brake Pad Type | Parts Cost Per Axle |
|---|---|
| Ceramic | $70-$150 |
| Semi-metallic | $50-$100 |
| Organic/NAO | $50-$80 |
Ceramic pads cost the most but provide the best longevity and performance. Organic pads are the most affordable but wear faster.
Adding 1-3 hours of labor costs $75-$250 or more for pad replacement. So expect a total cost of $150-$400 depending on pad type and labor rates.
Replacing rotors at the same time adds $125-$250 per axle for good quality cross drilled or vented rotors.
Cost Saving Tips
Ways to save money on brake pad replacement include:
– Buying pads yourself then paying for just labor time. Markups are high on parts.
– Choosing less expensive pad compounds that still offer adequate performance.
– Having a mechanically inclined friend help replace pads with you.
– Cleaning rotors carefully yourself instead of new rotors if not badly scored.
– Only replacing the axle with worn pads if fronts and rears are staggered.
– Checking prices from multiple repair shops to find the best deal.
– Asking the shop about any coupon specials for brakes they offer.
– Avoiding dealerships and luxury brand shops that have higher rates.
Paying attention to pricing allows you to get quality brake pad service at the most affordable cost. Properly maintaining your brakes saves money in the long run by preventing damage.
lifespan
The expected lifespan of brake pads depends on several factors:
– Driver habits – Aggressive braking shortens pad life.
– Vehicle weight – Heavier vehicles put more wear on brakes.
– Driving conditions – Stop-and-go city driving wears pads faster than highway.
– Component quality – Premium pads last longer than economy versions.
– Brake system – Larger brakes provide more pad surface area to dissipate heat and friction.
Typical Brake Pad Replacement Intervals
Under normal driving conditions, here are typical brake pad replacement intervals by vehicle type:
| Vehicle | Miles Between Replacement |
|---|---|
| Compact cars | 30,000-50,000 miles |
| Family sedans | 40,000-70,000 miles |
| Luxury cars | 50,000-80,000 miles |
| Performance cars | 15,000-35,000 miles |
| SUVs and trucks | 35,000-65,000 miles |
Higher performance vehicles tend to need pads replaced most frequently. But driving habits play a big role as well. Severe use can cut intervals in half. Checking pads during oil changes gives you a good handle on personal wear rate.
Maximizing Pad Life
You can maximize brake pad lifespan by:
– Avoiding excessive braking and hard stops when possible
– Going easy on brakes for the first 200 miles to properly bed-in pads
– Carrying lighter loads to reduce vehicle weight
– Having wheels aligned to prevent uneven pad wear
– Flushing old brake fluid and using high quality replacement fluid
– Keeping rotors in good condition to allow proper pad contact
Proper driving and brake maintenance habits allow you to reach the full lifetime of your brake pads. This saves you money over time on replacement costs.
Conclusion
Replacing brake pads is a common and important DIY maintenance task that can be accomplished without specialty tools in many cases. But having the proper equipment makes the job much easier and helps avoid component damage. Even with regular tools, brake pads can be changed safely with mechanical skill and caution. Be sure to look for signs of wear and budget for periodic brake service to keep your vehicle stopping safely.