Page Contents
Quick Answer
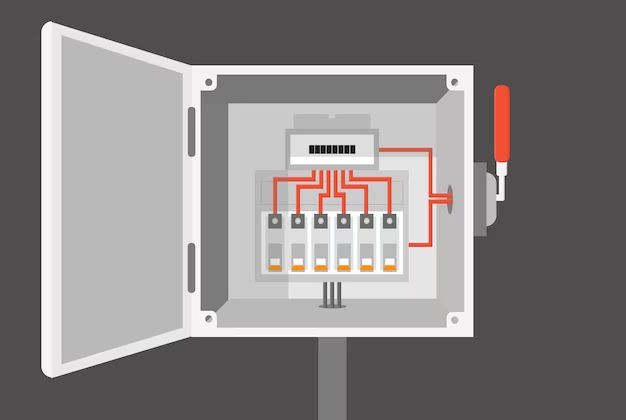
In most cases, yes you do need an outlet box for a light fixture. The National Electrical Code (NEC) requires that lighting fixtures be installed to a box that is approved for the fixture’s weight and use. An outlet box provides a mounting point for the fixture and a contained space for splices and wire connections. Not using an approved electrical box can create fire and shock hazards.
What is an Outlet Box?
An outlet box, also called a junction box, is an enclosure designed to safely mount electrical devices and contain connections. Outlet boxes:
- Provide protection for wires and connections from damage
- Allow access to wires for maintenance
- Contain any arcing or sparking within the grounded metal enclosure
- Provide a strong support point for mounting fixtures
Outlet boxes are made of steel, aluminum, or plastic. They come in many shapes and sizes to accommodate different wiring and mounting needs. The boxes feature knockouts that allow cables to be fed into the enclosure through removable plugs. The boxes connect to the electrical system grounding to protect against shocks.
Common Types of Outlet Boxes
- Plastic boxes – Used frequently in homes and indoor applications. They do not conduct electricity and are less expensive than metal boxes.
- Metal boxes – Used where more durability is needed. They conduct electricity and must be grounded.
- Conduit boxes – Designed to connect directly to electrical conduit runs.
- Ceiling boxes – Special heavy-duty boxes designed for ceiling-mounted fixtures.
- Gang boxes – Allow multiple devices to be wired to one box.
Outlet boxes are made in different cubic inch sizes to accommodate the number and size of wires contained within. They are available in both non-metallic and metallic types.
Do All Light Fixtures Require a Box?
The National Electrical Code requires all permanently installed light fixtures to be mounted to an approved outlet box. (NEC Article 410.16). This applies to all indoor and outdoor lighting.
However, there are some exceptions to this rule:
- Some undercabinet lights feature plug-in connections and do not require outlet boxes.
- Low voltage landscape lighting powered by an external transformer does not require boxes when wires are buried underground.
- Temporary lighting such as holiday lights or string lights do not require boxes when used for under 90 days.
In nearly all permanent indoor and outdoor installations, using an outlet box for the light fixture is required. The box provides an anchor point designed for the fixture’s weight, protects the connections from damage, contains any arcs or sparks, and gives a central point to connect all wires.
Choosing the Correct Box Type
When installing or replacing a light fixture, you will need to choose an outlet box rated for the fixture’s size, weight, and wiring needs. The NEC requires outlet boxes to be made of metal or fire-resistant material for most lighting. Consider the following when choosing an appropriate outlet box:
Supporting the Fixture Weight
Heavy fixtures require boxes that can support their weight. Lightweight plastic boxes can only support 25 lbs or less. Heavy chandeliers, bathroom vanities, and ceiling-mounted fixtures require stronger outlet boxes. This often requires using heavy-duty metal ceiling boxes securely mounted between ceiling joists.
Number of Wires
The outlet box must provide enough interior space for all the wires. This includes the incoming supply wires, outgoing wires to the switch, wires connecting multiple fixtures, ground wires, and wire connectors. Consult the fixture’s directions for minimum box size.
Voltage Rating
Be sure the box is rated for the circuit voltage it will contain. Most household lighting requires standard 120V outlet boxes. Higher wattage outdoor lighting may employ boxes rated for 240V circuits.
Indoor vs. Outdoor
Outdoor boxes need to be weatherproof to protect connections from moisture. Plastic boxes are only permitted for indoor use. Outdoor fixtures require grounded metal outlet boxes.
Mounting Type
Several box types suit different mounting locations:
- Standard boxes for walls and ceilings
- Octagon boxes for ceiling mounts
- Pancake boxes for confined spaces
- Grid-mounted boxes for suspended ceilings
- Concrete-mounted boxes for foundations and walls
Installing the Outlet Box
Installing the outlet box correctly is important to provide a safe foundation for the light fixture. Here are some tips on installing the box correctly:
Box Location
The box location will depend on the lighting design and fixture type. However, there are optimal heights for standard wall-mounted fixtures:
- Wall sconces beside doors or mirrors = 60-66 inches off the floor
- Kitchen ceiling lights = 30-36 inches down from the ceiling
- Bathroom vanity lights = 32-40 inches above the counter
Position recessed lights according to room dimensions and desired illumination pattern.
Box Support
Securely attach the outlet box directly to structural framing. For ceilings, mount boxes firmly between joists or rafters. Heavy ceiling fixtures may require additional bracing. For walls, attach boxes to studs or blocking. This provides a robust anchoring point for the fixture.
Box Connection
Use appropriate NM cable or conduit to supply power to the outlet box. Connect the supply line into the box with cable clamps or conduit connectors. Provide at least 6 inches of extra cable or conduit at the box for easy connections.
Box Mounting
Mount the box flush or recessed into the wall or ceiling surface. The open face of the box should be flush with the finished surface so the fixture canopy or cover seats properly. Adjust box depth accordingly.
Box Grounding
Connect the grounded circuit wire to the outlet box itself. This grounds the box and protects against electric shocks.
Following these guidelines provides a safely mounted box that meets code and manufacturers’ requirements. Always consult fixtures’ installation sheets for specific box requirements too.
Installing Fixtures Without Boxes
In rare cases, some fixtures may not require outlet boxes when installed professionally and safely. Examples include:
- Plug-in undercabinet lighting – Low voltage plug-in lights are connected to accessible outlets underneath cabinets.
- Track lighting – Specialized track heads fit onto electrified track rails mounting directly to the ceiling.
- Mirrored sconces – Affixed directly to a mirror backing.
- Temporary fixtures – Holiday lights plugged into outlets.
However, most permanent fixtures will need proper outlet boxes. Attempting to install fixtures directly to ceilings, walls or other structural surfaces without approved boxes raises safety concerns:
- No protection for exposed wires and connections
- No proper support for fixture weight
- Absence of grounding point increases shock risk
- Fire hazard from uncontained electrical arcing
In rooms like bathrooms, kitchens, and outdoors, the risk of electrocution and shorting wires makes installing any light without an outlet box very dangerous.
The fixture may seem physically supported without an outlet box initially. However, electrical connections can degrade over time, leading to loose wires, shorts, and fires in the building structure. Using outlet boxes is a small investment that prevents expensive hazards down the road.
Wiring the Fixture to the Box
When installing a light, always consult the manufacturer’s directions for wiring and outlet box requirements. Here are some general wiring guidelines:
Matching Wires
The outlet box wires should match the wiring configuration of the light fixture. Typically this involves:
- Black (hot) wire connected to the black fixture wire
- White (neutral) wire connected to the white fixture wire
- Green or bare copper (ground) wire connected to the green/ground wire
- Extra wires capped individually
Securing Connections
Use approved wire connectors or crimp caps to join the outlet box wires to the fixture wires. Connectors should be sized to fit the gauge of wires being joined. Connectors must be twisted firmly onto wires so no copper shows.
Grounding
Be sure to connect the ground wire from the box to the fixture’s ground wire. Ground provides an essential safety path to prevent electric shocks.
No Loose Wires
Do not leave any loose wires in the box. Curl loose wires neatly and cap them individually with approved caps. Loose wires can arc and short out connections.
Wires Neatly Contained
Wires should be neatly positioned to avoid pinching or damage. There should be no excessive kinks or pressure on wire connections.
Testing
Turn the power back on and test that the light powers on correctly. Check for secure connections by gently pulling wires from their caps. Tugging should not detach properly joined wires.
Box Fill Calculations
The NEC limits the volume of wires permitted in an outlet box. This prevents overfilling boxes that can lead to wires being damaged. Box fill refers to the volume of wires compared to the total interior volume of the box.
When installing a fixture, calculate the box fill to ensure the box meets code:
- Determine the total interior cubic inch volume of the box
- Calculate the total cubic inch volume of all the wires contained in the box
- Divide wire volume by box volume to find box fill percentage
Box fill should not exceed NEC limits:
- Boxes under 2,500 cubic inches can be filled to 40% capacity
- Boxes over 2,500 cubic inches can be filled to 25% capacity
Wires typically occupy between 20% to 45% depending on quantity. Use a larger box if the fill exceeds NEC limits. Too many wires pressurizes connections risking shorts.
Box Fill Example
A bathroom light outlet box measures 6 x 6 x 2.5 inches:
- Box interior volume = 6 x 6 x 2.5 = 90 cubic inches
- Contains four 14 AWG wires = 16 cubic inches total wire volume
- Box fill = 16/90 = 18% fill
This 18% fill is within the NEC’s 40% limit for a 90 cubic inch box. Therefore, the wiring is appropriately sized for the box.
Outlet Boxes and Room Additions
When renovating or adding onto rooms, installing new outlet boxes allows extending lighting into new areas:
Type of Room
The intended use of the room addition determines the type of outlet box:
- Standard boxes for living spaces
- Metallic/in-use rated for kitchens and bathrooms
- Weatherproof boxes for outdoor additions
Ceiling vs. Wall Mounts
Room layout and lighting plans determine box placement. Evaluate ceiling-mounted or wall-mounted fixtures as desired. Install boxes positioned appropriately.
Box Size for Fixtures
Choose outlet boxes sized for room addition fixtures. Larger, heavier fixtures like dining room chandeliers require bigger support boxes. Check manufacturers’ guidelines.
Number of Boxes
Install enough boxes to achieve the desired lighting design. Spacing boxes equidistant down hallways or staggered in grid patterns in large rooms. Follow all minimum spacing codes.
Wiring Runs
New boxes should connect to the existing wiring system or new circuits at the main panel. Consult an electrician to extend wiring through attics, basements or by cutting into existing walls.
Testing
Test all boxes to confirm power and ground connections before installing fixtures. Verify proper functionality of control switches.
Planning outlet box placement and sizes allows optimal lighting in the new space. A professional electrician can ensure code compliance and safe operation.
Conclusion
Using an approved outlet box is required for nearly all permanently installed lighting fixtures. The box properly mounts the fixture, contains splices safely, allows connections to the wiring system, and prevents damage that can lead to shorts and fires. Specialty lights, temporary fixtures, or plug-in lamps may not need boxes, but all standard hardwired lights must have outlet boxes according to code. Choosing the right box type and size for the fixture, area, and wiring allows the light to be durable, safe and code-compliant.