Painting a metal fence can help protect it from rust and corrosion and also allow you to update its appearance. When preparing a metal fence for painting, one of the key steps is sanding. Sanding creates a rough surface that allows the new paint to properly adhere. So do you really need to sand a metal fence before painting it? Here is a closer look at whether sanding is necessary and what options you have.
Page Contents
Should You Sand a Metal Fence Before Painting?
Sanding a metal fence prior to painting is highly recommended. Here are some of the key reasons why sanding first is important:
Removes Flaking Paint and Rust
If your existing metal fence already has paint that is cracked, peeling or flaking, you’ll want to sand down to the bare metal. Sanding removes any loose paint or rust. This helps create a smooth, uniform surface for the new paint. Without sanding away flaking paint and rust first, the new paint won’t properly adhere.
Scuffs Up the Surface
Metal has an inherently smooth surface. Paint applied to a very smooth metal surface will not have anything to “grip” onto. Sanding scuffs up the surface slightly and gives it some tooth. This allows the new paint to grab onto the rough areas for better adhesion.
Prepares the Surface for Priming
In most cases, you’ll want to apply a metal primer after sanding and before applying the finish paint. The primer helps protect the metal from rust and provides another layer for the topcoat paint to stick to. Sanding prepares the surface so the primer can properly bond.
How Thoroughly Should You Sand?
When sanding a metal fence before painting, how much you need to sand depends on the condition of the existing surface:
Bare Metal
If your fence does not have existing paint and is bare metal, a very light sanding is all that’s needed. You just want to scuff up the shiny metal surface a bit to help the paint adhere.
Good Condition Paint
If the existing paint is in good shape with minimal flaking or peeling, you can get by with a light sanding to rough up the surface. Enough to degloss and texture the surface.
Flaking/Peeling Paint
Any areas where paint is flaking, bubbling or peeling will need to be sanded thoroughly down to bare metal. You want to remove all of the failing paint in these spots.
Rusted Areas
Any rust spots need to be sanded until you’ve removed all traces of rust. Otherwise the rust will continue to spread underneath the new paint.
So for fences in good shape, a light overall sanding will do. For fences with a lot of problem areas, be prepared to sand all failing paint and rust completely away.
Sanding Options for Metal Fences
When it comes to sanding metal fences in preparation for painting, you have a few options:
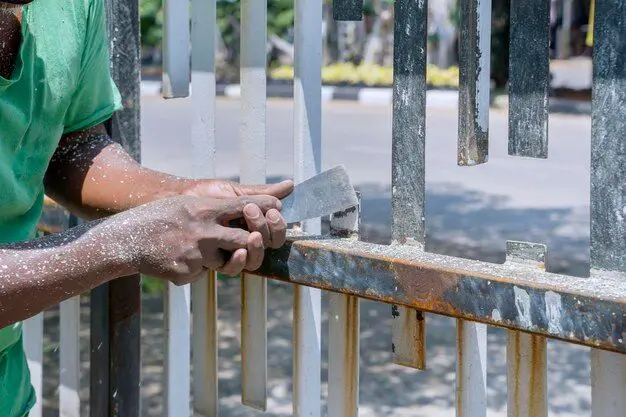
Sandpaper
The most basic way to sand a fence is by hand using sheets of sandpaper. Use a coarse grit sandpaper (40-60 grit) to remove failing paint and rust. Then switch to a finer grit (120-220 grit) for light overall sanding.
Always sand in the direction of the grain of the fence. Wrap sandpaper around a sanding block for best control.
Hand sanding with sandpaper works well for doing a small section. For sanding an entire fence, an orbital sander or wire wheel attachment on an angle grinder are better options.
Orbital Sander
An orbital or sheet sander uses rectangular sheets of sandpaper that vibrate in small circular oscillations. This makes it very effective at removing old paint and rust.
Use coarse grit paper (40-80 grit) to strip away failing paint and rust. Then switch to a finer grit (120-220) to smooth everything out once you’re down to bare metal.
Wire Wheel Brush
A wire wheel brush attachment on an angle grinder makes quick work of sanding metal fences. The spinning wire bristles quickly strip away rust and old paint.
Use a coarse wire wheel brush initially to remove the bulk of flaking paint and rust. Then use a finer brush to smooth everything out.
Wear eye protection, gloves and a dust mask when sanding with power tools.
How Much Time Does Sanding a Fence Take?
How much time it takes to sand your metal fence in preparation for painting depends on several factors:
- Condition of fence – A fence with no rust and good existing paint takes less time than one with heavy rust and peeling paint
- Fence size – More square footage equals more sanding time
- Method used – Sanding by hand takes longer than power tools like an orbital sander or wire wheel
- Desired thoroughness – A very light sanding is faster than stripping everything down to bare metal
As a general guideline for a typical 6 foot high metal fence around a backyard:
- Light hand sanding: 30-60 minutes
- Thorough hand sanding: 2-3 hours
- Power tool sanding: 45-90 minutes
For longer fences or fences in very poor condition, you may need multiple hours or even days to complete the sanding prep correctly.
Can You Skip Sanding Before Painting a Metal Fence?
Technically you can paint over a metal fence without sanding first. However, this is NOT recommended.
Here’s what happens if you don’t sand:
- Paint won’t properly adhere and will start peeling quickly
- New paint may bubble up from moisture trapped under old paint
- Rusting will continue as trapped rust isn’t removed
- The new paint will fail very prematurely
For the best, longest-lasting paint job on your fence, investing the time to properly sand first is crucial.
Tips for Sanding Metal Fences
Follow these tips when sanding metal fences to prepare them for new paint:
- Wear safety gear – eye protection, gloves & dust mask
- Clean fence first with degreaser if very dirty
- Sand with direction of grain
- Use coarse paper/brush first, then switch to finer
- Sand until you’ve removed all rust and loose paint
- Feather edges of stripped areas
- Rinse sanded surface thoroughly before priming & painting
Properly preparing your fence takes more effort up front. But it will greatly increase the quality and longevity of the paint job.
What to Do After Sanding Before Painting
Once you’ve finished sanding your metal fence, there are a few next steps:
- Wipe or rinse away all sanding dust. Make sure the surface is clean before priming.
- Spot prime any bare metal areas with a rust-inhibiting metal primer.
- Allow spot primed areas to dry.
- Apply overall metal primer coat to entire sanded fence.
- Allow primer to fully dry before painting.
- Paint fence with at least two finish coats of quality exterior metal paint.
The time invested in proper surface prep before painting will pay off for years to come.
Conclusion
Sanding a metal fence before painting is a critical preparation step. Sanding removes failing paint and rust, roughens the surface for better adhesion and prepares for priming. While an orbital sander or wire wheel attachment makes the work go faster, even hand sanding with sandpaper is better than not sanding. Completely stripping peeling areas provides the best results. With the proper prep work of sanding before painting, your freshly painted metal fence will look great and provide maximum corrosion resistance.