When it comes to painting the interior or exterior of a home, most DIYers rely on rollers and brushes to get the job done. However, professional painters have a few more tools in their arsenal that enable them to achieve more precise, professional-looking results. One of these tools is the paint edger.
So what exactly is a paint edger and why do professionals use them? Here’s a quick overview of what edgers are, why they are used, and whether DIYers should consider using them for their painting projects.
Page Contents
What is a Paint Edger?
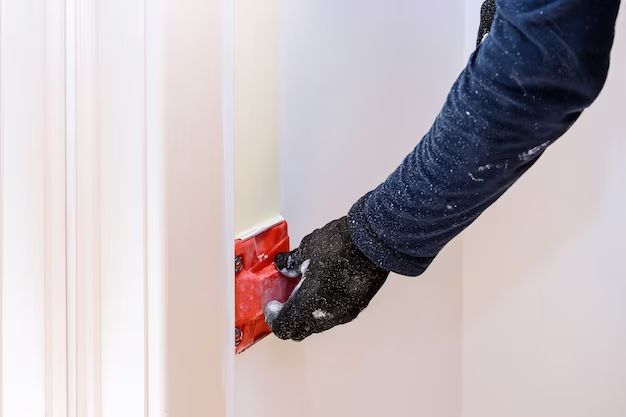
A paint edger, also sometimes called an edging tool or edging machine, is a tool used to paint sharp, clean lines along edges where two different colors meet. The most common type of edger has a pad that rests against the surface to be painted and a guided wheel that rides along the edge.
Edgers allow the user to run the tool smoothly along baseboards, ceilings, door and window trims, and any other edges to create a crisp demarcation between two colors. The edger pad holds the paint against the surface while the guided wheel ensures the paint only goes where intended to produce straight lines.
Why Do Professional Painters Use Edgers?
Professional painters use edgers for several key reasons:
Precision
Edgers allow painters to cut in edges and lines with more precision than is typically possible with a regular brush. The edging pad holds the paint right up against the surface while the guide ensures the line stays straight. This precision results in crisp, clean divides between colors.
Speed
While it does take practice to master using an edger, once perfected, an edger can deliver faster results than cutting in edges by hand with a brush. The edging tool does most of the work, making it possible to run along trim and edges much more quickly.
Reduced Fatigue
Cutting in edges by hand with a brush can be taxing on the hands, arms, and back. The effort needed to maintain precision with a brush over long periods can lead to fatigue. Edgers reduce fatigue by doing most of the hard work for you.
Consistent Results
Even experienced painters can have trouble maintaining perfect lines when cutting in by hand. Edgers provide reliable, consistent results from job to job. This consistency is key for professional painters looking to deliver quality work.
Reduced Overpainting
The increased precision of edgers means less chance of accidents and overpainting onto surfaces where paint isn’t wanted. Less time is wasted going back to fix mistakes.
Should DIYers Use Edgers?
While edgers provide definite benefits for professional painters, the question remains whether casual DIY painters should consider using them. Here are a few things for DIYers to consider when deciding whether investing in an edger is worthwhile:
Learning Curve
It does take practice to master proper edger technique. Like any tool, there is a learning curve. DIYers who are only painting occasionally may determine it’s not worth the effort to learn. However, those who paint frequently may decide it’s worth it.
Cost
Edgers range widely in price from $25 on the very low end to over $100 for professional grade models. Determining your painting frequency and budget can help assess if the cost is justified. Infrequent painters may be better off saving the money.
Project Scope
The larger the project in terms of walls to be edged, the bigger the potential time savings from using an edger over hand brushing. Small rooms or projects may not yield as much benefit. Evaluate the scope of your projects.
Desired End Result
If perfectly straight edges and lines are the priority for a project, an edger may be just the DIY tool to achieve magazine-worthy results. Those less concerned with perfection may be fine sticking to a brush.
Physical Limitations
Anyone with medical issues like back pain or arthritis that make extensive hand brushing challenging may find an edger to be just what they need to keep painting despite physical limitations.
Here is a comparison table summarizing some of the key factors when deciding on an edger:
| Factor | Favors Edger | Favors Hand Brushing |
| Learning curve | Not an issue for frequent painters | Too much effort for infrequent painters |
| Cost | Justified for regular painters | Not worth the cost for infrequent painters |
| Project size | Large projects with lots of edges | Small projects |
| Result priority | Perfect lines are critical | Perfection not required |
| Physical limitations | Difficulty with hand brushing | No issues with manual dexterity |
Tips for Learning to Use an Edger
If you do decide to try using a paint edger, keep these tips in mind:
– Practice on scrap material first to get a feel for the edger before attempting your project.
– Keep a light touch; don’t press hard as that can cause skipped lines. Let the edger do the work.
– Use a smooth continuous motion. Avoid stopping and starting mid-line which can make a mess.
– Load the pad evenly with paint so color is distributed consistently.
– Apply tape along edges for the wheel to run against for straighter lines.
– Edge before rolling larger areas to avoid overlapped edges.
– Clean the edger immediately after use for longest life.
Proper Edger Technique
Once you have an edger in hand, proper technique is required to get the desired results. Here are some key technique tips:
– Load the pad evenly with paint, removing any excess. Uneven paint distribution causes uneven lines.
– Hold the edger at a 30-60 degree angle to the surface you are painting.
– Apply light, even pressure to keep the pad flush to the surface. Excess pressure can cause skipped lines and splatters.
– Keep your movements steady. Moving too fast can cause poor coverage while moving too slowly increases chances of paint dripping.
– Overlap each stroke slightly to ensure complete coverage with no missed spots.
– Keep edger pad pressed to the surface as you finish each line. Lifting too soon causes drips.
– Use your free hand to guide the edger gently along any curved edges.
– Check for drips after finishing a line and touch up as needed for clean results.
– Let sections dry before overlapping additional coats to avoid smearing lines.
– Change pad covers frequently to prevent paint transfer to unwanted areas.
With the right technique, you can achieve professional-looking results even without the skills of a seasoned painter. Be patient, practice, and work slowly until you get the hang of using a paint edger.
Edger Care and Maintenance Tips
To keep an edger working at peak performance:
– Clean thoroughly after every use. Letting paint dry on the pad or wheel will impact smooth functioning.
– Use the appropriate solvent for the type of paint you are using. Oil-based paints require mineral spirits while water-based paints just need water for cleanup.
– Replace the pad cover frequently. Old, overused covers result in uneven paint distribution.
– Check the wheel for buildup of old paint. Remove any dried paint for smooth operation.
– Verify wheel and pad are properly aligned. Misalignment causes uneven and skipped lines.
– Confirm the pad remains flush to the surface when in use. Bent or distorted pads don’t apply paint evenly.
– Inspect the guide wheel for damage. Wheels that wobble result in crooked lines.
– Check for leaking hoses or seals. Small leaks can interfere with paint flow.
Proper cleaning and maintenance helps prevent issues like clogs, leaks, wobbly lines, and uneven coverage when using your paint edger. With regular upkeep, an edger should provide reliable results for many painting projects.
Types of Paint Edgers
There are a few main types of paint edgers available to suit different needs:
Manual Edgers
Manual edgers require no power source. The user simply pushes the edger along the surface to be painted using a hand strap. These are the most basic models and are best suited for smaller DIY jobs. They have minimal moving parts for less maintenance. However, they rely on complete control by the user.
Electric Powered Edgers
Electric edgers use a power cord plugged into an outlet to drive movement. They are a step up from manual in terms of coverage speed and control but are still suitable for DIY use. They provide consistent results with less effort than manual models. Just be aware of the cord during use.
Battery Powered Edgers
Cordless battery powered edgers provide maximum freedom of movement without dealing with a power cord. High end models have battery life capable of tackling large professional jobs. While convenient, they are the most expensive option. The batteries must also be maintained for optimal life.
Air Powered Edgers
Air edgers harness the power of compressed air to propel paint onto surfaces. They require being hooked to a high powered air compressor via a hose but deliver excellent results. Overspray can be an issue indoors so these are best reserved for large outdoor jobs.
When selecting an edger, consider factors like your painting frequency, typical project size, budget, and desired convenience. Casual DIYers may find a manual or electric model suits their needs well while professionals require maximum efficiency from air powered edgers.
Edger vs Brush: Which is Better?
So when it comes down to it, is an edger or traditional brush better for cutting in edges? Here’s a concise comparison:
| Edger | Brush | |
| Learning Curve | Moderate | Minimal |
| Speed | Faster with practice | Typically slower |
| Precision | Very precise results | Can be imperfect |
| Fatigue | Less tiring on hands/wrists | Can be taxing over time |
| Cost | From $25-$100+ | Very minimal for a brush |
For most professional painters regularly taking on large jobs, the time savings and precision of edgers makes them the clear choice. But for casual DIYers, a brush may provide sufficient results with less hassle and expense.
Much also depends on the specific project. Detail work or rooms with lots of trim and edges favor an edger. Smaller spaces with minimal edges won’t benefit as much. Evaluate each project to determine if it’s worth pulling out an edger over a trusty brush.
Conclusion
In conclusion, professional painters rely on paint edgers because they allow them to produce more precise painted edges and lines faster and with less fatigue than traditional hand brushing.
However, casual DIYers may find the learning curve and cost make sticking with a regular brush their better option for smaller weekend projects. For DIYers who do choose to use an edger, proper technique and maintenance is crucial for getting the best results from these tools.
The decision between edger vs brush comes down to painting frequency, project size, budget, and the level of precision desired. Those who paint often and want sharp demarcations between colors will find edgers to be a game changing addition to their tool arsenal. More casual painters may be perfectly satisfied saving their pennies and sticking to hand brushing.