Removing shallow dents and scratches from wooden furniture and flooring can seem daunting, but it is possible with the right techniques and tools. There are several effective methods that can be used to remove minor blemishes in wood and restore its smooth, flawless appearance.
Page Contents
What causes dents and scratches in wood?
Wood is susceptible to dents, scratches, and other surface imperfections from daily wear and tear. Common causes of minor damage include:
- Moving furniture or other heavy objects across the wood
- Children or pets running and playing on wooden floors
- Dropping heavy or sharp objects on wooden surfaces
- Not using protective pads under furniture legs
The softer the wood, the more likely it is to dent and scratch. Some common soft woods prone to marks are pine, cedar, and redwood. On the other hand, hardwoods like oak and maple better resist dents and scratches.
Assessing the dent or scratch
Before attempting to fix the blemish, assess the depth and severity of the dent or scratch. Light surface marks may buff out quickly, while deeper dents may require more intensive repairs.
Use your fingernail to catch the edge of the dent – if your nail fits under the raised edge, it is likely a shallow dent. Check the dent under adequate light from multiple angles.
For deeper impressions that cannot be smoothed out through simple buffing, you may need to use tools to steam out dents, apply wood fillers, or sand and refinish the damaged area.
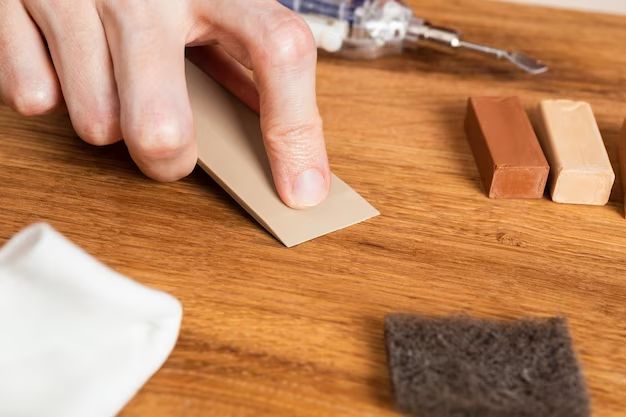
Buffing out minor dents and scratches
For very shallow surface marks, buffing is often enough to make them disappear. This simple approach works best for small dents, scratches, and scuffs that do not penetrate deep into the wood grain.
Supplies needed:
- Fine grit sandpaper (180 grit or higher)
- Rags
- Furniture polish or mineral spirits
- Soft cloth
- Old toothbrush
Steps to buff out minor wood surface blemishes:
- Clean the area around the dent to remove any dust or debris. Use a vacuum and soft brush attachment.
- Apply a small amount of furniture polish or mineral spirits directly into the damaged spot using a rag.
- Allow it to soak in for 5-10 minutes.
- Gently rub the blemish with fine sandpaper using straight even strokes. Check frequently to see if the dent is diminishing.
- Wipe away any residue with a clean dry cloth.
- Brush the area lightly with an old toothbrush to restore the grain.
- Apply furniture polish, wax, or oil and buff into the wood using a soft cloth until the dent disappears.
- Repeat steps if the dent is still somewhat visible.
The friction and abrasion from sanding should help smooth away the impression in the wood. Go slowly and take care not to sand too aggressively. Pay close attention to the pattern of the wood grain when sanding.
Using steam to remove dents
Steaming is an effective technique for removing dents and raising indented areas in wood. The steam swells the depressed wood fibers, causing the dent to pop up level to the surrounding surface.
This method works well for shallow to medium depth dents. Deeper marks may require multiple steam treatments or more intensive refinishing methods.
Supplies needed:
- Clothes iron
- Clean rag
- Water
- Plastic spreader or putty knife
- Wood polish, wax, or oil
Steps for steam dent removal:
- Clean the dented area thoroughly. Make sure the surface is free of dust, oils or polishes.
- Fill the iron with water, heat it up, and turn the steam on high.
- Hold the iron about 1-2 inches above the wood dent. Steam the area for 1-2 minutes, keeping the iron slowly moving over the indent.
- As the wood absorbs the steam, the fibers will swell and the dent will begin rising.
- Allow the area to fully dry.
- Once dry, use a plastic spreader or putty knife to gently press down on the ding while rubbing lightly in the direction of the wood grain.
- Continue steaming and pressing the dent at 2-3 minute intervals until it is no longer visible.
- When the dent has disappeared, reapply protective polish or oil to the area.
Take precautions not to burn the wood when steaming. Keep the iron constantly moving and avoid prolonged direct contact.
Filling small dents and scratches
For small dents that fail to steam out completely, wood filler can help level the surface.
Products such as plastic wood, spackle, and wood putty are designed to fill minor flaws in wood. Most can be sanded and stained to seamlessly blend with the surrounding material.
Supplies needed:
- Wood filler or plastic wood
- Putty knife
- Sandpaper
- Rags
- Matching wood stain/dye
- Clean cloth
Steps for filling small dents:
- Clean the damaged area to remove grease, polish or dirt.
- Use the putty knife to fill the dent fully with the wood filler product.
- Allow adequate drying time according to the filler instructions.
- Once dry, sand the area smooth and level with the rest of the surface.
- Use a stain or dye that matches the surrounding wood color. Test color on an inconspicuous spot first.
- Wipe away stain until the color blend is unnoticeable.
- Apply protective polish or oil when done repairing.
Using filler is best for minor dings and surface marks. For deep marks, filler can shrink and settle into the hole after drying and require additional treatments.
Refinishing larger damaged areas
For dents wider than a dime or deep gouges, refinishing the damaged section may be best. Refinishing involves recoloring and sealing the wood to conceal imperfections.
Supplies needed:
- Sandpaper
- Wood stain/dye
- Clean rags
- Wood sealer (varnish, polyurethane, etc.)
- Paintbrush
Steps for refinishing indented areas:
- Sand the damaged spot to remove scratches or dents. Be careful not to aggressively over-sand.
- Wipe surface clean after sanding and allow to dry fully.
- Use a stain or dye to recolor the sanded area to match the surrounding wood.
- Seal the recolored area using a clear varnish, polyurethane, or other sealing product and allow to cure.
- Lightly buff the refinished patch to blend with the untouched wood area.
- Apply polish or oil once the sealant has fully cured.
It is important to refinish only the damaged area, not the whole piece, to allow for a seamless blend. Apply stains and sealants sparingly to avoid overlaps.
Preventing future dents and scratches
To guard against future dents and abrasions, here are some helpful tips:
- Attach felt pads to furniture legs and chair legs.
- Lift furniture when moving it, rather than pushing or dragging.
- Keep pets’ nails trimmed to prevent claw scratches.
- Place rugs over high traffic wooden floor areas.
- Immediately clean up spills which can damage the wood surface.
- Use trivets and coasters under hot dishes and drinks.
- Install drawer knob bumpers.
Caring for your wood furniture and floors by dusting, polishing, and sweeping regularly can also help prevent buildup of abrasive dirt and grit that can scratch the surface.
| Dent Depth | Beginner DIY Fix | Advanced Fix (Refinishing) |
|---|---|---|
| Surface scratches or scuffs | Buffing | Sanding and refinishing |
| Shallow dings and dents | Steam and clamp | Wood filler |
| Deep depressions | Wood filler | Sanding and refinishing |
Key Points
- Assessing dent depth helps determine the best repair method.
- Steaming works well for shallow surface dents.
- Filler can conceal minor dings but may shrink and settle over time.
- Refinishing is best for large scratches, gouges and mismatched repairs.
- Prevention like furniture pads and rugs can avoid future damage.
Conclusion
Removing dents, scratches, and blemishes from wood surfaces is possible for the dedicated DIY-er. Refinishing products and techniques allow you to restore wood pieces with damaged areas rather than replacing them. Matching grain patterns and colors take patience and skill. Working slowly and cautiously is key to achieving an undetectable repair.
For deep gouges and extensive damage, you may wish to consult a professional refinisher. But for slight imperfections from daily wear, there are effective solutions to restore the smooth look of your wood surfaces.