Page Contents
- 1 Overview
- 2 Considerations Before Starting
- 3 Running the New Wiring
- 4 Installing the New Wall Switch
- 5 Connecting the New Wiring at the Light
- 6 Testing and Final Steps
- 7 Conclusion
- 8 Frequently Asked Questions
- 8.1 Is this project safe for a beginner DIYer?
- 8.2 Do I need any special tools?
- 8.3 What gauge wire should I use?
- 8.4 Can I connect more than one switch to control the light?
- 8.5 Will the pull cord still operate the light after the switch is added?
- 8.6 How do I determine the wattage rating of the light fixture?
- 8.7 Is it easier to just replace the entire light fixture?
- 9 Additional Resources
Overview
It is possible to add a wall switch to control a light that currently uses a pull cord switch, allowing you to control the light from both locations. This provides added convenience and flexibility in operating the light. However, some basic electrical work is required to install new wiring and a switch. Care must be taken to do this properly and safely.
Considerations Before Starting
There are a few things you’ll need to figure out before starting this project:
- Location of the new switch – Decide where you want to locate the new wall switch. It should be in a convenient spot near the entrance to the room.
- Power source – You’ll need to run new wiring from the light’s power source to the new switch location. Determine where the existing electrical box is located that powers the light fixture.
- Switch needed – Buy a new single pole switch to control the light. Make sure it can handle the wattage of the light bulb.
- Electrical box – You may need to install an electrical box at the switch location if one doesn’t exist. The box houses the switch’s wiring connections.
- Wire and tools – Gather the supplies, like wire connectors, electrical tape, wire strippers, drywall saw, etc. Make sure you have enough electrical wire to run from the power source to the switch.
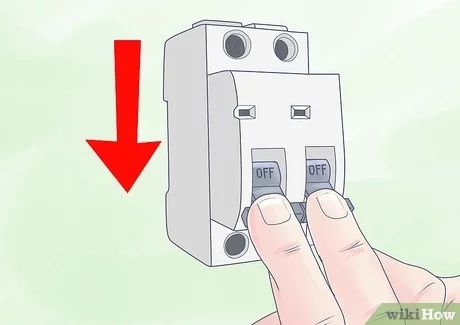
- Circuit breaker – Find the circuit breaker controlling the light fixture and turn it OFF before starting any work.
- Existing switch – Figure out exactly how the pull cord switch operates, so you can maintain its operation after adding the new wall switch.
Doing some prep work will make the installation go smoother.
Running the New Wiring
Here are the basic steps to running the new wiring from the electrical box for the light fixture to the location of the new switch:
- Turn OFF the circuit breaker for the light fixture at the main electrical panel.
- Cut a small access hole in the wall/ceiling between the existing electrical box and the new switch location. Make it large enough to fit the new electrical wire.
- Fish the new electrical wire from the new switch location through the access hole, over to the existing electrical box location. Leave plenty of extra wire at both ends.
- Secure the new wire at the electrical boxes at each end.
Running the wire involves basic drilling and fishing wire through attics, walls, and ceilings. Having an assistant can be useful here. Take precautions not to contact any existing electrical wires or plumbing inside the walls.
Installing the New Wall Switch
Once the new wire is connected to both locations, you can install the new switch:
- Install a new electrical box if needed at the new switch location. Mount the box securely and feed the new wire into it.
- Connect the new wire to the wall switch. There will usually be screw terminals on the sides of the switch to connect the wires.
- Attach the wall switch to the electrical box per the manufacturer instructions.
- Use wire nuts to secure the wire connections.
Be sure to attach the hot source wire to one screw terminal and the new wire running to the light fixture to the other terminal. This will allow the switch to control the electricity flow.
Connecting the New Wiring at the Light
The existing light fixture will have the pull cord switch wired into it. You need to integrate the new switch wiring with it:
- Carefully remove the light fixture’s cover plate and pull the fixture out from the ceiling enough to access its wiring.
- Locate the hot wire connected to the pull switch. This taps off the hot wire from the electrical box.
- Disconnect that hot wire from the pull switch wiring.
- Use a wire nut to connect that hot wire to the new wire you just ran from the new switch.
- Secure all wires neatly with electrical tape.
When complete, the new switch and pull cord will essentially be wired in parallel. Both control the hot wire to the light independently.
Testing and Final Steps
You’re almost done! Just a few finishing touches:
- Turn the circuit breaker back ON and test the light from both switches.
- Install the light fixture back into the ceiling and reattach the cover plates.
- Patch up any holes or openings with spackle and paint. Run the new switch wires neatly against the wall surface.
- Consider labeling the new switch to help avoid confusion.
Take your time when testing. Flip the switches back and forth to ensure proper operation. If the light isn’t responding correctly from both locations, double check the wiring connections. Everything should now be in working order!
Conclusion
Installing a new switch to control an existing light is a relatively straightforward project for a DIYer. The key steps are:
- Running a new wire between the light and switch location
- Installing a new electrical box if needed
- Hooking up the switch and integrating it with the fixture wiring
- Testing operation from both switches
Taking the proper safety precautions like turning off power and using caution when dealing with electrical wiring is critical. Overall, with some basic tools and wiring knowledge, you can add a wall switch to an existing light in a day or two. Just take your time and be careful when working with electrical systems. Enjoy the convenience of controlling your light from multiple locations!
Frequently Asked Questions
Is this project safe for a beginner DIYer?
For a DIYer with basic electrical and wiring knowledge, this project can certainly be taken on safely. The key is to be extremely cautious when working with electrical components. Turn power completely off at the breaker, confirm it’s off with a voltage tester, read instructions carefully, and connect wires securely. Consider asking an electrician friend to review the final connections before turning the power back on.
Do I need any special tools?
You’ll need common electrical tools – screwdrivers, wire strippers, wire cutters, electrical tape, wire nuts, a voltage tester, etc. Useful extras would be a drywall saw or long flexible drill bit to run wires through walls/ceilings. A voltage tester is critical for confirming the power is OFF.
What gauge wire should I use?
For a basic lighting circuit like this, 14/2 or 12/2 Romex style NM electrical wire is recommended. Use 14 gauge for 15 amp circuits and 12 gauge for 20 amp circuits. The wire needs to match the amperage capacity of the circuit.
Can I connect more than one switch to control the light?
Yes, you can have 3-way or 4-way switch wiring, where multiple switches control the same light fixture. This requires running wire between all the switch locations in series. Consult basic three-way switch wiring diagrams for guidance on connecting this type of multi-switch circuit.
Will the pull cord still operate the light after the switch is added?
Yes, the pull cord and new switch will operate independently. With the type of parallel wiring described above, both the existing pull switch and new wall switch will be able to turn the light ON and OFF.
How do I determine the wattage rating of the light fixture?
Check the bulb currently in the light fixture. It should indicate the wattage used (ex. 60W). Also look for a label on the fixture with the maximum wattage rating. Choose a switch rated for at least that wattage level.
Is it easier to just replace the entire light fixture?
You could choose to remove the existing light and install a new wired fixture controlled only by the wall switch. However, if you want to retain the pull cord functionality, wiring in a new switch is the better option. The pull cord provides some nice flexibility.
Should I hire an electrician if I’m uncomfortable doing this?
Absolutely! If you lack confidence working with electrical systems, it’s best to hire a professional electrician. They can ensure all wiring is done properly and safely. Consider having an electrician review your planned approach beforehand as well. Safety is paramount when dealing with household electrical.
Can I control the light from more than two locations?
Yes, it’s possible to control a light from 3 or more switches by wiring them properly in series. This requires running wire between all the switch locations in a “daisy chain” approach. Look up diagrams for 3-way or 4-way switch wiring to see how this works. An electrician can help with this more complex setup.
Additional Resources
For further information on adding a switch to an existing light, consult these additional resources:
- How to Wire a Switch at the End of a Circuit – Step-by-step guide from Better Homes and Gardens covering the complete process.
- Light Switch Wiring (How To) – Helpful YouTube video demonstrating wiring switch connections.
- How to Run Romex Cable – Tips on running electrical cable through walls from Family Handyman.
- Wiring Switches and Lights – Overview of basic switch wiring from The Spruce.
- 3-way Switch Wiring Diagrams – Diagrams for wiring multiple switches from Easy Do It Yourself Home Improvements.
- How to Replace a Light Fixture – Guide from BobVila.com on light fixture replacement.
These provide additional details on techniques, safety tips, diagrams, videos, and step-by-step instructions for wiring new switches and lights. Reference them to enhance your knowledge and help ensure success!
